Bringing Life to Your Rooftop: A Comprehensive Guide to Flowers for Your Rooftop Garden

Transform your rooftop into a flowers for rooftop garden! Discover the best flowers for a sunny rooftop garden and expert tips for success.

Introduction: Flowers for Rooftop Garden

Does your urban dwelling lack a sprawling yard? Don’t despair! A flowers for rooftop garden can be your personal sanctuary overflowing with vibrant blooms. If you live in the US, the possibilities for rooftop gardening are nearly endless depending on your climate zone. In this blog post, we’ll uncover the perfect flowers to add color and life to your airy oasis and give you the tools to make your rooftop garden flourish.

Choosing the Best Flowers for Your Rooftop Garden

When selecting flowers for rooftop garden, there are several factors to consider. First, consider the climate and sunlight exposure of your rooftop. Different flowers have different sunlight and temperature requirements, so it’s essential to choose blooms that will thrive in your specific conditions.Next, consider the size and layout of your rooftop. Some flowers are better suited for small spaces, while others require more room to grow. Additionally, consider the aesthetic you’re aiming for in your garden. Do you prefer a wild, natural look, or a more formal, structured design?

Best Flowers for Rooftop Gardens

Here are some of the best flowers for rooftop garden:

  1. Marigolds: These bright, cheerful blooms are easy to grow and thrive in full sun.
  2. Petunias: Petunias are a popular choice for rooftop gardens due to their vibrant colors and ability to thrive in a variety of conditions.
  3. Zinnias: These drought-tolerant blooms are perfect for rooftop gardens, and they come in a variety of colors and sizes.
  4. Nasturtiums: These edible flowers are easy to grow and add a pop of color to any rooftop garden.
  5. Snapdragons: These tall, stately blooms are perfect for adding height and structure to your rooftop garden.
  6. Daisies: These classic blooms are easy to grow and add a charming touch to any rooftop garden.
  7. Lavender: This fragrant herb is perfect for rooftop gardens, and it attracts bees and butterflies.

Planting and Caring for Your Rooftop Garden

Once you’ve selected the flowers for rooftop garden, it’s time to plant and care for them. Here are some tips for planting and caring for your rooftop garden:

  1. Choose the right soil: Rooftop gardens require special soil that is lightweight and can retain moisture.
  2. Water regularly: Rooftop gardens can dry out quickly, so it’s essential to water your flowers regularly.
  3. Fertilize regularly: Rooftop gardens require more frequent fertilization than ground-level gardens.
  4. Monitor for pests: Rooftop gardens can be more susceptible to pests, so it’s essential to monitor your flowers for signs of infestation.
  5. Deadhead regularly: Deadheading, or removing spent blooms, can encourage new growth and prolong the blooming period.

Benefits of Flowers for Rooftop Gardens

Incorporating flowers into your rooftop garden has many benefits. Here are a few:

  1. Beauty: Flowers add beauty and color to any rooftop garden.
  2. Eco-friendliness: Rooftop gardens can help reduce your carbon footprint by absorbing carbon dioxide and releasing oxygen.
  3. Wildlife: Flowers attract bees, butterflies, and other pollinators, which can help support local ecosystems.
  4. Mental health: Gardening has been shown to have numerous mental health benefits, including reducing stress and anxiety.

What are the benefits of having a rooftop garden?

Credit: Google

The benefits of having a rooftop garden include:

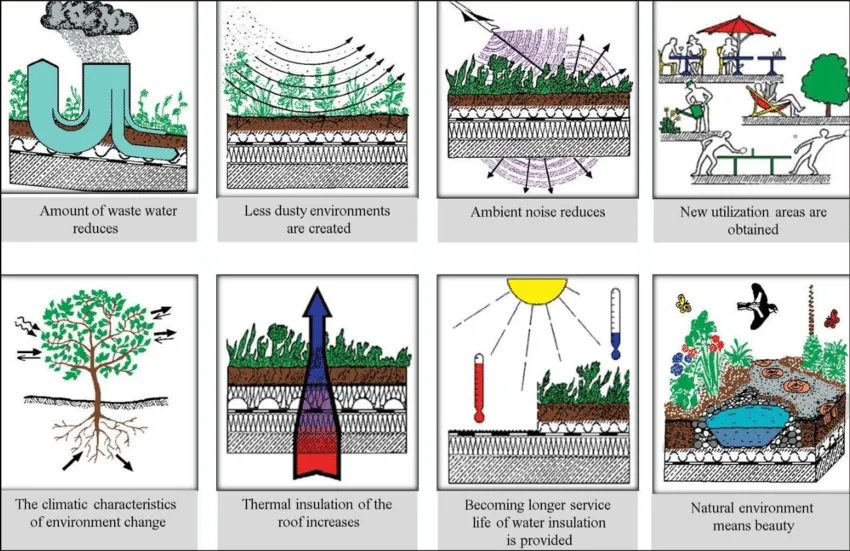
  1. Reducing Urban Heat Island Effect: Rooftop gardens help lower urban temperatures and moderate the heat island effect by covering concrete rooftops with vegetation.
  2. Improving Air Quality: They capture harmful gases and particulate matter, reducing air pollution and removing greenhouse gases from the atmosphere.
  3. Enhancing Stormwater Management: Rooftop gardens retain water, reducing and slowing stormwater runoff, filtering pollutants, and improving stormwater management.
  4. Creating Habitat for Wildlife: Rooftop gardens provide new habitats for birds, insect pollinators, and native species, increasing biodiversity in urban environments.
  5. Energy Efficiency: They act as insulators, retaining heat in winter and keeping temperatures cool in summer, making cities more energy-efficient and reducing greenhouse gas emissions.

What are the maintenance requirements for a rooftop garden?

Credit: Google

The maintenance requirements for a flowers for rooftop garden can vary depending on the type of garden, but generally include the following:

  1. Regular Inspections: Conduct inspections at least twice a year to check for weeds, seeds, and unwanted vegetation that may need to be removed manually.
  2. Fertilization: Fertilize the garden twice a year to ensure a steady supply of nutrients for healthy and strong plant growth4.
  3. Watering: Depending on the climate zone, provide water as needed, especially during dry conditions, and consider installing an irrigation system for optimal plant health.
  4. Drainage System: Regularly check and ensure that the drainage system is functioning properly to prevent water accumulation and damage.
  5. Leaf Removal: Remove any leaves that may have blown into gutters and drains to maintain proper water flow and prevent blockages.
  6. Safety Considerations: Ensure that safety measures are in place, such as easy and safe access, fencing or railings, and compliance with building codes for the garden’s construction and maintenance.

By following these maintenance requirements, you can ensure the longevity and health of your rooftop garden, creating a beautiful and sustainable green space.

How often should a rooftop garden be watered?

The frequency of watering a flowers for rooftop garden depends on various factors such as the type of plants, soil composition, and weather conditions. In general, rooftop gardens require more frequent watering than traditional gardens due to their exposure to sun, wind, and higher temperatures. It is recommended to water rooftop gardens in the morning, as early as possible, to allow the water to soak thoroughly into the soil and for the leaves of the plants to dry off before the hottest part of the day. Watering at midday is less efficient due to higher evaporation rates, and watering in the evening can promote disease in the garden due to prolonged leaf wetness.

For container gardens, it is recommended to water twice a day, especially during hot and dry weather. The watering duration should be between 5 and 15 minutes, depending on the size of the containers. Smaller containers may require more frequent watering due to their limited soil capacity and higher surface area exposure to the sun.

For drip irrigation systems, it is recommended to run the system until water just starts to seep from the bottom of the containers, ensuring that the soil is thoroughly moistened. The system should be set to run twice a day, ideally around 6:00 am and 2:00 pm, to coincide with the cooler parts of the day and minimize evaporation.

In summary, watering frequency for a rooftop garden depends on various factors, and it is essential to consider these factors when establishing a watering schedule. Regular monitoring of soil moisture levels, adjusting watering duration and frequency, and using appropriate irrigation techniques can help ensure the health and vitality of the plants in a rooftop garden.

What are some alternative methods for watering a rooftop garden?

Alternative methods for watering a flowers for rooftop garden include drip irrigation systems, soaker hoses, and self-watering containers. Drip irrigation systems are a popular choice for rooftop gardens due to their efficient water distribution and low risk of water loss through evaporation.

Soaker hoses are porous hoses that allow water to seep out slowly, delivering water directly to the plant roots. Self-watering containers are designed to provide a consistent water supply to plants by using a reservoir of water that is gradually released to the plants as needed. These methods can help conserve water and promote healthy plant growth in a rooftop garden.

How to start a rooftop garden?

Credit: Google

To start a flowers for rooftop garden, follow these steps:

  1. Check building codes: Before starting, ensure that rooftop gardening is allowed in your building and that it complies with local regulations.
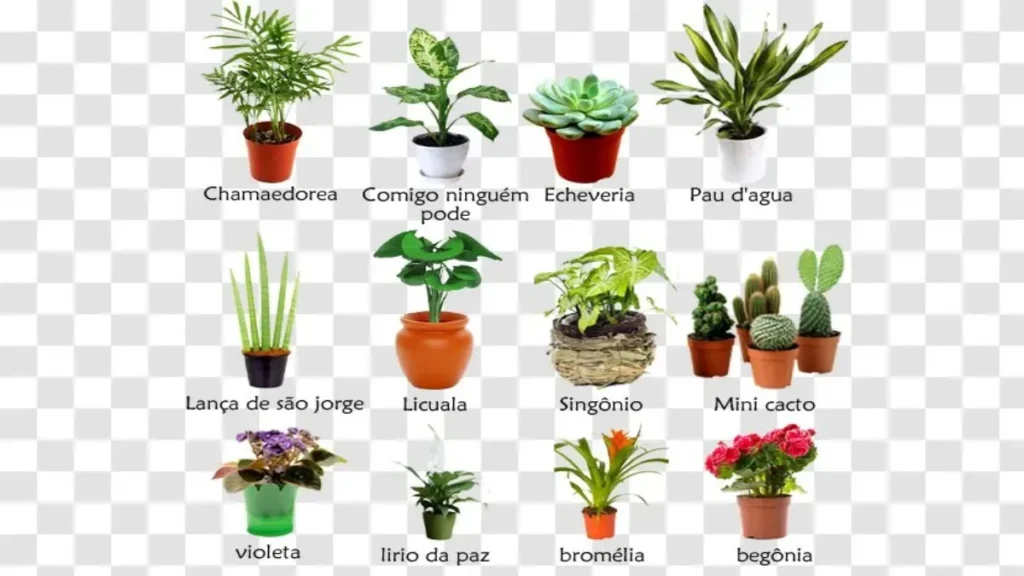
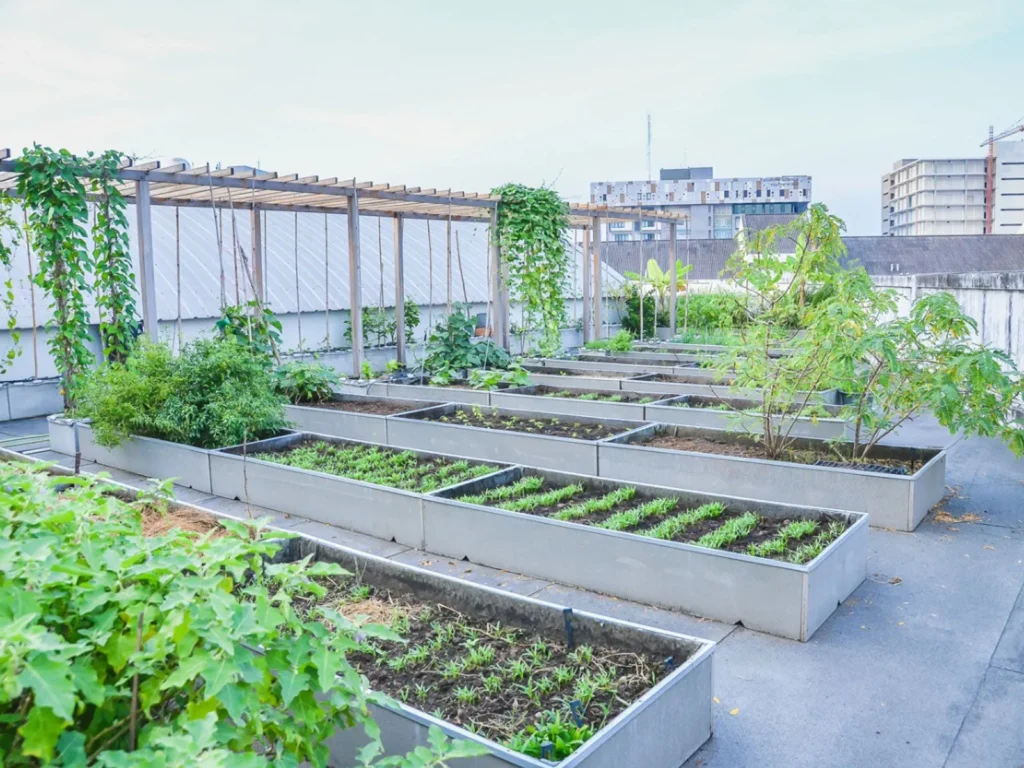
  2. Select plants: Choose hardy plants that can thrive in containers and handle various weather conditions. Examples include peppers, kale, collard greens, sedum, elephant ears, ficuses, irises, petunias, calla lilies, begonias, hostas, kousa dogwoods, Japanese maples, eggplant, cucumbers, lettuce, oregano, tomatoes, thyme, sage, basil, and cilantro.
  3. Choose or build containers: Select sturdy and large-sized containers, such as half-barrel planters, that can handle the weight of the soil and plants. Avoid heavy materials like clay and concrete, and instead opt for plastic resin, wood, wicker, or other synthetic materials.
  4. Set up irrigation: Install a drip irrigation system or soaker hoses for efficient water distribution and low risk of water loss through evaporation.
  5. Prepare soil: Use lightweight, soilless potting mix that includes ingredients such as peat moss, vermiculite, and perlite. This type of soil is ideal for container gardens.
  6. Fertilize: Regularly fertilize the garden with slow-release formulas and lime every three to four months, or apply a liquid fertilizer every two weeks.
  7. Install windbreaks: Incorporate trellises or latticed windbreaks for your rooftop garden to disrupt the flow of the wind, rather than trying to stop it completely.
  8. Consider water storage: Install a water storage system or automatic watering system to ensure that your rooftop garden is watered frequently, especially during hot weather.

By following these steps, you can create a thriving and sustainable rooftop garden that provides environmental benefits and outdoor living space.

How to prepare the rooftop surface before starting a garden?

To prepare the flowers for rooftop garden surface before starting a garden, follow these steps:

  1. Clean the Roof: Start by thoroughly cleaning the roof surface. Remove any debris, dirt, or existing vegetation that may hinder the proper installation of your garden. Sweep or use a leaf blower to clear away loose debris.
  2. Inspect for Damages: Inspect the roof for any damages or leaks. Repair any cracks, leaks, or structural issues before proceeding. It is important to ensure the roof is in good condition to support the weight of your garden and prevent water damage.
  3. Protect the Roof: To safeguard your roof against potential damage, consider adding a layer of protection. Install a root barrier or a waterproofing membrane to prevent the roots of your plants from penetrating the roof surface. This is especially important for green roofs or areas where plants will be directly planted in the soil.
  4. Consider Roof Slope: Take into account the slope of your rooftop when planning your garden. If your rooftop has a significant slope, it may affect water drainage and plant stability. Consider building raised beds or using containers with proper drainage to prevent soil erosion and slippage.
  5. Add a Protective Layer: To protect the roof surface and improve insulation, consider adding a protective layer like a geotextile fabric or a rubber mat. This will provide an additional buffer between the roof and the containers, reducing the risk of damage and heat transfer.
  6. Ensure Accessibility: Make sure there is a safe and convenient access point to your rooftop garden. Install stairs, a ladder, or a secure rooftop hatch to ensure ease of movement for maintenance and enjoyment of your garden.

By following these steps, you can create a stable and secure foundation for your rooftop garden. Once the roof surface is prepared, it’s time to install a drainage system to manage excess water.

What materials are needed to prepare the rooftop surface for a garden?

To prepare the rooftop surface for a garden, you will need the following materials:

  1. Containers: Opt for sturdy materials like plastic resin, wood, wicker, or other synthetic materials. Avoid heavy materials like clay and concrete, as they can potentially compromise the structural integrity of the roof itself.
  2. Soil: Use lightweight, soilless potting mix that includes ingredients such as peat moss, vermiculite, and perlite. This type of soil is ideal for container gardens.
  3. Fertilizer: Regularly fertilize the garden with slow-release formulas and lime every three to four months, or apply a liquid fertilizer every two weeks.
  4. Root Barrier: Install a root barrier or a waterproofing membrane to prevent the roots of your plants from penetrating the roof surface.
  5. Protective Layer: Add a protective layer like a geotextile fabric or a rubber mat to protect the roof surface and improve insulation.
  6. Windbreaks: Incorporate trellises or latticed windbreaks for your rooftop garden to disrupt the flow of the wind, rather than trying to stop it completely.
  7. Drainage System: Install a proper drainage system to manage excess water.
  8. Roof Decking: Ensure the roof decking is in good condition and can support the weight of the garden.
  9. Shingles: If you’re using asphalt shingles, make sure to include starter shingles and ridge cap in your materials list.

These materials will help ensure a stable and secure foundation for your rooftop garden.

What are some tools needed to prepare the rooftop surface for a garden?

Credit: YouTube

Based on the provided sources, some tools needed to prepare the rooftop surface for a garden include:

  1. Fertilizer: Essential for providing nutrients to the plants and ensuring healthy growth.
  2. Spades and Forks: Used for digging and turning the soil, essential for planting.
  3. Secateurs: Pruning shears for trimming plants and maintaining their health.
  4. Gloves: Protect hands while gardening and handling soil and plants.
  5. Compost: Provides organic matter and nutrients to the soil, promoting plant growth.
  6. Potting Mix: Lightweight soil mix suitable for container gardening.
  7. Buckets: Useful for carrying soil, water, and other gardening materials.
  8. Hoses: For watering plants and maintaining proper moisture levels.
  9. Waterproofing Materials: Necessary to protect the roof from water seepage and damage.
  10. Root Barrier Material: Prevents plant roots from penetrating the roof surface.
  11. Structural Support: Ensures the roof can bear the weight of the garden.
  12. Drainage System Components: Including porous mats, granular materials, or drainage modules to manage excess water.
  13. Filter Layer: Prevents clogging of the drainage system and maintains its functionality.
  14. Insulation Layer: Provides mechanical strength, moisture resistance, and temperature control.
  15. Tools for Installation: Safety glasses, ear plugs, gloves, scissors, caulking gun, saw, tape measure, utility knife, etc., for installing materials like pavers and grids.

These tools and materials are essential for preparing the rooftop surface for a garden, ensuring proper installation and maintenance of the garden.

What are the best flowers for rooftop gardens?

The best flowers for rooftop garden are those that are resilient and can thrive in sunny, hot/cold, dry, and windy conditions. Some examples include sunflowers, lavender, daylilies, rose of Sharon, Montana Moss juniper, and Donkey’s Tail plants. These plants have adaptations such as fuzzy or silver leaves that slow evaporation from leaf surfaces, tap roots that store moisture in specialized root tissue, and succulent plant tissue that stores moisture.

Other suitable flowers for rooftop garden include lamb’s ears, lavenders, and sages. These plants are well-suited for rooftop gardening in containers, as they are tough and can thrive in the unique conditions of a rooftop environment.

What are some low-maintenance plants that are suitable for a rooftop garden?

Credit: Google

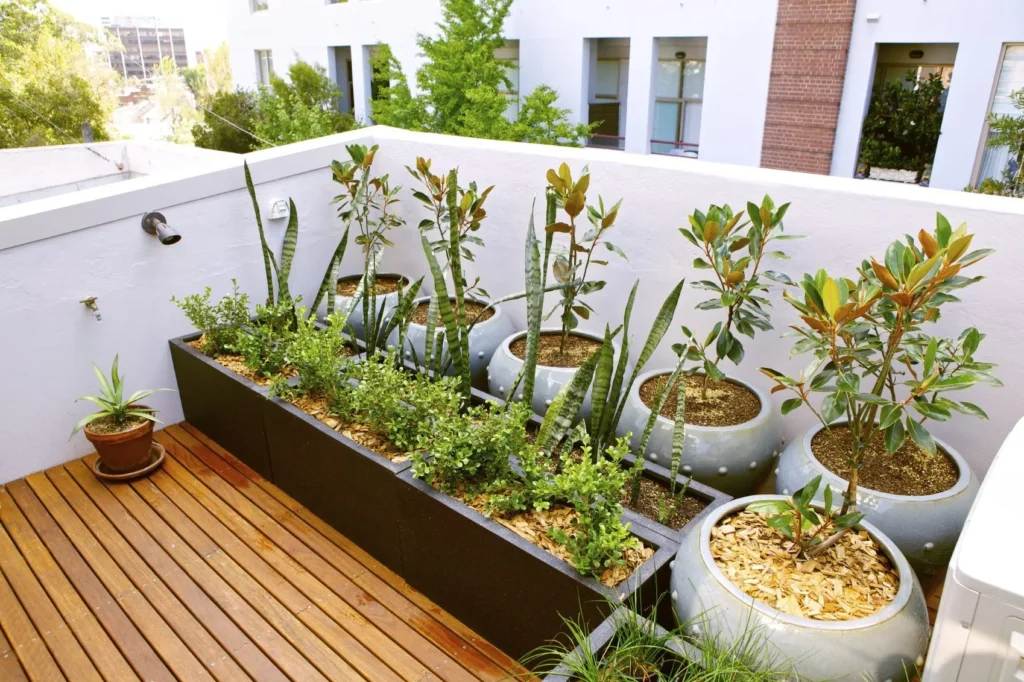
Some low-maintenance plants that are suitable for a rooftop garden include:

  1. Ornamental Grasses: These plants are hardy, low-maintenance, and provide year-round interest. They are also drought-tolerant and can thrive in sunny conditions, making them ideal for rooftop gardens.
  2. Herbs: Herbs like thyme, rosemary, sage, and lavender are perfect for rooftop gardens. They are resilient, require minimal maintenance, and thrive in direct sunlight. Additionally, they can be used for cooking, making them both functional and decorative.
  3. Succulents: Succulents are known for their ability to store moisture in their leaves, making them ideal for rooftop gardens. They are low-maintenance, drought-tolerant, and can thrive in both dry and well-drained conditions.
  4. Small Trees: Dwarf Crape Myrtle trees and Bonsai Trees are small and can fit in a 15-inch pot. They provide enough foliage for perfect privacy and can add a touch of greenery to your rooftop garden.
  5. Cacti: Cacti are low-maintenance plants that require minimal watering and can thrive in full sun. They are also easy to find and can add a unique touch to your rooftop garden.
  6. Native Tussock Grass (Poa labillardieri): This plant is ideal for exposed locations such as rooftops and requires minimal maintenance.
  7. Fountain Grass (Pennisetum alopecuroides): This plant is drought-tolerant and can add texture and interest to your rooftop garden.
  8. Blue Jellybean (Sedum pachyphyllum): This plant is low-maintenance and can thrive in full sun. It is also drought-tolerant and can add a pop of color to your rooftop garden.
  9. Cordyline: Cordyline is a hardy plant that can thrive in both sunny and shady conditions. It is also drought-tolerant and can add a touch of greenery to your rooftop garden.
  10. Hibbertia: This plant is low-maintenance and can thrive in both sunny and shady conditions. It is also drought-tolerant and can add a pop of color to your rooftop garden.
  11. Agave (Agave americana ‘Variegata’): This plant is low-maintenance and can thrive in full sun. It is also drought-tolerant and can add a unique touch to your rooftop garden.

When designing and building your rooftop or balcony garden, it is important to consider factors such as waterproofing, weight capacity, and structural integrity. It is also important to choose lightweight pots over heavy ceramics and keep soil depth to a minimum to reduce weight. Additionally, consider the theme of your garden and the type of plants you want to include, such as vegetables, herbs, or flowers. Finally, ensure that you have the necessary tools and materials for gardening, such as fertilizer, spades, forks, secateurs, gloves, compost, potting mix, buckets, and hoses.

Conclusion:

Incorporating flowers for rooftop garden is an excellent way to add beauty, functionality, and eco-friendliness to your outdoor space. By selecting the right flowers for your climate and rooftop conditions, planting and caring for them properly, and enjoying the many benefits of a rooftop garden, you can create a vibrant, thriving oasis in the heart of the city.

FAQs:

Q: What flowers are best for a small rooftop garden?

A: Marigolds, petunias, and zinnias are all great options for small rooftop gardens.

Q: How often should I water my rooftop garden?

A: Rooftop gardens require regular watering, especially during hot, dry weather.

Q: How do I protect my rooftop garden from pests?

A: Regularly monitoring your flowers for signs of infestation and using organic pest control methods can help protect your rooftop garden.

Which turf looks the best?

Discover the top turf grass varieties for creating a lush, green lawn. Compare cool and warm season grasses to find the perfect low-maintenance option with superior aesthetics.

Introduction:

When it comes to creating a beautiful and functional lawn, choosing the right turf is crucial. With so many options available, it can be overwhelming to determine which type of turf is best for your US property. In this blog post, we’ll explore some of the most popular turf options and their benefits to help you make an informed decision.

Bermuda Grass

Bermuda grass is a popular choice for warm-season turf in the southern United States. It’s a drought-tolerant grass that thrives in full sun and high temperatures. Bermuda grass has a fine texture and a deep root system, making it an excellent choice for high-traffic areas such as sports fields and backyards. It’s also a low-maintenance grass that requires minimal watering and fertilization.

Zoysia Grass

Zoysia grass is a warm-season turf that’s known for its thick, lush blades. It’s a slow-growing grass that forms a dense mat, making it an excellent choice for areas with heavy foot traffic. Zoysia grass is also drought-tolerant and requires minimal maintenance, making it a popular choice for homeowners.

Fescue Grass

Fescue grass is a cool-season turf that’s commonly used in the northern United States. It’s a versatile grass that thrives in both sun and shade, making it an excellent choice for areas with mixed lighting conditions. Fescue grass has a fine texture and a deep root system, making it an excellent choice for high-traffic areas. It’s also a low-maintenance grass that requires minimal watering and fertilization.

St. Augustine Grass

St. Augustine grass is a warm-season turf that’s commonly used in the southern United States. It’s a fast-growing grass that forms a dense mat, making it an excellent choice for areas with heavy foot traffic. St. Augustine grass has a coarse texture and a shallow root system, making it susceptible to drought. It requires regular watering and fertilization to maintain its lush appearance.

Centipede Grass

Centipede grass is a warm-season turf that’s commonly used in the southeastern United States. It’s a low-maintenance grass that requires minimal watering and fertilization. Centipede grass has a coarse texture and a shallow root system, making it susceptible to drought. It’s also a slow-growing grass that forms a thin mat, making it an excellent choice for areas with low foot traffic.

What are the different types of turf available in the us market?

Credit: Google

There are several types of turf available in the US market, including natural turf and artificial turf.

Natural turf is categorized into several types based on product types, including Bermuda, Zoysia, Fescue, and others. Bermuda and Zoysia are popular choices for warm-season turf, while Fescue is a cool-season turf that thrives in both sun and shade. Each type of natural turf has its own unique benefits and requires different levels of maintenance.

Artificial turf is another popular option in the US market. It is made from synthetic fibers that imitate the look and feel of natural grass. Artificial turf is low-maintenance and can be used in a variety of applications, including sports venues, residential lawns, and commercial buildings. Some of the key players in the artificial turf market include DuPont, FieldTurf, Shaw Industries Group, Inc., ACT Global, and TigerTurf.

Artificial turf is made from several types of materials, including polyethylene, polypropylene, nylon, and hybrid (polypropylene + polyethylene)5. Nylon is the strongest and most resilient synthetic fiber, making it an excellent choice for artificial turf. However, it is also the most expensive. Polyethylene and polypropylene are less expensive than nylon but are not as strong or resilient.

Artificial turf is finding new applications beyond traditional sports venues. It is being used in urban landscapes, on rooftops, balconies, and indoor spaces, and is becoming a popular choice for event venues, sustainable landscaping practices, and the pet industry. However, heat retention in artificial turf poses a significant challenge, and innovative cooling technologies are being explored to mitigate this issue.

In conclusion, there are several types of turf available in the US market, each with its own unique benefits and applications. Whether you prefer natural turf or artificial turf, there are many options to choose from to create a beautiful and functional lawn or sports field.

What are the differences between natural and artificial turf?

Credit: Google

Natural turf and artificial turf are two popular options for lawns, sports fields, and other applications. While both have their advantages and disadvantages, there are significant differences between the two.

Natural turf, also known as natural grass, is a living organism that requires regular maintenance, including mowing, watering, and fertilizing. It provides a natural aesthetic and is often preferred for its softness and coolness in hot weather. However, natural grass can be affected by weather conditions, and its growth and color can vary throughout the year.

Artificial turf, on the other hand, is a synthetic surface that mimics the look and feel of natural grass. It is made from synthetic fibers that are tufted into a backing material and then filled with infill material to provide cushioning and stability. Artificial turf requires minimal maintenance, including occasional rinsing and brushing, and provides a consistent playing surface year-round. However, it can be hotter than natural grass in hot weather, and some people may prefer the natural aesthetic of real grass.

One of the key differences between natural and artificial turf is their impact on the environment. Natural grass absorbs carbon dioxide and releases oxygen, while artificial turf is made from non-biodegradable materials that can contribute to pollution. Natural grass also allows for rainwater to seep into the soil, while artificial turf can cause stormwater runoff, which can carry pollutants into waterways.

Another difference is their cost. While natural grass has a lower upfront cost, it requires ongoing maintenance expenses, including watering, fertilizing, and mowing. Artificial turf has a higher upfront cost but requires minimal maintenance expenses over its lifespan, which can make it a more cost-effective option in the long run.

In terms of performance, artificial turf provides a consistent playing surface that is less affected by weather conditions, making it a popular choice for sports fields. However, some athletes may prefer the softer surface and natural feel of natural grass.

Overall, the choice between natural and artificial turf depends on various factors, including personal preference, cost, maintenance, environmental impact, and performance. It is essential to consider these factors when deciding which option is best for your specific needs and goals.

What are the environmental impacts of using artificial turf?

The environmental impacts of using artificial turf are significant and worth considering before opting for it in your backyard or sports field. Here are some key environmental impacts highlighted in the sources provided:

  1. Heat Retention: Artificial turf can become extremely hot in summer, posing a risk of burns to children and radiating heat that can impact the surrounding environment, leading to increased energy consumption for cooling homes and buildings1.
  2. Loss of Biodiversity: Artificial turf lacks the biodiversity found in natural grass, impacting the soil’s carbon storage and the living systems below the ground. This lack of biodiversity can disrupt the soil fauna and critters, affecting the ecosystem’s balance and carbon storage capacity1.
  3. Disposal and Solid Waste Pollution: Artificial turf typically lasts for 8 to 10 years and is disposed of in landfills after use, contributing to solid waste pollution. Components of the turf system may not be easily recyclable, leading to environmental concerns related to waste management5.
  4. Microplastic Pollution: Migration of rubber and plastic particles from artificial turf into the environment can contribute to microplastic pollution, impacting wildlife habitats and ecosystems. This pollution can have long-lasting effects on the environment and wildlife5.
  5. Climate Change Impact: Choosing artificial turf over natural grass eliminates the potential for carbon capture in healthy soil ecosystems, contributing to the urban heat island effect. This loss of green space and carbon storage can have implications for climate change mitigation efforts
  6. Health Concerns: Artificial turf can trap heat, leading to concerns about heat-related illnesses and skin burns for athletes playing on these fields. The surface temperature of artificial turf can be significantly higher than natural grass, posing risks to athletes’ health and safety5.

In conclusion, while artificial turf offers benefits like low maintenance and consistent playing surfaces, it is essential to consider its environmental impacts, including heat retention, loss of biodiversity, waste disposal issues, microplastic pollution, climate change implications, and health concerns. Understanding these impacts can help individuals and communities make informed decisions when choosing between natural and artificial turf for their outdoor spaces.

How does the environmental impact of artificial turf compare to natural grass?

The environmental impact of artificial turf compared to natural grass depends on several factors, including maintenance, carbon footprint, air pollutants, eutrophication, and ecotoxic emissions.

According to a study by Zurich University of Applied Sciences, natural turf causes 60% and 45% of the greenhouse gas emissions of natural turf, naturally drained and with a drainage layer, respectively, due to maintenance. On the other hand, artificial turf with and without infill only causes 8% and just over 1% of the environmental impact from maintenance3. However, renovation causes 45% to 48% and disposal 20% to 23% of the greenhouse gas emissions of artificial turf.

In terms of air pollutants and the eutrophication of seas and soils, the environmental impact of artificial turf is significantly lower than that of natural turf, mainly due to the maintenance of natural turf, including the burning of diesel during lawn-mowing and the use of artificial fertilisers. However, natural turf and artificial turf differ most in terms of ecotoxic emissions, with plant protection products used on natural turf releasing toxic effects into the environment.

A preliminary life cycle assessment suggested that the environmental impacts of artificial turf fields were lower than equivalent grass fields. However, artificial turf can become extremely hot in summer, posing a risk of burns to children and radiating heat that can impact the surrounding environment, leading to increased energy consumption for cooling homes and buildings. Artificial turf also lacks the biodiversity found in natural grass, impacting the soil’s carbon storage and the living systems below the ground.

In conclusion, while artificial turf may have lower environmental impacts in some areas, such as air pollutants and eutrophication, it can have higher impacts in others, such as ecotoxic emissions and heat retention. Natural grass, on the other hand, has higher maintenance costs but contributes to carbon sequestration, helps maintain a healthier ecosystem, and provides a natural aesthetic. Ultimately, the choice between natural and artificial turf depends on the specific needs and priorities of the user, including factors such as maintenance costs, environmental impact, and aesthetic preferences.

What are the specific environmental impacts of artificial turf?

The specific environmental impacts of artificial turf include:

  1. Heat Retention: Artificial turf can become extremely hot in summer, posing a risk of burns to children and radiating heat that can impact the surrounding environment, leading to increased energy consumption for cooling homes and buildings.
  2. Lack of Biodiversity: Artificial turf does not support the biodiversity found in natural grass, impacting the carbon in the soil and the living systems below the ground. This lack of biodiversity disrupts the soil fauna and critters, affecting the ecosystem’s balance and carbon storage capacity.
  3. Microplastic Pollution: Migration of rubber and plastic particles from artificial turf into the environment can contribute to microplastic pollution, impacting wildlife habitats and ecosystems. This pollution can have long-lasting effects on the environment and wildlife5.
  4. Environmental Damage: Artificial turf can cause environmental damage, including the consumption of raw materials and energy, emissions to air, water, and land. The lack of transpiration and heat trapping in the plastic and rubber materials elevate the surface temperature of artificial turf, especially under direct sunlight.
  5. Greenhouse Gas Emissions: The production and transportation of artificial turf release large amounts of greenhouse gases. If the components of artificial turf are not recycled at the end of its life, the greenhouse gas emissions from the artificial turf field would nearly double.
  6. Infill Concerns: The infill used in artificial turf, such as silica sand and granulated rubber made from old car tires, can contribute to environmental issues. Sharp edges in the infill material can break off grass blades, and loose infill material can spread and impact aquatic environments.
  7. Soil and Groundwater Contamination: The use of chemicals on natural grass fields for maintenance can cause soil and groundwater contamination. Artificial turf eliminates the need for chemicals, reducing the risk of contamination.

These specific environmental impacts highlight the importance of considering the broader implications of choosing artificial turf over natural grass, especially in terms of sustainability, biodiversity, pollution, and resource consumption.

What are the health risks associated with artificial turf?

Artificial turf has been associated with several health risks, including skin abrasions, bacterial infections, and heat-related illnesses. Turf burns, or skin abrasions, are more common on artificial turf than on natural grass and can increase the risk of bacterial infections. Studies have implicated artificial turf as a source of methicillin-resistant Staphylococcus aureus (MRSA) in athletes.

In sunny, warm weather, artificial turf can become much hotter than natural grass, raising concerns of heat-related illness and skin burns for athletes playing on the fields. Heat-related illness can be a life-threatening emergency.

Chemicals identified in artificial turf, including polycyclic aromatic hydrocarbons (PAHs), phthalates, and per- and polyfluoroalkyl substances (PFAS), are known carcinogens, neurotoxicants, mutagens, and endocrine disruptors. However, few studies have looked directly at health outcomes of exposure to these chemicals in the context of artificial turf.

Ecotoxicology studies in invertebrates exposed to crumb rubber have identified risks to organisms whose habitats have been contaminated by artificial turf. Chicken eggs injected with crumb rubber leachate also showed impaired development and endocrine disruption.

The only human epidemiology studies conducted related to artificial turf have been highly limited in design, focusing on cancer incidence. In addition, government agencies have begun their own risk assessment studies to aid community decisions.

Additional studies in in vitro and in vivo translational models, ecotoxicological systems, and human epidemiology are strongly needed to consider exposure from both field use and runoff, components other than crumb rubber, sensitive windows of development, and additional physiological endpoints. Identification of potential health effects from exposures due to spending time at artificial turf fields and adjacent environments that may be contaminated by runoff will aid in risk assessment and community decision making on the use of artificial turf.

Which turf looks the best?

When it comes to choosing the best turf for your needs, there are several factors to consider, including the type of turf, its appearance, durability, and environmental impact.

If you are looking for a natural-looking turf, you can choose one that includes various colors to mimic the look of real grass. High-quality artificial grass will have a blend of different shades of green, and some may also include brown or tan fibers to resemble dead grass and provide a more natural appearance.

Durability is another important factor to consider. The best artificial grass is specifically designed to resist matting and laying flat, with turf fibers that return to an upright position when you walk across them. This is partly due to the structure of the fibers and partly to the infill that’s used. Rounded silica sand infill and T°Cool’s Evaporative Cooling Infill are recommended for their ability to keep the synthetic turf springy and cool, just like the real thing.

A quality turf drainage system is also essential to ensure that water and pet urine can pass through the turf and into the sub-base below. There are two types of turf backings or drainage systems: 100% permeable and hole-punched. The 100% permeable backing allows water and pet urine to pass directly through any point in the turf, while hole-punched backing has drainage holes every few inches and is best for dry areas that seldom see excess runoff.

Antimicrobial properties are also important if you have pets or children on your lawn often. Antimicrobial additives can be added during the manufacturing process to help prevent the buildup of odors from pet urine, as well as germs and bacteria, keeping your backyard denizens clean and healthy.

When it comes to the appearance of your turf, you can choose from a variety of colors and textures to match the natural grass in your area. A close-up photo or sample of grass from a neighboring lawn can be used as a guide when choosing a color and texture of artificial grass for your lawn.

In terms of environmental impact, artificial turf has both advantages and disadvantages. While it does not require water or pesticides, it can contribute to microplastic pollution and may not provide the same ecological benefits as natural grass. However, some artificial turf products are made from eco-friendly materials, such as recycled plastic, and can be recycled at the end of their life.

In conclusion, when choosing the best turf for your needs, it is important to consider factors such as appearance, durability, drainage, antimicrobial properties, and environmental impact. By carefully evaluating your options, you can find a turf that meets your needs and enhances the beauty and functionality of your outdoor space.

How to maintain artificial turf to keep it looking fresh?

Credit: Google

To maintain artificial turf and keep it looking fresh, follow these key steps:

  1. Regular Cleaning: Remove debris like leaves, twigs, and dirt by using a leaf blower, stiff broom, or garden vacuum. This helps prevent the buildup of dirt and keeps the turf looking clean and vibrant.
  2. Deep Cleaning: Periodically perform a deeper clean by using a flexible lawn rake or power brush to agitate the turf fibers, keeping them upright and removing deeper debris. Rinse the turf with a garden hose to wash away dust and pollen, ensuring proper drainage.
  3. Stain Removal: Address stains promptly to prevent them from setting in. Blot liquid spills with a clean, dry cloth and use a mixture of mild detergent and water to gently scrub the stain. For tougher stains like oil-based stains, gum, or pet waste, use appropriate cleaning solutions or methods.
  4. Odor Management: Artificial turf can trap odors, especially from pet urine. Use a water-vinegar mixture to neutralize odors and disinfect the turf. Regular rinsing with water and applying natural deodorizers can also help maintain a fresh-smelling lawn.
  5. Preventive Measures: Implement preventive measures to extend the lifespan and preserve the aesthetics of your artificial turf. This includes periodic inspection for wear, damage, or drainage issues, using pet-friendly cleaning products, checking the infill level, and preventing weed growth.
  6. Proper Maintenance Tools: Use the right tools for maintenance, such as a leaf blower, rake, brush, and hose with a light pressure setting. These tools help in keeping the turf clean and well-maintained.

By following these maintenance tips, you can ensure that your artificial turf remains in excellent condition, looking fresh and vibrant year-round. Regular care and attention will help preserve the longevity and appearance of your synthetic lawn, making it a worthwhile investment for any homeowner or facility manager.

What are the benefits of using artificial turf over natural grass?

Artificial turf offers several benefits over natural grass, including:

  1. Reduced Maintenance: Artificial turf requires minimal maintenance compared to natural grass, which needs regular mowing, watering, and fertilizing. This saves time and money for homeowners and facilities managers.
  2. Durability: Artificial turf is highly durable and can withstand heavy foot traffic, making it an excellent choice for sports fields, playgrounds, and high-traffic areas.
  3. All-weather Use: Artificial turf is weather-resistant and can be used all year round, regardless of rain or sun. It drains quickly and efficiently, preventing floods or standing water.
  4. Extensive Uses: Artificial turf can be used in various settings beyond gardens, such as decks, swimming areas, roof terraces, play areas, offices, exhibition spaces, balconies, dining establishments, hotels, gyms, and more.
  5. Safe for Children and Pets: Artificial turf is soft, cushioned, and free from chemicals and pesticides, making it safer for children and pets. Some brands also contain anti-bacterial properties to prevent the spread of germs and bacteria.
  6. Cost-effective: Artificial turf is a cost-effective solution in the long run, as it does not require watering, fertilizing, or mowing. It is also immune to climate challenges and can be used in indoor spaces.
  7. Aesthetically Pleasing: Artificial turf can be customized to your preferences, with various colors, heights, densities, textures, and designs available. It can mimic the look of natural grass while providing a consistent and clean appearance.
  8. Environmentally Friendly: Artificial turf can be produced using recycled materials, reducing its environmental impact. It also eliminates the need for harsh fertilizers, which can harm the local environment.
  9. Consistent Finish: Artificial turf provides a clean and consistent finish, reducing maintenance costs and eliminating patchiness, discoloration, weeds, or mud.
  10. Proper Drainage: Artificial turf is designed with small holes for proper drainage, making it a safer and more convenient option for outdoor activities.

However, there are also some downsides to artificial turf, such as the initial cost of installation and the potential for heat absorption in hot weather. It is essential to weigh the pros and cons and consider your specific needs and circumstances when deciding between artificial turf and natural grass.

Conclusion:

Choosing the right turf for your US lawn depends on several factors, including your location, climate, and maintenance preferences. Bermuda grass, Zoysia grass, Fescue grass, St. Augustine grass, and Centipede grass are all popular options that offer unique benefits. By considering these factors and working with a local turf expert, you can create a beautiful and functional lawn that meets your needs and exceeds your expectations.

FAQs:

What is the best turf for high-traffic areas?

Bermuda grass, Zoysia grass, and Fescue grass are all excellent choices for high-traffic areas due to their dense root systems and ability to withstand heavy foot traffic.

What is the best turf for drought-prone areas?

Bermuda grass and Zoysia grass are both drought-tolerant turfs that require minimal watering and maintenance.

What is the best turf for shady areas?

Fescue grass is a cool-season turf that thrives in both sun and shade, making it an excellent choice for areas with mixed lighting conditions.

What is the best low-maintenance turf?

Centipede grass is a low-maintenance turf that requires minimal watering and fertilization.

What is the best turf for sports fields?

Bermuda grass is a popular choice for sports fields due to its ability to withstand high foot traffic and maintain its lush appearance.

What is a Rajnigandha Flower in English?: A Fragrant Marvel

Discover What is a rajnigandha flower in English?: Symbolism, Rituals & Global Celebrations.

Introduction: What is a rajnigandha flower in English?

Rajnigandha, also known as tuberose, is a fragrant flowering plant that belongs to the Agavaceae family. While native to Mexico and Central America, it has found a second home in India, where it symbolizes love and purity. In this blog post, we’ll delve into the fascinating world of Rajnigandha, exploring its types, benefits, and care tips.

Planting Rajnigandha Bulbs: A Step-by-Step Guide

  1. Choose the Right Spot: Rajnigandha bulbs thrive in warm, sunny locations with well-drained soil. Aim for at least 6 hours of direct sunlight daily.
  2. Prepare the Soil: Ensure the soil is well-draining and rich in organic matter. Add compost or well-rotted manure to enhance texture and fertility.
  3. Plant the Bulbs: Spring, after the last frost, is the ideal time to plant Rajnigandha bulbs. Dig a hole 6 inches deep and 6 inches wide. Place the bulb with the pointy end facing upwards and cover it with soil. Maintain a spacing of 6 inches between bulbs.
  4. Water Thoroughly: After planting, water the bulbs generously to settle the soil. Regular watering during dry spells and hot weather keeps the soil moist.
  5. Fertilize Regularly: Rajnigandha bulbs need consistent feeding. Apply a balanced fertilizer (such as 10-10-10) every 2-3 weeks during the growing season.
  6. Mulch the Soil: Add organic mulch (like straw or shredded leaves) around the bulbs to retain moisture and suppress weed growth.
  7. Care for the Plants: Regular care includes watering, fertilizing, and pest control. Remove dead or yellowing leaves to maintain plant health and aesthetics.

Planting Season and Popular Varieties

  • Planting Season: In India, Rajnigandha should be planted between mid-March and mid-April. Wait for warm temperatures and ample sunlight before planting.
  • Varieties:
    • Single Mexican: Highly fragrant with single white flowers, often chosen for commercial cultivation.
    • Double Pearl: Larger, ornamental double white flowers, perfect for floral arrangements and weddings.
    • The Pearl: Long stems with clusters of double white flowers, sweet and spicy fragrance, prized for ornamental value.

Tuberose in Perfumery and Beyond

  • Perfume Note: Extracts from Rajnigandha are used as a note in perfumery, adding a sweet, heady scent to fragrances.
  • Ornamental Beauty: Widely grown as an ornamental plant, Rajnigandha graces gardens, events, and bouquets.
  • Cultural Significance: In India, it symbolizes love, purity, and elegance.
Credit: Bing

How do I propagate Rajnigandha?

Propagating Rajnigandha (Tuberose): A Comprehensive Guide

Rajnigandha, also known as Tuberose, is a delightful flowering plant that graces gardens and bouquets with its fragrant white blooms. If you’re keen on propagating this beauty, here’s how you can do it:

  1. Propagation Methods:
    • Seeds: While Rajnigandha seeds are challenging to germinate, you can try sowing them evenly in a well-prepared mixture of leaf mold, garden soil, and sand. Plant them at a depth of 1.0 to 1.75 cm in a nursery bed or seed pan.
    • Bulbs: Rajnigandha bulbs are the most common propagation method. They can be obtained from nurseries or garden centers. Here’s how to propagate using bulbs:
      • Direct Planting: Plant the bulbs directly in your garden or individual pots.
      • Sunlight: Choose a location that receives plenty of sunlight.
      • Watering: After planting the bulbs, water them well.
      • Shoots: Within 3-5 weeks, the tubers will sprout new shoots.
      • Blooming: Expect flowers to appear after 100-120 days.
  2. Varieties of Rajnigandha:
    • Rajnigandha offers three main varieties:
      • Single Flowered: These have a single row of petals and are commonly used for making garlands.
      • Semi-Double Flowers: With 2-3 rows of petals, these are versatile for both cut flowers and ornamental use.
      • Double Flowered: These varieties have more than three rows of petals and are excellent for cut flowers due to their prolonged blooming period.
  3. Soil Requirements:
    • Rajnigandha thrives in well-drained soil. Ensure a mix of garden soil, leaf mold, and sand for optimal growth.
  4. Planting Time:
    • In India, plant Rajnigandha bulbs between mid-March and mid-April for best results.

Remember, Rajnigandha’s sweet fragrance and elegant appearance make it a delightful addition to any garden or floral arrangement. Happy gardening! 🌸🌿

How do I care for Rajnigandha once it’s planted?

Caring for Rajnigandha (Tuberose): A Comprehensive Guide

Rajnigandha, also known as Tuberose, is a fragrant perennial flower that graces gardens and bouquets with its waxy white blooms. To ensure your Rajnigandha thrives, follow these care guidelines:

  1. Soil Requirements:
    • Rajnigandha prefers well-drained soil that is rich in organic matter. Ensure good drainage to prevent waterlogging.
    • Mix garden soil, leaf mold, and sand for optimal growth.
  2. Watering:
    • Regular watering is essential. Water the plant when the top inch of soil feels dry.
    • Avoid overwatering, as it can lead to root rot.
  3. Sunlight:
    • Rajnigandha needs full sunlight for at least 6 hours a day.
    • Place it in a sunny spot in your garden or on a windowsill.
  4. Fertilization:
    • Fertilize your Rajnigandha every two weeks during the growing season.
    • Use a balanced fertilizer to promote healthy growth and flowering.
  5. Mulching:
    • Apply organic mulch (such as straw or shredded leaves) around the base of the plant.
    • Mulching helps retain moisture, suppress weeds, and regulate soil temperature.
  6. Pest and Disease Control:
    • Keep an eye out for pests like aphids and spider mites. Treat them promptly.
    • Ensure good air circulation to prevent fungal diseases.
  7. Deadheading:
    • Remove faded flowers to encourage continuous blooming.
    • Deadheading redirects energy to new flower buds.
  8. Pruning:
    • Trim yellowing or dead leaves regularly.
    • Prune after flowering to maintain shape and encourage new growth.

Remember, Rajnigandha’s sweet fragrance and elegant appearance make it a delightful addition to any garden. Happy gardening! 🌸🌿

What are some common problems faced while growing Rajnigandha?

Common Challenges When Growing Rajnigandha (Tuberose)

Rajnigandha, also known as Tuberose, is a delightful flowering plant with fragrant white blooms. While it’s relatively easy to grow, there are some common challenges you might encounter:

  1. Lack of Sunlight:
    • Rajnigandha requires ample sunlight for healthy growth and flowering.
    • If your plant isn’t getting enough sunlight, it may not bloom. Consider moving it to a sunnier spot.
  2. Root-Bound Condition:
    • A root-bound plant has outgrown its container, and its roots become cramped.
    • Signs include roots emerging from drainage holes and a stiff container.
    • Transplant your Rajnigandha into a slightly larger pot to allow proper root development.
  3. Insufficient Fertilization:
    • Rajnigandha needs nutrient-rich soil to bloom.
    • Feed it with a balanced fertilizer during the flowering season (such as 19:19:19 NPK or rotted cow dung).
    • Water after fertilizing to release nutrients.

Remember, proper care, adequate sunlight, and timely fertilization will help your Rajnigandha thrive and reward you with its sweet fragrance! 🌸🌿

For more detailed information, you can refer to this source.

What is the best time to harvest Tuberose flowers?

Harvesting Tuberose Flowers: A Fragrant Endeavor

Tuberose (Polianthes tuberosa) is a night-blooming plant native to Mexico, cherished for its sweet-smelling flowers used in perfumes, floral arrangements, and traditional medicine. When it comes to harvesting these fragrant blooms, timing is crucial. Let’s explore the best practices for harvesting Tuberose flowers:

  1. When to Harvest:
    • Tuberose flowers are usually ready for harvest when the first spike begins to open and the flowers emit their delightful fragrance.
    • Look for spikes with at least 1-2 pairs of open flowers.
  2. Harvesting Technique:
    • Cut the flower spikes from the base using sharp, clean scissors or pruning shears.
    • To prevent the stem from getting waterlogged, remove the lower leaves.
  3. Preservation Options:
    • Fresh Arrangements: Place the harvested spikes in a vase with water. Enjoy their beauty and fragrance indoors.
    • Drying: Alternatively, you can hang the spikes upside down in a cool, dry place. This drying method preserves the blooms for longer-lasting enjoyment.

Remember, Tuberose flowers are not only visually stunning but also fill the air with their sweet aroma. Whether you’re creating a bouquet or simply appreciating their beauty, these blooms are sure to bring joy to any space! 🌸🌿

Cultural significance of Tuberose:

Tuberose Flower: A Fragrant Marvel with Spiritual and Cultural Significance

The Tuberose (Polianthes tuberosa) is a white, fragrant flower native to Central America. Its glossy green leaves and intoxicating scent have woven a rich tapestry of symbolism and meaning across various cultures. Let’s explore its spiritual and cultural significance:

  1. Spiritual Meaning:
    • Tuberose flowers are believed to possess strong spiritual properties:
      • Meditation and Relaxation: The fragrance of Tuberose promotes calmness and serenity, aiding meditation and inner connection.
      • Protection: In some cultures, Tuberose is used to ward off negative energies and protect those who wear it.
      • Aphrodisiac: Ancient traditions considered Tuberose an aphrodisiac, evoking feelings of passion and desire.
      • Wedding Symbolism: Tuberose is used in wedding ceremonies, symbolizing deep and eternal love between couples.
  2. Symbolism in Literature and Art:
    • Innocence and Purity: Tuberose often symbolizes innocence, purity, and sincerity. It appears in literature as a representation of young love and new beginnings.
    • Beauty and Grace: In art, Tuberose is depicted as a powerful symbol of beauty and grace, reflecting the delicacy of its petals and the elegance of its scent.
    • Death and Mourning: Interestingly, Tuberose flowers were used in Victorian England for funeral arrangements, signifying mourning. In Mexican culture, they honor departed loved ones during the Day of the Dead celebrations.
  3. Practical Uses:
    • Essential Oil: Extracted from Tuberose flowers, the essential oil is used in perfumes and aromatherapy. It calms the mind and body, promoting relaxation and stress relief.
  4. Dream Interpretation:
    • If you dream of Tuberose flowers, it signifies good luck, hope, new beginnings, purity, and inner spiritual growth.
  5. Cultural Practices:
    • India: Tuberose garlands feature in religious ceremonies, symbolizing purity and devotion.
    • Various Traditions: Tuberose is associated with love, romance, and prosperity. Its scent is believed to attract positive energy and repel negativity.

So, embrace the Tuberose’s fragrant legacy—a flower that bridges the earthly and the ethereal! 🌸✨

What are some Tuberose festivals or rituals around the world?

Tuberose: A Fragrant Guest at Global Celebrations

The Tuberose (Polianthes tuberosa) transcends borders, weaving its fragrant magic into diverse cultural celebrations worldwide. Let’s explore some of the festivals and rituals where this botanical gem takes center stage:

  1. Floral Poetry in Indian Culture:
    • In India, the Tuberose holds deep significance. It is associated with purity and features prominently in various religious ceremonies.
    • The sweet fragrance of Tuberose garlands pleases deities during worship, creating a bridge between the earthly and the divine.
  2. Weddings and Tuberose:
    • Globally, Tuberose graces wedding traditions. Beyond its beauty, it symbolizes the fragility and transformative nature of love.
    • Bridal bouquets and adornments often feature Tuberose, adding an ethereal touch to the ceremony.
  3. The Day of the Dead in Mexico:
    • During Mexico’s vibrant Dia de los Muertos (Day of the Dead) celebrations, Tuberose plays a crucial role.
    • Known as “Nardo” or “The Flower of the Dead,” Tuberose is used to honor and remember departed loved ones. Families create altars adorned with these fragrant blooms.
  4. Tuberose in Hawaiian Leis:
    • Journey to the Hawaiian Islands, where Tuberose is a staple in the creation of leis—traditional floral garlands.
    • The fragrance of Tuberose is intertwined with the spirit of aloha, representing love, respect, and hospitality.
  5. Chinese New Year Customs:
    • During Chinese New Year celebrations, Tuberose symbolizes a wish for a prosperous and positive start to the year.
    • It is used in decorations, believed to attract good fortune and blessings.
  6. Victorian Language of Flowers:
    • In the romantic era of Victorian England, flowers conveyed sentiments. Tuberose had a unique message: dangerous pleasure.
    • Its intoxicating scent hinted at both desire and risk.
  7. Tuberose in Ayurveda:
    • Beyond cultural festivities, Tuberose serves as more than a fragrant flower. In Ayurveda, it is considered a therapeutic herb.
    • Tuberose promotes emotional well-being and inner balance.

As we traverse these diverse cultural landscapes, we discover that Tuberose is not merely a bloom; it’s a carrier of stories, emotions, and centuries-old traditions—a fragrant touch in the celebrations of life. 🌸✨

Tips for growing Tuberose at home?

Growing Tuberose (Polianthes tuberosa) at Home: A Comprehensive Guide

Tuberose, also known as Rajanigandha, is a fragrant flowering plant cherished for its sweet-smelling blooms. Whether you’re a seasoned gardener or a beginner, here are essential tips for successfully growing Tuberose at home:

1. Planting Tuberose:

  • Choose the Right Time: Plant Tuberose bulbs in early spring after the last frost. If you have a shorter growing season, start them indoors and transfer them outdoors once night temperatures are above 60°F (15.5°C).
  • Prepare the Soil: Tuberose prefers well-draining, highly nutritious soil. Mix in organic material like peat moss, compost, or decomposed manure. Raise the soil surface by 2-3 inches (5-7.5 cm) to prevent waterlogging.
  • Select a Sunny Location: Tuberose thrives in full sun (6-8 hours a day). If it shows signs of withering, move it to bright partial shade.

2. Caring for Tuberose:

  • Water Sparingly Initially: Keep the soil fairly dry until green tips emerge. Once established, provide consistent moisture.
  • Moderate Watering: During the growing season, water approximately 1-1.5 inches (2.5-3.75 cm) per week. Avoid overwatering to prevent rot.
  • Fertilize Regularly: Apply a balanced, slow-release fertilizer every 4-6 weeks during active growth.
  • Prune: Remove dead or yellowing leaves and spent flowers to encourage new growth.
  • Pest and Disease Control: Watch out for snails, grasshoppers, aphids, and fungal diseases. Provide good air circulation and avoid overhead watering.

3. Harvesting and Preservation:

  • Harvest Tuberose flowers when the first spike begins to open and they are fragrant.
  • Cut the spikes and remove lower leaves to prevent waterlogging.
  • Place the spikes in a vase with water or hang them upside down to dry.

Remember, Tuberose’s sweet aroma will fill your space, bringing joy and beauty to your garden! 🌸✨

What are some common Tuberose varieties I can grow?

Tuberose (Polianthes tuberosa) offers a delightful array of varieties to choose from. Here are some common ones categorized by their flower types:

  1. Single Flowered Varieties:
    • Rajat Rekha: Single-row petals, ideal for loose flower garlands.
    • Shringar: Another single-flowered variety.
    • Single Mexican: Known for its simplicity and fragrance.
    • Svarna Rekha: Double-flowered variety.
  2. Double Flowered Varieties:
    • Arka Nirantara: High spike yield, early flowering, and prolonged blooming period.
    • Arka Vaibhav: Medium spikes with double flowers.
    • Arka Prajwal: Tall, sturdy spikes with single-type flowers.
  3. Other Notable Varieties:
    • Suvasini: Double-flowered type.

Choose the one that resonates with your preferences and enjoy the fragrant beauty of Tuberose in your garden! 🌸✨

What are some unique colored varieties of Tuberose?

Tuberose (Polianthes tuberosa) offers a delightful array of varieties, each with its own unique charm. Let’s explore some of the distinct colored Tuberose varieties:

  1. Common Tuberose (Polianthes):
    • Classic snowy white blooms, known for their intense fragrance.
  2. Yellow Tuberose (Polianthes Yellow Baby):
    • A sunny twist on the traditional white, with yellow-hued flowers.
  3. Light Pink Tuberose (Polianthes Sensation):
    • Delicate pink petals add a soft touch to bouquets and arrangements.
  4. Golden-Yellow Tuberose (Polianthes Super Gold):
    • A radiant golden hue that stands out in floral displays.
  5. Pink Tuberose (Polianthes Pink Saphier):
    • A blush of pink for a romantic and elegant touch.

Remember, Tuberose varieties offer a spectrum of colors, allowing you to create captivating floral designs! 🌸✨

Conclusion: What is a rajnigandha flower in English?

The Tuberose, with its sweet fragrance and global presence, transcends mere botanical beauty. From Indian rituals to Hawaiian leis, it weaves a fragrant tapestry across cultures, symbolizing love, purity, and spiritual connections. Let its delicate blooms continue to grace our celebrations and touch our hearts! 🌸✨

What is the Champaka flower?

Champaka flower, also known as Magnolia champaca, is prized for its fragrance. Explore its cultural significance, uses, and health benefits. 🌸✨

Introduction: What is the Champaka flower?

Let’s delve into the captivating world of the Champaka flower (also known as Magnolia champaca). This fragrant blossom holds a special place in various cultural and spiritual contexts. Here’s a detailed exploration:

Champaka Flower: Fragrance and Beauty

1. Etymology and Vernacular Names

  • The scientific name Magnolia champaca originates from the Sanskrit word “campaka” (pronounced [tɕɐmpɐkɐ]), which beautifully captures its essence.
  • In English, it goes by several vernacular names:
    • Joy Perfume Tree
    • Yellow Jade Orchid Tree
    • Fragrant Himalayan Champaca

2. Distribution and Habitat

  • Native to the Indomalayan realm, Champaka thrives in South Asia, Southeast Asia, and southern China.
  • It graces tropical and subtropical moist broadleaf forests at elevations ranging from 200 to 1,600 meters (660 to 5,250 feet).
  • Countries where it flourishes include:
    • Maldives
    • Bangladesh
    • Cambodia
    • China
    • India
    • Indonesia
    • Malaysia
    • Myanmar
    • Nepal
    • Philippines
    • Thailand
    • Vietnam
    • And now, an isolated population was discovered in Yemen, making it the only Magnoliaceae species in the Arabian Peninsula.

3. Description

  • Height: In its native range, Champaka can grow up to 50 meters (160 feet) or even taller.
  • Trunk Diameter: Its sturdy trunk can reach up to 1.9 meters (6.2 feet) in diameter.
  • Crown Shape: The tree boasts a narrow umbelliform crown.
  • Flowers: The strongly fragrant flowers bloom from June to September in varying shades of cream to yellow-orange.
    • Each flower has 6-12 petals and exudes an irresistible aroma.
    • The obovoid-ellipsoid carpels produce 2-4 seeds during September to October.

4. Cultural Aspects and Spiritual Significance

  • Buddhism: The Champaka flower symbolizes purity of the mind and represents the Buddha. It is used in Buddhist prayer offerings and during meditation due to its calming fragrance.
  • Indian Worship: Since time immemorial, the Champa flower has been an integral part of Indian spiritual worship. Its distinct aroma infuses sacred spaces with reverence.

5. Practical Uses

  • Fragrance: Beyond its spiritual significance, the Champaka flower’s fragrance has practical applications.
  • Timber: The tree’s timber finds use in woodworking.

In summary, the Champaka flower enchants with its beauty, fragrance, and cultural significance. Whether adorning temple courtyards or gracing home gardens, it remains a timeless favorite. 🌸✨

Credit: Bing

How can I grow Champaka at home?

Growing Champaka (Plumeria), also known as Frangipani, is a delightful endeavor. These tropical flowering plants are prized for their fragrant blossoms. Here are some care tips and steps to cultivate Champaka at home:

  1. Choose the Right Location:
    • Sunlight: Place your Champaka in a bright spot, but avoid direct sunlight, especially during scorching hours.
    • Temperature: They thrive in warm climates, so ensure a minimum temperature of 60°F (15°C).
  2. Soil and Potting Mix:
    • Use a well-draining cactus potting mix or a blend of garden soil and sand.
    • Ensure the pot has good drainage holes.
  3. Watering:
    • Regular Watering: Water your Champaka regularly, especially during hot weather.
    • Allow Soil to Dry: Let the soil dry out slightly between waterings to prevent root rot.
  4. Fertilization:
    • Feed your Champaka with a balanced fertilizer every month during the growing season (spring to fall).
    • Opt for a fertilizer with an N-P-K ratio of 10-10-10 or similar.
  5. Pruning and Shaping:
    • Pinch back the tips of stems to encourage bushier growth.
    • After flowering, prune your Champaka to promote new growth.
  6. Pest and Disease Control:
    • Be vigilant for pests like aphids and whiteflies. Treat them promptly.
    • Keep an eye out for signs of diseases such as leaf spots.
  7. Propagation:
    • Propagate Champaka through stem cuttings:
      • Take a healthy stem cutting (about 6-8 inches long) with a few leaves.
      • Let it dry for a day or two.
      • Plant the cutting in well-draining soil.
      • Keep it out of direct sunlight for 15-20 days.
      • Once it develops roots, gradually introduce it to full sunshine.
  8. Blooming:
    • Champaka will begin to bloom in its second year of growth.
    • Enjoy the stunning, fragrant flowers!

Remember, Champaka trees can grow to be 5-15 feet tall and are excellent for patio pots. Their elegant blooms and intoxicating fragrance make them a delightful addition to any garden. 🌸✨

Credit: www.itslife.in

What are some common Champaka varieties?

Champaka (Magnolia champaca) comes in several varieties and hybrids. Let’s explore some of them:

  1. Magnolia (Michelia) champaca var. champaca:
    • Known as Huang lan in Chinese.
    • Can grow up to 30 meters (98 feet) tall.
    • Documented in China.
  2. Magnolia (Michelia) champaca var. pubinervia:
    • Referred to as Mao ye mai huang lan in Chinese.
    • Can reach heights of 50 meters (160 feet) or taller.
    • Also documented in China.

These varieties showcase the diversity within the Champaka family. Whether you’re a gardener or simply an admirer of beautiful blooms, exploring these variations can be a delightful journey. 🌸✨

Fragrance of Champaka:

The Champaka flower (Magnolia champaca) is renowned for its captivating fragrance. Let’s explore its aromatic allure:

  1. Scent Profile:
    • The Champaka emits a rich, sweet, and heady fragrance that lingers in the air.
    • Imagine a blend of jasmineorange blossom, and fruity undertones—a harmonious symphony of scents.
  2. Intensity:
    • The fragrance is intensely powerful, especially during the flowering season.
    • A single Champaka blossom can fill an entire room with its delightful aroma.
  3. Notes:
    • Top Notes: The initial burst of fragrance is fresh, citrusy, and slightly spicy.
    • Heart Notes: As the scent develops, it reveals floral nuances—hints of jasmine, ylang-ylang, and magnolia.
    • Base Notes: The lingering base notes are warm, woody, and sweet, akin to sandalwood and vanilla.
  4. Cultural Significance:
    • In Buddhist traditions, the Champaka’s fragrance symbolizes purity and aids in meditation.
    • Temples often use Champaka flowers during rituals and ceremonies.
  5. Personal Experience:
    • Imagine strolling through a tropical garden at dusk, the air thick with Champaka’s sweet embrace.
    • The fragrance evokes a sense of serenity, connecting you to nature’s beauty.

In summary, the Champaka flower’s fragrance is a sensory delight—a blend of floral elegance and exotic warmth. Whether in gardens, temples, or perfumes, it leaves an indelible impression. 🌸✨

Are there any Champaka-based perfumes?

The Champaka flower (Magnolia champaca) is a prized ingredient in perfumery, known for its exotic and intoxicating fragrance. Let’s explore its scented journey:

  1. Overview of Champaka Flowers:
    • Appearance and Botanical Family: These golden-orange or yellow blooms belong to the Magnoliaceae family. They grace medium-to-tall evergreen trees, reaching heights of up to 50 meters.
    • Historical Use: Champaka flowers have enchanted people for centuries. Initially used in traditional Indian and Southeast Asian rituals, they soon found their way into perfumery due to their captivating scent.
  2. Cultural and Spiritual Significance:
    • In India, Champaka flowers are revered as sacred offerings in Hindu temples.
    • In Indonesia, they symbolize love, unity, and divine blessings during weddings.
  3. Importance in Perfumery:
    • Rarity and Demand: Genuine Champaka flowers are rare, enhancing their value and desirability.
    • Distinctive Aroma Profile: The exotic, heady aroma sets Champaka apart from other floral scents, making it a favorite among top perfumers.
    • Market Trends: With growing appreciation for niche and natural ingredients, Champaka is gaining popularity in the perfume industry.
    • Luxury Brands: Renowned houses like ChanelTom Ford, and Guerlain incorporate Champaka into exclusive, upscale perfumes.
  4. Champaka-Based Perfumes:

Inhale the essence of Champaka—a sensory journey through exotic blooms and timeless elegance. 🌸✨

Credit: Bing

Champaka’s role in traditional medicine:

The Champaka flower (Magnolia champaca) plays a significant role in traditional medicine, particularly in Ayurveda and other ancient healing systems. Let’s explore its therapeutic uses:

  1. Aromatherapy and Stress Relief:
    • The essential oil extracted from Champaka flowers is prized for its calming and stress-relieving properties.
    • In aromatherapy, it promotes relaxation, soothes the mind, and enhances mental well-being.
  2. Digestive Aid:
    • Champaka flowers are used in Ayurvedic remedies to alleviate digestive issues.
    • They stimulate appetite and improve overall digestive function.
  3. Antibacterial and Antifungal Properties:
    • Champaka extracts are valued for their potential to combat bacterial and fungal infections.
    • Topically, they treat skin conditions caused by microbial infections.
  4. Anti-inflammatory Effects:
    • Champaka is known for its anti-inflammatory properties.
    • It may help reduce inflammation associated with conditions like arthritis.
  5. Respiratory Health:
    • Ayurvedic formulations use Champaka to support respiratory well-being.
    • It helps clear respiratory passages and alleviates coughs and congestion.
  6. Aphrodisiac Effects:
    • Some traditional remedies consider Champaka as an aphrodisiac.
    • It is believed to enhance sexual desire and performance.
  7. Skin Care:
    • The oil derived from Champaka flowers is used in skincare for its moisturizing properties.
    • It nourishes and rejuvenates the skin.
  8. Headache and Migraine Relief:
    • Champaka oil is occasionally used in head massages or as a topical application to alleviate headaches and migraines.
  9. Menstrual Support:
    • In Ayurveda, Champaka helps regulate menstrual cycles and alleviate associated discomfort.
    • It balances hormonal levels.
  10. Calming the Nervous System:
    • Traditionally, Champaka soothes the nervous system, making it beneficial for anxiety-related conditions.

Remember, this exquisite flower not only graces gardens but also contributes to holistic well-being. 🌸✨

Are there any Champaka-based herbal teas?

The Champaka flower (Magnolia champaca) is not only revered for its fragrance and ornamental beauty but also finds its way into culinary and herbal applications. Let’s explore its role in herbal teas:

  1. Champaka Petals in Tea:
  2. Health Benefits:
    • Stress Reduction: The aroma of Champaka is known to reduce stress and promote relaxation. Incorporating it into herbal teas can enhance the calming effect.
    • Improved Sleep Quality: A cup of Champaka-infused tea before bedtime may help improve sleep quality.
    • Anti-Inflammatory Properties: The flower’s extracts have anti-inflammatory effects, making it beneficial for overall health.
    • Skin Conditions: Champaka extracts are used in treatments for various skin conditions.
    • Immunity Boost: Regular consumption of Champaka tea may enhance overall immunity.
  3. Traditional Remedies:

Incorporating Champaka petals into herbal teas not only delights the senses but also offers potential health benefits. 🌸🍵✨

What are the best brewing methods for Champaka petals?

Brewing with Champaka petals (Magnolia champaca) can yield delightful and aromatic results. Here are some methods to extract the essence of these beautiful flowers:

  1. Champaka Petal Tea:
    • Ingredients:
      • Fresh or dried Champaka petals
      • Hot water (just below boiling)
    • Steps:
      1. Harvest: Gather fresh, clean Champaka petals. If using dried petals, ensure they are of good quality.
      2. Infusion:
        • Place a handful of petals in a teapot or cup.
        • Pour hot water over the petals.
        • Cover and steep for about 5-7 minutes.
      3. Strain:
        • Use a fine mesh strainer to separate the petals from the tea.
      4. Enjoy: Sip the fragrant Champaka petal tea. You can add honey or lemon for extra flavor.
  2. Champaka Petal Syrup:
    • Ingredients:
      • Fresh Champaka petals
      • Sugar
      • Water
    • Steps:
      1. Prepare Petals:
        • Rinse the petals thoroughly.
        • Remove any green parts.
      2. Create Syrup:
        • In a saucepan, combine equal parts sugar and water (e.g., 1 cup each).
        • Add the Champaka petals.
        • Simmer over low heat until the sugar dissolves and the syrup thickens.
      3. Strain and Store:
        • Strain the syrup to remove the petals.
        • Store the Champaka petal syrup in a glass container.
      4. Use:
        • Drizzle the syrup over desserts, pancakes, or waffles.
        • Mix it into cocktails or mocktails.
  3. Champaka Petal Infused Oil:
    • Ingredients:
      • Fresh Champaka petals
      • Carrier oil (such as coconut oil or jojoba oil)
    • Steps:
      1. Petal Preparation:
        • Crush the petals slightly to release their fragrance.
      2. Oil Infusion:
        • Place the petals in a glass jar.
        • Pour the carrier oil over the petals, covering them completely.
        • Seal the jar and place it in a sunny spot for about 2-3 weeks.
      3. Strain and Store:
        • Strain the oil to remove the petals.
        • Store the Champaka petal-infused oil in a dark glass bottle.
      4. Uses:
        • Use the oil for massage, as a hair treatment, or as a fragrant body oil.

Remember, the brewing method you choose depends on your preference and intended use. Whether you’re sipping a soothing tea or drizzling Champaka syrup over desserts, these petals bring a touch of exotic elegance to your culinary creations. 🌸🍵✨

What are the storage guidelines for Champaka petal syrup?

Champaka petal syrup, crafted from the fragrant petals of the Magnolia champaca tree, deserves careful storage to preserve its aromatic essence. Here are some guidelines to ensure its longevity:

  1. Container Choice:
    • Use a glass container with an airtight seal. Glass is non-reactive and won’t alter the flavor or fragrance.
    • Avoid plastic containers, as they may absorb odors and affect the syrup’s quality.
  2. Cool and Dark Environment:
    • Store the syrup in a cool, dark place away from direct sunlight.
    • Sunlight can degrade the delicate flavors and aromas.
  3. Refrigeration:
    • While Champaka petal syrup doesn’t require refrigeration, it’s advisable to keep it in the refrigerator.
    • Cold temperatures slow down flavor deterioration.
  4. Avoid Moisture and Heat:
    • Ensure the container is dry before pouring in the syrup.
    • Heat exposure can cause fermentation or spoilage.
  5. Check for Spoilage:
    • Periodically inspect the syrup for any signs of moldcloudiness, or off smells.
    • If you notice any changes, discard it promptly.
  6. Labeling and Date:
    • Label the container with the date of preparation.
    • This helps you track freshness and usage.

Remember, Champaka petal syrup is a precious elixir—handle it with care and savor its exotic fragrance whenever you indulge. 🌸✨

What are some creative recipes using Champaka petal syrup?

While Champaka petal syrup is not as commonly used as some other floral syrups, its exotic fragrance and delicate flavor can add a unique twist to various culinary creations. Here are some creative recipes to explore:

  1. Champaka Petal Iced Tea:
    • Brew a strong cup of your favorite tea (black, green, or herbal).
    • Add a splash of Champaka petal syrup for a fragrant and subtly sweet twist.
    • Serve over ice with a slice of lemon or orange.
  2. Champaka-Infused Cocktails:
    • Champaka Martini:
      • Mix vodka, dry vermouth, and a dash of Champaka petal syrup.
      • Shake with ice and strain into a chilled martini glass.
      • Garnish with a fresh Champaka petal.
    • Champaka Collins:
      • Combine gin, lemon juice, simple syrup, and a few drops of Champaka petal syrup.
      • Top with soda water and serve over ice.
      • Garnish with a lemon wheel and a sprig of mint.
  3. Champaka Petal Desserts:
    • Champaka Panna Cotta:
      • Prepare a classic panna cotta (cream, sugar, and gelatin).
      • Add a teaspoon of Champaka petal syrup to the mixture before setting.
      • Serve chilled with fresh berries.
    • Champaka Rice Pudding:
      • Make a creamy rice pudding.
      • Stir in Champaka petal syrup for a floral twist.
      • Top with toasted coconut or chopped pistachios.
  4. Champaka Petal Drizzle:
    • Drizzle Champaka petal syrup over:
      • Vanilla ice cream
      • Yogurt parfaits
      • Pancakes or waffles
      • Fresh fruit salads
  5. Champaka Petal Mocktail:
    • Champaka Fizz:
      • Mix sparkling water, a splash of Champaka petal syrup, and a squeeze of lime.
      • Serve over ice with a mint sprig.

Remember, creativity knows no bounds—feel free to experiment with Champaka petal syrup in your favorite recipes. Its delicate floral notes will transport your taste buds to an enchanting garden. 🌸🍹✨

For more detailed and authentic recipes, you might want to explore the book “Petals of the Champaka: Recipes to Teach My Children and Grandchildren,” which celebrates the Siamese culinary legacy of Thanphuying Mahidhorn. 📖🌺

What are the health benefits of consuming Champaka petals?

The Champaka flower (Magnolia champaca) offers several health benefits due to its medicinal properties. Let’s explore them:

  1. Anti-Inflammatory and Antimicrobial Effects:
    • Champaka is valued for its anti-inflammatory and antimicrobial properties.
    • Traditionally, it has been used to treat conditions related to inflammation and infections.
  2. Urinary Health:
    • Consuming Champaka petals may provide relief for those experiencing painful urination or difficulty urinating.
    • It aids in promoting urine flow.
  3. Stress Reduction and Sleep Improvement:
    • Champaka is used in aromatherapy to reduce stress and promote relaxation.
    • Its fragrance can help improve sleep quality.
  4. Skin Conditions:
    • Extracts from Champaka have been incorporated into treatments for various skin conditions.
    • It may help soothe skin irritations and maintain healthy skin.
  5. Digestive Support:
    • Champaka petals are sometimes used in culinary applications, adding a subtle, aromatic flavor to teas and dishes.
    • While its culinary uses are limited, it contributes to overall well-being.
  6. Holistic Wellness:
    • Whether in the form of oilsextracts, or teas, Champaka plays a role in enhancing overall immunity and promoting health.

Remember, incorporating Champaka petals into your routine can be a delightful way to experience both its fragrance and potential health benefits. 🌸✨

Conclusion:

Let’s delve deeper into the captivating world of the Champaka flower (also known as Magnolia champaca). This fragrant blossom holds a special place in various cultural and spiritual contexts, and its beauty and significance extend far beyond its delicate petals.

The Champaka flower enchants with its beauty, evocative aroma, and rich cultural heritage. Whether adorning temples or gracing gardens, it remains a timeless favorite. 🌸🕊️

Blossoming Beauty: Which awesome ornamental plant is a must-have for my garden?

Discover Which awesome ornamental plant is a must-have for my garden? Roses, lavender, and more. Cultivation tips included.

Introduction: Which awesome ornamental plant is a must-have for my garden?

Let’s delve into the captivating world of awesome ornamental plant, where each bloom adds a touch of magic to your garden. Here are some splendid choices that will elevate your outdoor space:

  1. Roses:
    • Description: Roses are timeless classics, available in an array of colors and fragrances. Hybrid tea roses and shrub roses are popular varieties.
    • Growing Tips: Plant them in full sun with well-drained soil. Hybrid tea roses are excellent for cut flowers, while shrub roses thrive in various garden settings1.
    • Height: Hybrid tea roses can reach heights of 3 to 6 feet, while shrub roses vary from 2 to 5 feet.
    • Color: Roses come in an array of colors, including red, pink, yellow, white, and even multicolored varieties.
    • Fragrance: Their scent ranges from delicate and sweet to rich and spicy.
    • Soil: Well-drained soil with a slightly acidic to neutral pH.
    • Watering: Regular watering, keeping the soil consistently moist but not waterlogged.
  2. Desert Rose:
    • Description: Native to North Africa, the desert rose boasts small pink or white flowers on tall stems.
    • Ideal Conditions: Hot climates with ample sunlight suit this low-maintenance plant. Perfect for walkways, fences, and borders1.
    • Height: Desert roses grow as small shrubs or small trees, reaching 3 to 10 feet in height.
    • Color: Pink or white flowers with a striking contrast against their thick, succulent stems.
    • Fragrance: Minimal fragrance.
    • Soil: Well-drained, sandy soil.
    • Watering: Allow the soil to dry out between waterings.
  3. Lavender:
    • Description: This perennial herb from Europe and Asia features attractive lavender-blue flowers with a delightful fragrance.
    • Growing Tips: Lavender thrives in well-drained soil and full sun. It’s a favorite for its aromatic blooms and soothing properties1.
    • Height: Lavender plants typically reach 1 to 3 feet in height.
    • Color: Lavender-blue flowers atop slender stems.
    • Fragrance: Intensely aromatic, reminiscent of fresh herbs.
    • Soil: Well-drained, alkaline soil.
    • Watering: Water sparingly once established; avoid overwatering.
  4. Aglaonema:
  5. Ornamental Grasses:
    • Description: Grasses like fountain grass, maiden grass, and pampas grass add texture and movement to your garden.
    • Benefits: They require minimal care, provide year-round interest, and sway gracefully in the breeze.
    • Height: Varies by species; fountain grass can reach 2 to 4 feet, while maiden grass can grow up to 6 feet.
    • Color: Green, bronze, or reddish hues.
    • Texture: Feathery plumes add movement and grace.
    • Soil: Well-drained soil.
    • Watering: Moderate water needs; avoid excessive moisture.
  6. Japanese Maple:
    • Description: These elegant trees offer delicate, lacy leaves in shades of red, orange, or green.
    • Growing Tips: Plant them in partial shade and well-drained soil. Their unique foliage adds drama to any landscape.
    • Height: Japanese maples range from 6 to 25 feet, depending on the variety.
    • Color: Leaves in shades of red, orange, or green.
    • Texture: Delicate, lacy foliage.
    • Soil: Moist, well-drained soil.
    • Watering: Regular watering during dry spells.
  7. Bougainvillea:
    • Description: Vibrant bougainvillea vines produce clusters of papery bracts in hues of pink, purple, or orange.
    • Ideal Conditions: Warm climates with plenty of sunlight. They thrive in containers, hanging baskets, or as climbing vines.
    • Height: Climbing vines that can reach 10 to 30 feet.
    • Color: Vibrant bracts in pink, purple, orange, or red.
    • Fragrance: Mild, if any.
    • Soil: Well-drained soil.
    • Watering: Allow the soil to dry between waterings.
  8. Dahlias:
    • Description: Dahlias flaunt intricate, show-stopping blooms in various shapes and colors.
    • Cultivation: Plant tubers in spring, and they’ll reward you with stunning flowers throughout summer and fall.
    • Height: Dahlia plants vary from 1 to 6 feet, depending on the cultivar.
    • Color: A rainbow of options, from pastels to bold hues.
    • Texture: Showy, intricate blooms.
    • Soil: Rich, well-drained soil.
    • Watering: Consistent moisture during the growing season.
  9. Hibiscus:
    • Description: Tropical hibiscus varieties boast large, trumpet-shaped flowers in vibrant shades.
    • Care Tips: Provide warmth, sunlight, and well-drained soil. They’re perfect for adding a tropical flair to your garden.
    • Height: Tropical hibiscus can grow 6 to 15 feet tall.
    • Color: Large, trumpet-shaped flowers in red, yellow, or pink.
    • Fragrance: Mildly sweet.
    • Soil: Well-drained, fertile soil.
    • Watering: Regular watering, especially during hot weather.
  10. Caladiums:
    • Description: These heart-shaped, colorful leaves thrive in shade gardens.
    • Growing Conditions: Plant them in moist, well-drained soil. Caladiums are ideal for borders, containers, or as houseplants.
    • Height: Caladiums reach 1 to 2 feet.
    • Color: Heart-shaped leaves in shades of pink, red, and green.
    • Texture: Bold and eye-catching.
    • Soil: Moist, well-drained soil.
    • Watering: Keep the soil consistently moist.
Credit: Bing

Remember, the best ornamental plant for your garden depends on your climate, soil type, and personal preferences. Choose wisely, and watch your garden transform into a breathtaking oasis! 🌸🌿

Conclusion: Awesome ornamental plant

Incorporate these captivating awesome ornamental plant into your garden to transform it into a blooming paradise. Roses add timeless elegance, while desert roses thrive in hot climates. Lavender’s fragrance soothes the senses, and Aglaonema purifies indoor air. Ornamental grasses sway gracefully, Japanese maples bring drama, and bougainvillea dazzles with vibrant bracts. Dahlias, hibiscus, and caladiums complete the ensemble. Tailor your choices based on your garden’s unique conditions, and watch nature’s magic unfold! 🌸🌿

Credit: Bing

FAQs: Awesome ornamental plant

What is the most beautiful ornamental plant?

Orchids are considered one of the most beautiful ornamental plants due to their intricate shapes and stunning colors. Roses, known as the “Queen of Flowers,” also come in a variety of colors and fragrances, making them a popular choice for gardens and bouquets.

What are the five flowers of ornamental value?

Five flowers with ornamental value commonly cultivated at homes and in gardens include:
Marigold
Jasmine
Lily
Rose
Tulip

What ornamental grasses don’t need to be cut back?

Evergreen grasses such as blue fescue, blue oat grass, and most sedges don’t need pruning. They maintain their foliage throughout the year and don’t require regular cutting.

What plants are good for landscaping?

Several plants are excellent for landscaping:
Boxwood (Buxus spp.)
Liriope (Lily turf)
Hosta
Azalea (Rhododendron spp.)
Rhododendron

What is the most amazing plant?

The world of plants is full of amazing specimens. Some fascinating ones include the Mimosa pudica (sensitive plant), Welwitschia, Rafflesia Arnoldii (corpse flower), and the Socotra dragon tree.

What is the king of the ornamental flowers?

The rose is often referred to as the “King of Flowers.” Its diverse colors, fragrances, and timeless beauty make it a symbol of love and elegance.

What is the most popular ornamental plant?

Orchids and roses are among the most popular ornamental plants due to their beauty and versatility.

Which is the queen of ornamental flowers?

The rose is often called the “Queen of Flowers” because of its widespread popularity, rich symbolism, and various colors.

What are perennial ornamental grasses?

Perennial ornamental grasses are grass-like plants that persist year after year. They enhance landscapes with their varied forms, colors, and textures. Examples include fountain grass, maiden grass, and pampas grass.

What are dwarf ornamental grasses?

Dwarf ornamental grasses are compact varieties of grass-like plants. They are smaller in size, making them suitable for smaller gardens, containers, or edging. Examples include dwarf mondo grass and blue fescue.

Can I Use Scotts Turf Builder Starter Plus Weed Control with Overseeding?

Discover Can I use scotts turf builder starter plus weed control with over seed? is compatible with overseeding. Tips and insights for a thriving lawn.

Introduction: Can I use scotts turf builder starter plus weed control with over seed?

When it comes to nurturing a lush, healthy lawn, timing and product compatibility are crucial. Can I use scotts turf builder starter plus weed control with over seed? is a popular choice for promoting new grass growth while simultaneously preventing weeds. In this blog post, we’ll explore whether you can effectively use this product during overseeding.

Credit: YouTube

Understanding Scotts Turf Builder Starter Plus Weed Control

  • What Is It?
    • Scotts Turf Builder Starter Plus Weed Control is specially designed to be used when planting new grass. It combines essential nutrients to help your new lawn grow strong roots and establish itself faster.
    • This product not only promotes thicker grass but also contains weed control properties.
  • Key Features:
    • Prevents Germination of Weeds: It inhibits the growth of common weeds such as dandelion, crabgrass, clover, chickweed, ground ivy, and yellow nutsedge.
    • Fertilizes New Grass: Provides vital nutrients to support healthy growth.
    • Safe for Various Grass Types: Suitable for Kentucky Bluegrass, Tall Fescue, Perennial Ryegrass, Centipedegrass, Fine Fescues, and more.

Using Scotts Turf Builder Starter Plus Weed Control with Overseeding

  1. Timing Matters:
    • Apply Scotts Turf Builder Starter Plus Weed Control when planting grass seed.
    • Ensure that temperatures consistently range between 60°F and 90°F.
    • Lightly water the lawn after application to activate the product.
  2. Application Guidelines:
    • Use a Scotts spreader for even distribution.
    • For broadcast/rotary spreaders, set the dial to 3 ¼.
    • For drop spreaders, choose a setting of 6.
  3. Grass Types Supported:
    • You can use this product on:
      • Newly seeded lawns
      • Overseeded lawns
      • Newly planted lawns
  4. Avoid Using on Non-Grass Areas:
    • Do not apply this product to flowers, shrubs, trees, fruit, or vegetable plants.

What are some alternatives to Scotts Turf Builder?

If you’re looking for alternatives to Scotts Turf Builder, here are some excellent options to consider:

  1. Espoma Organic Weed Preventer:
  2. GreenView Broadleaf Weed Control Plus Lawn Food:
    • Best Bang for the Buck: GreenView’s product combines weed control with lawn food. It effectively targets broadleaf weeds while nourishing your grass. A cost-effective option for maintaining a lush lawn.
  3. BioAdvanced 5-in-1 Weed & Feed:
    • Upgrade Pick: BioAdvanced’s 5-in-1 formula not only feeds your lawn but also tackles weeds, crabgrass, and other common lawn issues. It’s a comprehensive solution for a healthy yard.
  4. Concern Weed Prevention Plus:
    • Best Natural Option: Concern’s weed prevention product is organic and safe for pets and children. It prevents weed germination without synthetic chemicals.
  5. GreenView Fairway Formula Spring Weed & Feed:
    • Best for Cool Season Grasses: Specifically designed for cool-season grasses, this product provides essential nutrients while controlling weeds.
  6. Scotts Turf Builder Southern Triple Action:
    • Best for Warm Season Grasses: Ideal for warm-season grasses, this triple-action formula feeds, weeds, and prevents fire ants.
  7. Preen One Lawncare:
    • Best for Weed Prevention: Preen’s product prevents weeds from germinating, keeping your lawn weed-free.
  8. Scotts Liquid Turf Builder with Plus 2 Weed Control:
    • Best Liquid Option: Scotts’ liquid formula is easy to apply and effectively controls weeds while providing essential nutrients to your grass.

Remember to choose an alternative based on your specific lawn type, climate, and personal preferences. Happy gardening! 🌿🌱

Credit: Google

Conclusion:

Scotts Turf Builder Starter Plus Weed Control is a valuable tool for establishing a robust lawn. Let’s recap the key points:

  1. Purpose and Features:
    • Designed for use when planting new grass.
    • Combines essential nutrients to help new lawns grow strong roots.
    • Contains weed control properties to prevent common weeds.
  2. Application Guidelines:
    • Apply when planting grass seed.
    • Suitable for newly seeded, overseeded, or newly planted lawns.
    • Use a Scotts spreader for even distribution.
    • Water the lawn lightly after application.
  3. Safety and Compatibility:
    • Safe for people and pets once watered in and dried.
    • Compatible with various grass types.
  4. Overseeding and Weed Control:
    • Weed control should precede overseeding.
    • Wait until the new grass has been mowed at least four times before applying broadleaf weed killer.
    • Avoid pre-emergent herbicides on newly seeded lawns for 3-4 months.

Remember that a well-timed application can lead to a healthier, weed-free lawn. Happy gardening! 🌿🌼

FAQs:

Scotts Turf Builder Starter Plus Weed PreventerScotts Turf Builder Triple Action Built for Seeding, and starter fertilizers with weed control:

Scotts Turf Builder Starter Plus Weed Preventer FAQs

1. What Is Scotts Turf Builder Starter Plus Weed Preventer?
  • Scotts Turf Builder Starter Plus Weed Preventer is a lawn care product designed for use when planting new grass.
  • It combines essential nutrients to help new lawns grow strong roots and establish themselves faster.
  • Additionally, it contains weed control properties to prevent common weeds.
2. How Does Scotts Turf Builder Starter Plus Weed Preventer Work?
  • Weed Prevention: It inhibits the germination of weeds such as dandelion, crabgrass, clover, chickweed, ground ivy, and yellow nutsedge.
  • Fertilization: Provides vital nutrients to support healthy grass growth during the critical establishment phase.
3. When Should I Apply Scotts Turf Builder Starter Plus Weed Preventer?
  • Apply when planting new grass, whether starting a new lawn, reseeding an existing one, or installing sod, sprigs, or grass plugs.
  • Use on newly seeded, overseeded, or newly planted lawns.
4. How Do I Apply It?
  • Use a Scotts spreader for even distribution.
  • For broadcast/rotary spreaders, set the dial to 3 ¼.
  • For drop spreaders, choose a setting of 6.
  • Lightly water the lawn after application to activate the product.
5. Can I Use It with Other Grass Types?
  • Yes, it is safe for use on various grass types, including Kentucky Bluegrass, Tall Fescue, Perennial Ryegrass, Centipedegrass, and Fine Fescues.
6. How Much Area Does One Bag Cover?
  • One 4.3 lb. bag of Scotts Turf Builder Starter Plus Weed Preventer covers 1,000 sq. ft. for warm-season lawns and 4,000 sq. ft. for cool-season lawns.
7. Is It Safe for People and Pets?
  • People and pets can re-enter the treated area after it has been watered in and dried.

Scotts Turf Builder Triple Action Built for Seeding FAQs

1. What Is Scotts Turf Builder Triple Action Built for Seeding?
  • It’s a product designed for use when planting new grass.
  • Prevents dandelion and crabgrass for up to 6 weeks without harming new grass.
  • Jumpstarts grass development and feeds to protect against heat and drought.
2. Which Weeds Does It Prevent?
  • Dandelion, crabgrass, clover, chickweed, ground ivy, henbit, and nutsedge.
3. Which Grass Types Can I Use It On?
  • Newly seeded, overseeded, or newly planted Kentucky Bluegrass, Tall Fescue, Perennial Ryegrass, Centipedegrass, and Fine Fescues.
4. How Do I Apply It?
  • Use a Scotts spreader.
  • For broadcast/rotary spreaders, set to 4 ½.
  • For drop spreaders, use a setting of 7.
  • Apply to a dry lawn when temperatures are consistently between 60°F and 90°F.
5. Does It Include Seed?
  • No, it does not include seed and will not kill existing weeds.

Starter Fertilizer with Weed Control FAQs

1. What Are Some Good Starter Fertilizers with Weed Control?
  • Scotts Turf Builder Triple Action Built for Seeding: Prevents weeds, jumpstarts grass development, and feeds.
  • Scotts Starter Fertilizer with Mesotrione: Contains a built-in crabgrass pre-emergent.
  • The Andersons 18-24-12: Balanced N-P-K ratio with slow-release nitrogen.
  • Sunday Lawn Starter Liquid Fertilizer: Organic option.
  • Ferti-Lome New Lawn Starter Fertilizer: Includes micro-nutrients.

Remember to follow application instructions and choose the right product based on your lawn type and specific needs. Happy gardening! 🌿🌱

Can you apply weed control after overseeding?

Yes, you can apply weed control after overseeding, but timing is crucial. Wait until the new grass has been mowed at least four times before applying a broadleaf weed killer (such as 2,4-D). Avoid using a pre-emergent herbicide on a newly seeded lawn for at least 3-4 months. For overseeding, consider using a weed and feed fertilizer 7-14 days before overseeding the lawn. Always follow label instructions

Should I use starter fertilizer when overseeding?

Absolutely! Applying starter fertilizer immediately after overseeding is essential. Starter fertilizer provides the nutrients (nitrogen, phosphorus, and potassium) needed for new grass to establish strong roots. Wait until the new grass has been established for at least two weeks before applying starter fertilizer. Water thoroughly after application.

Can I mix Scotts Turf Builder with grass seed?

Yes, you can mix Scotts Turf Builder Grass Seed with grass seed. For example, the Scotts Turf Builder Grass Seed Sun & Shade Mix is designed for full sun and dense shade. It combines grass seed, fertilizer, and soil improver. Apply it in the spring or fall for new lawns or overseeding existing lawns.

Can you use Scotts Weed and Feed and seed at the same time?

Yes, you can use Scotts Turf Builder Weed and Feed and seed at the same time. However, ensure that the product does not contain a pre-emergent herbicide, as it could interfere with grass seed germination. Always follow label instructions and apply as directed.

Should you overseed or weed control first?

It’s best to weed control first before overseeding. Weeds compete with grass for resources, so eliminating them ensures better results. Use a non-toxic herbicide to get rid of weeds, then proceed with overseeding. Fertilization should follow weed control for a healthier lawn.

What weed killer should I use before overseeding?

Use a non-toxic, selective herbicide to kill weeds before overseeding. Ensure it won’t damage your grass. Apply the herbicide only to affected areas. Afterward, proceed with overseeding for a thicker lawn.

Can you put starter fertilizer on top of grass seed?

Yes, you can put starter fertilizer on top of grass seed. Apply it immediately after overseeding to provide essential nutrients for strong root development. Water thoroughly after application.

Will starter fertilizer burn grass seed?

Properly applied starter fertilizer will not burn grass seed. Follow recommended rates and guidelines. Water thoroughly to help dissolve the fertilizer and reach the grass roots without causing harm.

Remember to follow specific product instructions and tailor your approach based on your lawn’s needs. Happy gardening! 🌿🌱