Discover how to create stunning metallic epoxy floors on a budget. Step-by-step guide for beginners to mimic marble or granite finishes.
Metallic Epoxy Floors: The Secret to Affordable Luxury Under Your Feet
Introduction
Tired of dull, outdated floors but worried about the cost of high-end materials like marble or granite? Enter metallic epoxy floors—the DIY-friendly solution that delivers jaw-dropping, luxurious finishes without breaking the bank. Whether you’re revamping your garage, basement, or living room, this step-by-step guide will show you how even beginners can create showstopping floors that look like they cost a fortune. Ready to transform your space? Let’s dive in!

Why Choose Metallic Epoxy Floors?
The Budget-Friendly Luxury Secret
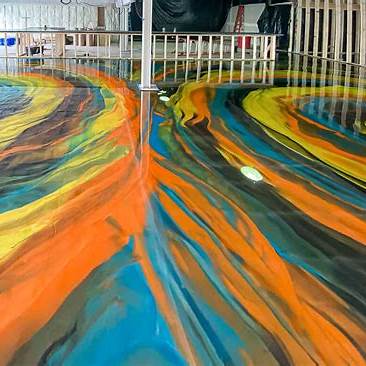
Metallic epoxy floors combine durability with artistic flair. Unlike traditional stone or tile, epoxy is:
- Affordable: Costs 60–70% less than natural stone.
- Customizable: Create marble veins, granite speckles, or cosmic designs.
- Durable: Resists stains, scratches, and moisture.
Perfect for Beginners
You don’t need professional skills! With the right tools and patience, you’ll achieve a flawless finish.
Tools & Materials You’ll Need
Gather these essentials:
- Epoxy resin kit (base coat, metallic pigments, topcoat)
- Concrete cleaner/etching solution
- Squeegee, roller, and mixing tools
- Heat gun or torch (for creating swirls)
- Safety gear (gloves, goggles, respirator)
Pro Tip: Buy 10–20% extra epoxy to account for mistakes.
Step-by-Step Tutorial: Mimicking Marble & Granite
Step 1: Prep Your Surface
Keyword: How to prepare floors for metallic epoxy
- Clean thoroughly: Remove grease, dust, and debris.
- Etch the concrete: Use a grinder or etching solution for better adhesion.
- Repair cracks: Fill gaps with epoxy filler.
Why It Matters: Skipping prep leads to peeling or bubbles.
Step 2: Apply the Base Coat
- Mix epoxy resin and hardener as directed.
- Pour onto the floor and spread with a squeegee.
- Let cure for 12–24 hours.

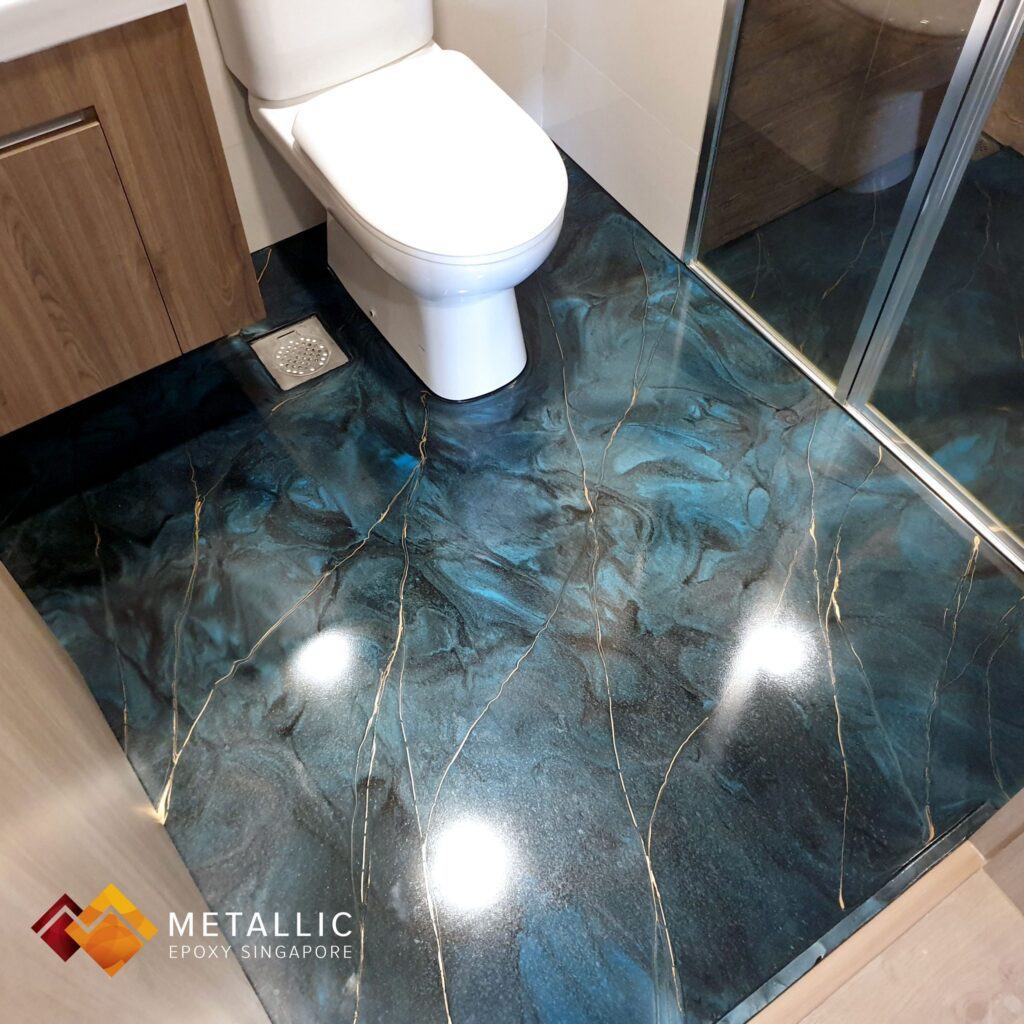
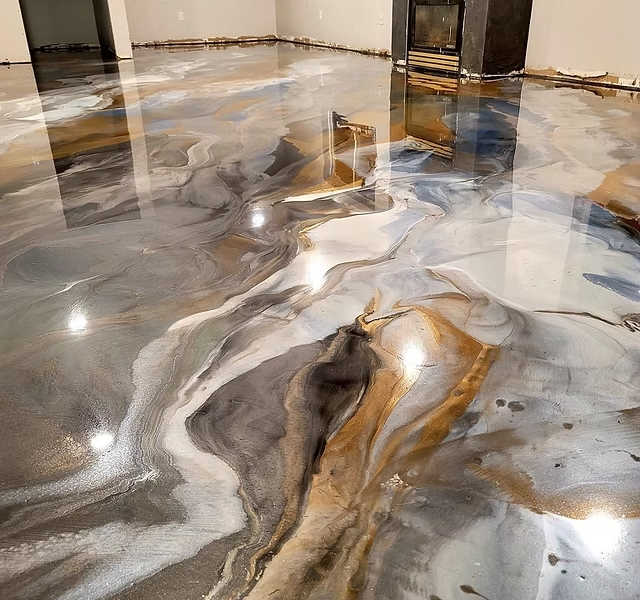
Step 3: Create the Metallic Effect
Keyword: Achieving metallic swirls on epoxy floors
- Mix metallic pigments into a clear epoxy layer.
- Pour small sections and use a heat gun to create swirls (marble effect) or speckles (granite).
- Work quickly—epoxy sets fast!

Step 4: Seal with a Topcoat
- Apply a UV-resistant topcoat to protect against yellowing.
- Let cure for 48 hours before walking.
Pro Tips for Beginners
- Practice First: Test techniques on a spare board.
- Work in Teams: Epoxy dries fast—divide tasks.
- Avoid Overworking: Less blending = more natural veins.
Maintenance & Longevity
- Clean with pH-neutral soap.
- Reapply topcoat every 3–5 years.
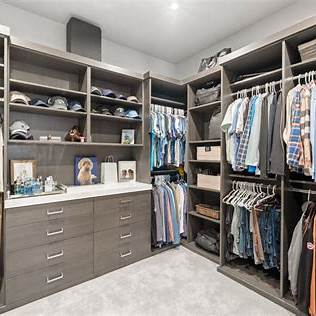
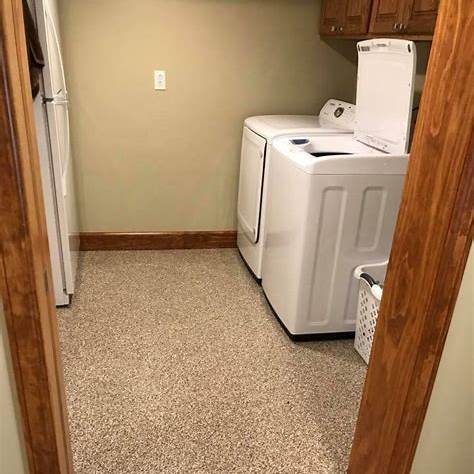
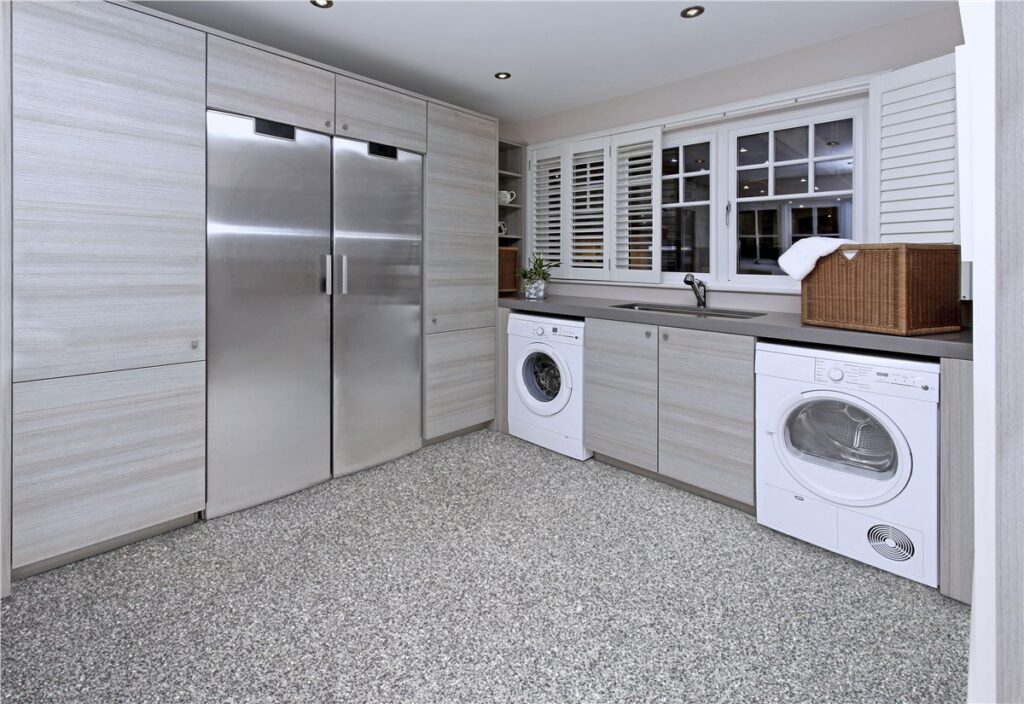
Epoxy flooring is a versatile and durable option for various spaces, including small areas like bathrooms, laundry rooms, and closets. Its seamless application creates a smooth, continuous surface that can make compact rooms appear larger. Additionally, epoxy’s durability and resistance to moisture make it a practical choice for spaces like bathrooms and laundry rooms.
FAQs: Metallic epoxy floors
Yes, epoxy flooring is ideal for small areas. Its seamless application creates a smooth, continuous surface that can make compact rooms appear larger. Additionally, epoxy’s durability and resistance to moisture make it a practical choice for spaces like bathrooms and laundry rooms.
Epoxy flooring offers several advantages:
Durability: It withstands heavy foot traffic and resists scratches and abrasions.
Moisture Resistance: Ideal for areas prone to spills or humidity, such as bathrooms and laundry rooms.
Aesthetic Appeal: Available in various colors and finishes, epoxy can enhance the look of any small space.
Easy Maintenance: Its smooth surface makes cleaning simple, requiring only regular sweeping and occasional mopping.
In residential environments, epoxy floors can last between 5 to 20 years, depending on factors like foot traffic and maintenance. Proper installation and regular care can significantly extend the lifespan of your epoxy flooring.
While DIY installation is possible, achieving a flawless finish requires careful surface preparation and application. For small areas, hiring a professional ensures proper installation and longevity of the flooring.
Absolutely. Opting for light colors can make a room feel more spacious, and incorporating subtle patterns or a glossy finish can add depth and reflect light, enhancing the overall appearance of the space.
Epoxy floors can be slippery when wet due to their glossy finish. To mitigate this, consider adding non-slip additives or choosing a textured finish, especially in areas prone to moisture like bathrooms.
Maintenance is straightforward:
Regular Cleaning: Sweep or vacuum to remove debris.
Mopping: Use a damp mop with mild detergent as needed.
Avoid Harsh Chemicals: Steer clear of abrasive cleaners that can damage the surface.
By following these simple steps, your epoxy flooring will remain in excellent condition for years.
Conclusion: Metallic epoxy floors
Epoxy flooring is a practical and stylish solution for small spaces, offering both aesthetic and functional benefits. Whether you’re renovating a bathroom, laundry room, or closet, epoxy can enhance the space’s appearance and durability.
For a visual demonstration of epoxy application techniques, you might find this video helpful: