Choosing the Perfect Home Decor Flower Pots: A Comprehensive Guide

Discover the secrets to selecting the ideal home decor flower pots that complement your home. Learn about the different types, sizes, and materials, and find out how to style them for maximum impact.

Introduction: Home Decor Flower Pots

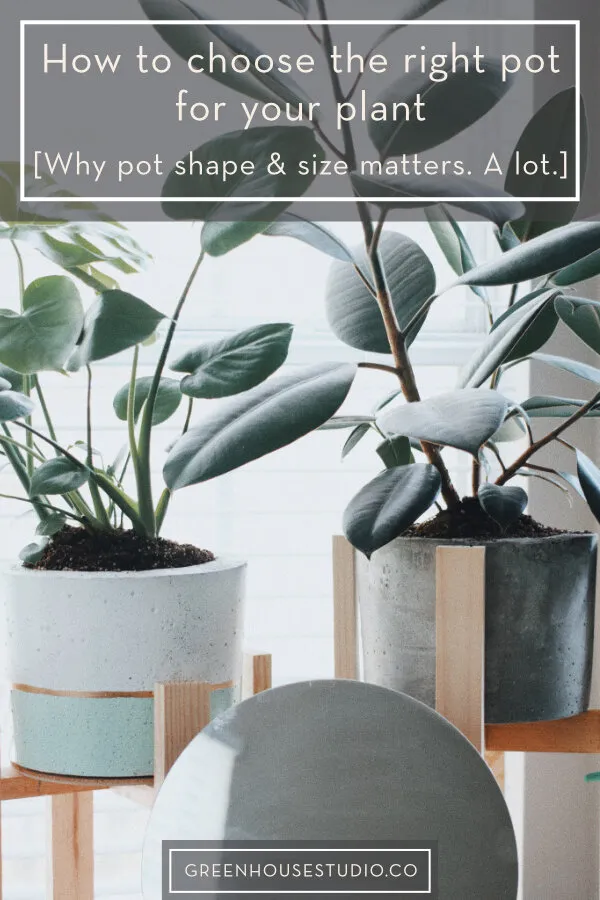
Welcome to our comprehensive guide on how to choose home decor flower pots for your home. Whether you’re a seasoned gardener or a beginner, selecting the right flower pots can be a daunting task. With so many options available, it’s easy to get overwhelmed. But don’t worry, we’ve got you covered. In this article, we’ll take you through everything you need to know to make an informed decision.

Credit: YouTube

Types of Flower Pots

When it comes to flower pots, there are several types to choose from, including:

  • Ceramic pots
  • Plastic pots
  • Terracotta pots
  • Concrete pots
  • Metal pots

Ceramic Pots

Ceramic pots are a popular choice for indoor and outdoor decor. They come in a variety of shapes, sizes, and colors, making them a versatile option. Ceramic pots are also durable and can withstand extreme temperatures.

Plastic Pots

Plastic pots are a lightweight and affordable option. They are perfect for indoor use and can be used for both flowers and plants. Plastic pots are also easy to clean and maintain.

Terracotta Pots

Terracotta pots are a classic choice for outdoor decor. They are made from natural clay and are porous, allowing for good air circulation and water drainage. Terracotta pots are also a great option for succulents and cacti.
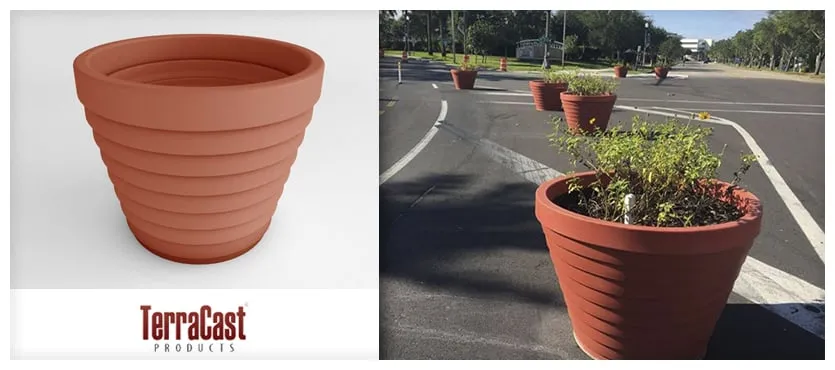
Concrete Pots

Concrete pots are a modern and stylish option for indoor and outdoor decor. They are heavy and durable, making them a great choice for larger plants. Concrete pots are also weather-resistant and can withstand extreme temperatures.

Metal Pots

Metal pots are a unique and contemporary option for indoor and outdoor decor. They come in a variety of finishes, including copper, brass, and stainless steel. Metal pots are also a great option for adding a pop of color to your decor.

Choosing the Right Size

When it comes to choosing the right size flower pot, it’s important to consider the size of the plant and the pot’s drainage capabilities. A pot that is too small can restrict the plant’s growth, while a pot that is too large can lead to overwatering.

Indoor Plants

For indoor plants, it’s best to choose a pot that is 1-2 inches larger than the current pot. This will allow for proper root growth and water drainage.

Outdoor Plants

For outdoor plants, it’s best to choose a pot that is 2-4 inches larger than the current pot. This will allow for proper root growth and water drainage.

Choosing the Right Material

When it comes to choosing the right material for your flower pot, it’s important to consider the plant’s needs and the location of the pot.

Porous Materials

Porous materials, such as terracotta and unglazed ceramic, are great for plants that require good air circulation and water drainage.

Non-Porous Materials

Non-porous materials, such as plastic and glazed ceramic, are great for plants that require less watering and moisture retention.

Styling Flower Pots

When it comes to styling flower pots, it’s important to consider the overall decor of your home. Here are some tips for styling your flower pots:

  • Group pots of different sizes and shapes together for a dynamic look
  • Use a variety of materials, such as ceramic, plastic, and metal, to add texture and interest
  • Add decorative elements, such as ribbons, stickers, and paint, to personalize your pots
  • Use a variety of colors to complement your home’s decor

What are the different types of home decor flower pots?

Credit: Google

The different types of home decor flower pots include clay pots, plastic pots, wooden pots, ceramic pots, composite pots, metal pots, concrete pots, vertical pots and cabinets, hanging pots, railing planters, decorative pots and urn planters, and coir pots. 

Clay pots are made of natural material that allows roots to breathe and have good moisture-wicking properties, but they are heavy and can break if carried or dropped. 

Plastic pots are lightweight and inexpensive, but they can overheat in the sun and affect plants negatively. 

Wooden pots give a natural and traditional look and can last for many years if properly cared for. 

Ceramic pots are available in various designs and colors, but they are fragile and require care when handling. Composite pots are made from a mixture of materials for strength and lightweight, with excellent weather resistance and available in various styles. 

Metal pots add a modern or industrial look, but the metal can heat up in the sun and oxidize over time. 

Concrete pots are durable and weather-resistant, with a natural, earthy appearance and can support heavy plants. Vertical pots and cabinets are specifically designed for creating vertical gardens and are ideal for small spaces such as balconies or small yards. 

Hanging pots do not need much space and are ideal for growing beautiful flowers in small spaces, but they need regular watering due to low water retention capacities. Railing planters provide an easy and effective way to grow plants without much space and are ideal for growing different flowers like roses, marigold, and lilies. 

Decorative pots and urn planters are eye-catching and provide an enhanced look to the garden, and large-sized urn planters may be difficult to move but can retain more water for a long time and provide great support to the plants. 

Plastic pots are lightweight and available in colorful options, while metal pots give an elegant and unique look but may get very hot when placed under the sun2. Coir pots are made from coconut fibre and are an excellent option if looking for biodegradable planters, offering a great medium for the growth of plants with high porosity and efficient drainage.

How to choose the right size of flower pot for your home decor?

Credit: Google

To choose the right size of flower pot for your home decor, consider the following factors:

  1. Plant size: The diameter of the pot should be at least 2 inches wider than the plant’s diameter to allow for root development and prevent overcrowding.
  2. Root system: Consider the depth and width of the plant’s root system when selecting a pot. Shallow-rooted plants require shorter and wider pots, while deep-rooted plants need taller and narrower pots.
  3. Drainage: Ensure the pot has proper drainage holes to prevent waterlogging and root rot. A pot without drainage holes can lead to overwatering and harm the plant’s health.
  4. Material: Different materials have different properties, such as terra cotta being porous and allowing for better airflow, while plastic pots are lightweight and inexpensive.
  5. Aesthetics: Choose a pot that complements your home decor and the plant’s appearance. Consider the color, texture, and style of the pot.

When repotting a plant, choose a pot that is 2-4 inches larger in diameter than the current pot to provide enough space for the roots to grow. However, avoid overpotting, as larger pots can retain too much moisture and lead to root rot4.In summary, choosing the right size of flower pot for your home decor involves considering the plant’s size, root system, drainage needs, material preferences, and aesthetic appeal. By taking these factors into account, you can ensure your plants thrive and add beauty to your home.

What are the best materials for home decor flower pots?

Credit: Google

The best materials for home decor flower pots include:

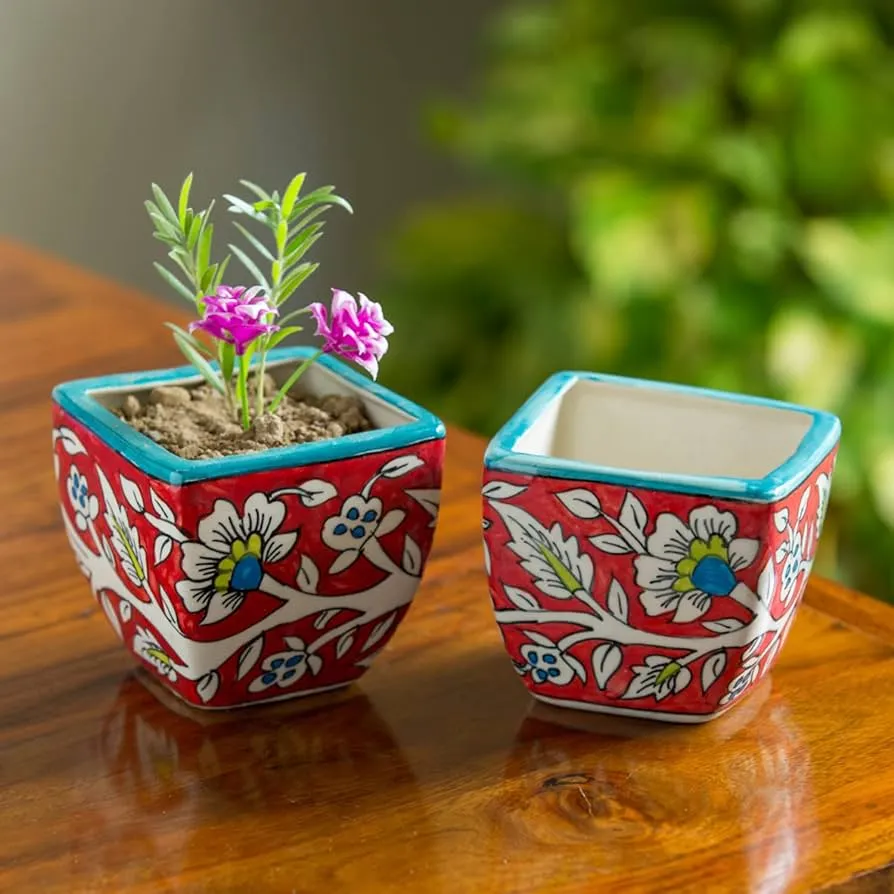
  1. Ceramic: Ceramic pots are popular for their diverse range of styles, patterns, and designs. They are attractive, come in a variety of colors, and are excellent for retaining moisture, making them ideal for moisture-loving plants like ferns.
  2. Terracotta: Terracotta pots are well-known for their porous nature, allowing air and moisture to move in and out, which is crucial for plant health. They are heavier than wood or plastic planters, making them less likely to tip over if your plant is top-heavy.
  3. Metal: Metal planters, such as iron, stainless steel, and aluminum, are great for creating a modern or industrial look in your home or garden. They are strong, durable, and can add a unique aesthetic to your decor.
  4. Plastic: Plastic flower pots are lightweight, long-lasting, and resist breaking. They come in a variety of styles and can be manufactured to resemble other materials like wood or stone. Plastic pots are affordable and easy to maintain, making them a practical choice for home decor.
  5. Wood: Wood planters acquire character with age and add rustic style to your plantings. They offer good drainage and natural wood retains moisture, making them a suitable option for various plants.

Each material has its own set of advantages and considerations, so choosing the best material for your home decor flower pots depends on factors such as plant needs, aesthetics, durability, and maintenance preferences.

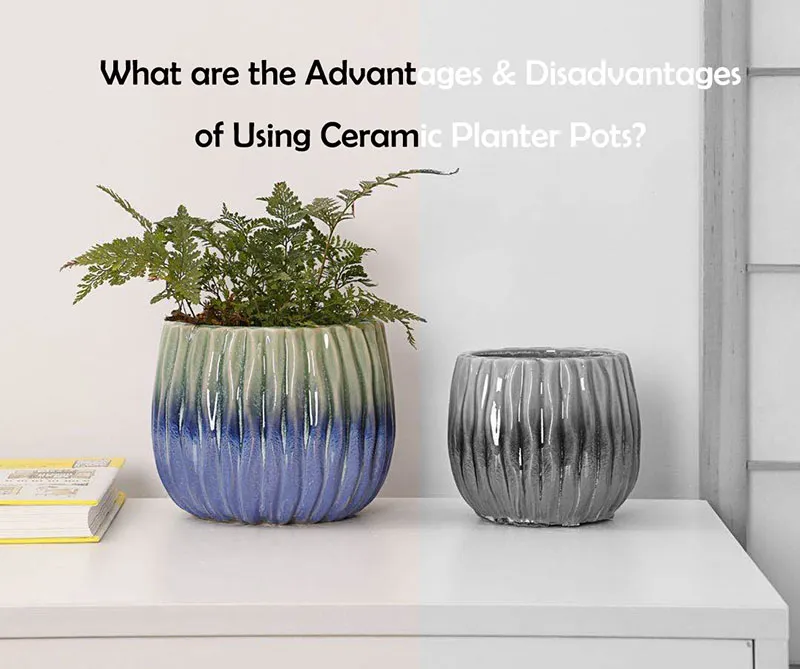
What are the pros and cons of using ceramic pots for home decor?

Credit: Google

Pros and Cons of Using Ceramic Pots for Home Decor

Ceramic pots are a popular choice for home decor due to their aesthetic appeal and functionality. Here are the pros and cons of using ceramic pots for home decor based on the provided sources:

Pros:

  1. Aesthetic Appeal: Ceramic pots are beautiful and elegant, adding a touch of sophistication to any space.
  2. Porous Material: Ceramic pots are porous, allowing for good airflow and water absorption, which benefits plant health.
  3. Root Revitalization: The porous nature of ceramic pots stimulates root growth by allowing airflow into the soil.
  4. Moisture Mitigation: Ceramic pots are excellent at absorbing excess moisture, reducing the risk of overly wet soil and root rot.

Cons:

  1. Drainage Drawbacks: Some ceramic pots may have fewer drainage holes, leading to water flow issues and over-absorption.
  2. Special Care Required: Ceramic pots require careful handling to prevent chips, discoloration, and damage to the nonstick coating.
  3. Maintenance: Ceramic pots may require more frequent watering compared to other materials, posing a challenge for plants that need consistent moisture levels.
  4. Durability: Ceramic pots are not as durable as other materials, and the coating can wear out over time, affecting their nonstick properties.

In conclusion, while ceramic pots offer aesthetic appeal and benefits for plant health, they require special care, maintenance, and attention to ensure longevity and optimal performance in home decor settings.

What are the benefits of using ceramic pots for home decor?

Credit: Google

Ceramic pots offer several benefits for home decor. Firstly, they are available in a wide variety of shapes, sizes, and designs, making it easy to find a pot that matches your personal style and complements your home decor. Ceramic pots are also durable and can support top-heavy plants due to their heavier weight and more substantial build compared to plastic containers.

In terms of functionality, ceramic pots are porous, which allows for good airflow and water absorption, benefiting plant health. This porous nature also facilitates essential plant nutrients, allowing them to course through the plant and its roots, providing a healthy environment for the plant to grow. Ceramic pots are also excellent at absorbing excess moisture, reducing the risk of overly wet soil and root rot.

Moreover, ceramic pots are eco-friendly and can help shield plants from drastic and sudden temperature shifts, protecting them from excess heat absorption during hot days and helping to retain moisture in the soil on intensely hot days. Ceramic pots can be used both indoors and outdoors, making them a versatile option for any space.

In summary, ceramic pots offer several benefits for home decor, including a wide variety of design options, durability, porousness for better airflow and water absorption, eco-friendliness, and versatility for indoor and outdoor use.

How to care for hanging pots in your home decor?

Credit: Google

To care for hanging pots in your home decor, consider the following tips:

  1. Choose the right plants: Select plants that are suitable for indoor hanging and can thrive in a hanging environment. Some popular options include Boston ferns, English ivy, spider plants, string of hearts, and string of pearls.
  2. Select the right pot and hanger: Choose a pot with drainage holes to allow excess water to escape and prevent root rot. Consider using a pot within a pot or an attached tray to protect floors and furniture from dripping water. For the hanger, ensure it can support the weight of the pot and plant, and is securely attached to a wall stud or ceiling joist.
  3. Use appropriate soil: Use a lightweight potting mix that promotes air circulation and proper drainage, which is essential for keeping your plant lightweight. A mixture of soil, peat moss, and perlite works well.
  4. Water properly: Water regularly, keeping in mind that potted plants tend to dry out more quickly than plants in the ground. However, avoid overwatering. When watering indoor hanging plants, be mindful of dripping on the floor or furniture. Take the whole plant outside for watering or use a tray or saucer to catch excess water.
  5. Fertilize as needed: Fertilize your hanging plants according to their specific needs, following the plant species’ feeding recommendations.
  6. Maintain temperature requirements: Bring perennials inside to overwinter as soon as cold temperatures are in the forecast. Also, bring hanging baskets inside or put them in a safe spot on the ground if there’s a threat of severe weather knocking them down.
  7. Regularly check the soil: Check the soil to see how dry it is before adding more water. Also, note that air tends to get warmer and drier as it rises toward the ceiling, so your hanging baskets might need a little more water than plants closer to the floor.
  8. Deadhead and trim: Deadhead (remove spent blooms) flowering plants to encourage further blooming. Trim back leggy foliage to promote a neater, bushier appearance and fresh, healthy growth.

By following these tips, you can ensure your hanging pots thrive in your home decor, adding an interesting design element by drawing the eye up and showcasing the beauty of your plants.

What are the disadvantages of using ceramic pots for home decor?

Credit: Google

The disadvantages of using ceramic pots for home decor include:

  1. Drainage Drawbacks: Most ceramic pots tend to have fewer drainage holes, which can lead to problems with water flow and over-absorption, potentially causing issues for plant health.
  2. Maintenance: Ceramic pots require more care and attention compared to other materials, as they can be prone to chipping, cracking, and damage if not handled gently.
  3. Watering Frequency: Ceramic pots may require more frequent watering compared to other materials, as they can absorb moisture from the soil, leading to the need for more regular watering to maintain plant health.
  4. Air and Water Flow Restrictions: Glazed ceramic pots can restrict air and water flow, potentially affecting plant health and growth if not selected carefully.

These factors should be considered when choosing ceramic pots for home decor to ensure optimal plant care and longevity of the pots themselves.

What are some alternatives to ceramic pots for home decor?

Credit: Google

Some alternatives to ceramic pots for home decor include:

  1. Plastic Pots: These are lightweight, inexpensive, and come in a variety of colors and styles. They are also easy to clean and maintain, making them a popular choice for indoor and outdoor use.
  2. Terracotta Pots: These are made from natural clay and are porous, allowing for good airflow and water absorption. They are also eco-friendly and can help shield plants from drastic and sudden temperature shifts, protecting them from excess heat absorption during hot days and helping to retain moisture in the soil on intensely hot days.
  3. Wooden Pots: These give a natural and traditional look and can last for many years if properly cared for. They are also biodegradable and can be used as a sustainable option for planting.
  4. Metal Pots: These add a modern or industrial look and are available in various finishes, including copper, brass, and stainless steel. They are also durable and can withstand extreme temperatures.
  5. Concrete Pots: These are durable and weather-resistant, with a natural, earthy appearance and can support heavy plants.
  6. Vertical Pots and Cabinets: These are specifically designed for creating vertical gardens and are ideal for small spaces such as balconies or small yards.
  7. Hanging Pots: These do not need much space and are ideal for growing beautiful flowers in small spaces, but they need regular watering due to low water retention capacities.
  8. Railing Planters: These provide an easy and effective way to grow plants without much space and are ideal for growing different flowers like roses, marigold, and lilies.
  9. Decorative Pots and Urn Planters: These are eye-catching and provide an enhanced look to the garden, and large-sized urn planters may be difficult to move but can retain more water for a long time and provide great support to the plants.
  10. Coir Pots: These are made from coconut fibre and are an excellent option if looking for biodegradable planters, offering a great medium for the growth of plants with high porosity and efficient drainage.

These alternatives offer various benefits and drawbacks, and it is essential to consider factors such as plant health, maintenance, and aesthetics when selecting the right pot for home decor.

What are some creative ways to use flower pots in home decor?

Credit: Google

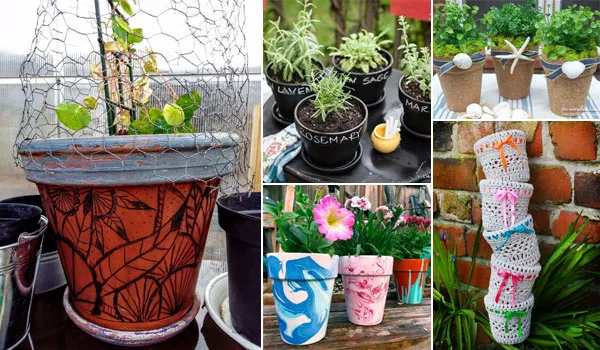
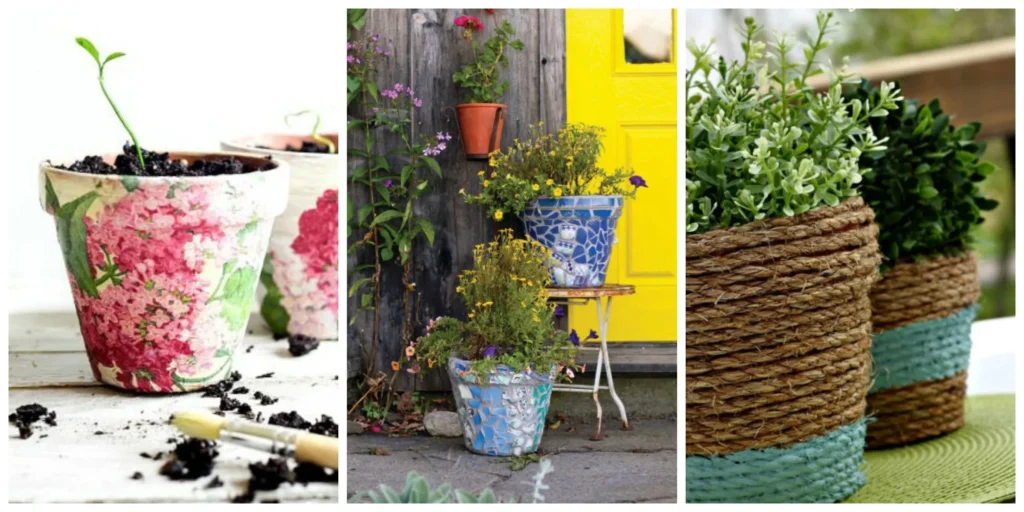
Flower pots can be used for a variety of creative purposes beyond just gardening. Here are some ideas:

  1. Bird Feeder: Use a flower pot, two clay saucers, and a plastic bottle to create a DIY bird feeder that adds charm to your outdoor space.
  2. Party-Themed Flower Pots Condiment Station: Paint flower pots according to your party or holiday theme to create a utensil and condiment station for your next gathering.
  3. Plunger Holder: Use a pretty flower pot as a plunger holder to add a touch of whimsy to your bathroom.
  4. Outdoor Cooker: Turn a clay pot into an outdoor cooker for smoked meat, fish, or s’mores.
  5. Gumball Machine: Create a gumball machine-inspired candy holder using a terra-cotta pot and saucer for a fun gift or decoration.
  6. Flowerpot PinCushion: Make a flowerpot pin cushion for a functional and decorative addition to your sewing area.
  7. Rain Catcher: Flower pots can be used to catch rainwater for watering plants or other purposes.
  8. Indoor Storage: Use clay pots as storage containers inside your home for toys, fireplace kindling, bathroom or kitchen essentials, or kitchen utensils.
  9. Utensil Storage: Dress up some flower pots as utensil holders for your next outdoor party.
  10. Bird Bath: Stack several painted pots together to form a bird bath.
  11. Address Number Display: Paint your house number on clay pots to display your address.
  12. Candle Holder: Turn a clay pot upside down, top it with a clay saucer, and set a pillar candle on top for a rustic candle holder.
  13. DIY Centerpiece: Create a French-inspired pot for your indoor plants or use decorated pots for storage throughout your home.
  14. Yard Art: Make yard art out of flower pots, such as frogs, butterflies, minions, and ladybugs, to hold napkins, utensils, and other picnic/outdoor eating items.
  15. Rock Garden: Use flower pots to create a rock garden for a low-maintenance decoration.
  16. Organizer: Clean up and use flower pots for organizing areas of your home, such as storing extra towels and washcloths, office supplies, kitchen utensils, or toys.
  17. Wreath: Make a wreath using flower pots for a unique decoration.

These are just a few ideas to get you started. Flower pots offer endless possibilities for creative use in home decor.

How to clean flower pots for home decor?

Credit: YouTube

To clean flower pots for home decor, follow these steps:

  1. Remove old soil and debris: Before cleaning, remove any old soil and debris from the pot. This can be done by gently scraping it out with a plastic scraper or brush.
  2. Wash with soapy water: For a quick cleaning of the outside of clay pots, use warm soapy water and a sponge or brush to remove dirt and prevent mineral buildup.
  3. Scrub inside the pot: For a deeper clean, scrub the inside of the pot with a brush, using a solution of one part bleach to nine parts water. This will help remove any residual bacteria or fungi.
  4. Rinse thoroughly: After cleaning, rinse the pot thoroughly with water to remove any remaining soap or bleach solution.
  5. Dry completely: Allow the pot to dry completely before using it again, as moisture can lead to mold and mildew growth.

For specific materials, consider the following:

  • Terra cotta pots: To clean terra cotta pots, use a solution of one part bleach to nine parts water to scrub the inside of the pot, then rinse and dry thoroughly.
  • Ceramic pots: For ceramic pots, use warm soapy water and a sponge or brush to clean the outside and inside of the pot. Rinse and dry completely before use.
  • Plastic pots: For plastic pots, use warm soapy water and a sponge or brush to clean the pot. Rinse and dry completely before use.

Remember to always check the care instructions for your specific pot material before cleaning.

Conclusion:

Choosing the right home decor flower pots for your US home doesn’t have to be a daunting task. By considering the type, size, and material of the pot, you can make an informed decision that will complement your home’s decor and provide the perfect environment for your plants. Don’t be afraid to get creative and add your own personal touch to your pots. Happy decorating!

FAQs:

Q: What is the best material for flower pots?

A: The best material for flower pots depends on the plant’s needs and the location of the pot. Porous materials, such as terracotta and unglazed ceramic, are great for plants that require good air circulation and water drainage. Non-porous materials, such as plastic and glazed ceramic, are great for plants that require less watering and moisture retention.

Q: How do I choose the right size flower pot?

A: When choosing the right size flower pot, it’s important to consider the size of the plant and the pot’s drainage capabilities. A pot that is too small can restrict the plant’s growth, while a pot that is too large can lead to overwatering. For indoor plants, it’s best to choose a pot that is 1-2 inches larger than the current pot. For outdoor plants, it’s best to choose a pot that is 2-4 inches larger than the current pot.

Q: How do I style flower pots?

A: When styling flower pots, it’s important to consider the overall decor of your home. Group pots of different sizes and shapes together for a dynamic look. Use a variety of materials, such as ceramic, plastic, and metal, to add texture and interest. Add decorative elements, such as ribbons, stickers, and paint, to personalize your pots. Use a variety of colors to complement your home’s decor.

Creative Party Decor: How to Make Stunning Flower and Fruit Decorations for Free!

Creative party decor discover budget-friendly ways to using fresh flowers and fruits without spending a dime. Get inspired now!

Introduction: Creative Party Decor

Are you looking to add a touch of natural beauty to your next party without breaking the bank? Fresh flowers and fruits can be the perfect solution! In this blog post, we’ll explore creative and cost-effective ways to create stunning party decorations using these natural elements. Let’s dive in!

Tips for Creating Party Decorations with Fresh Flowers and Fruits

Utilize What You Have

Look around your home and garden for flowers and fruits that can be repurposed for decorations. Use a mix of colors and textures to create a visually appealing display.

DIY Flower and Fruit Centerpieces

Create eye-catching centerpieces by arranging flowers and fruits in vases or bowls. Mix and match different varieties for a unique and vibrant look.

What are some diy party decoration ideas using fresh flowers and fruits?

Credit; YouTube

DIY creative party decor Ideas Using Fresh Flowers and Fruits If you’re looking for creative and budget-friendly ways to decorate for your next party, consider using fresh flowers and fruits. Not only do they add a natural and elegant touch, but they can also be a cost-effective alternative to traditional party decorations. Here are some DIY party decoration ideas using fresh flowers and fruits:

  1. Fruit and Floral Arrangement: Create a stunning centerpiece by arranging a mix of fresh fruits and flowers in a vase or bowl. This can be a simple and affordable way to add a pop of color and texture to your table. For a tutorial on how to create a DIY fruit and floral arrangement, check out Refresh Restyle.
  2. Citrus Fruits and Flowers: Mix in grapefruit or other citrus fruits with your flower arrangements to add a fresh and fragrant touch. This is especially great for large clear vases, as it can help hide the stems of the flowers. For more tips on how to incorporate citrus fruits into your flower arrangements, check out The Spruce Crafts.
  3. Floral Foam and Roses: Use floral foam as a base for your flower arrangements to help the flowers stay in place and create fuller-looking centerpieces. This is especially helpful when working with roses. For a tutorial on how to build a breathtaking rose centerpiece using floral foam, check out Sanctuary Home Decor.
  4. Filler Flowers: Don’t forget to add filler flowers to your arrangements to create a fuller and more voluminous look. Earnest Home Co has some great hacks for making the most of your filler flowers.
  5. Antique Containers and Old World Flowers: Use antique containers and heirloom flowers to create a vintage-inspired look. This can be a beautiful and unique way to incorporate fresh flowers into your party decorations. For more inspiration, check out The Spruce Crafts.
  6. Edible Fruit Bouquet: Create a healthy and fun party decoration by arranging fresh fruits in a creative and visually appealing way. For a tutorial on how to make a fresh fruit bouquet, check out The More Florist and Bridal.

Remember, the possibilities are endless when it comes to DIY creative party decor using fresh flowers and fruits. Get creative and have fun with it!

How to make party decorations using fresh flowers and fruits?

Credit; Google

To make creative party decor using fresh flowers and fruits, you can start by gathering your materials. You will need a variety of flowers and fruits, such as red grapefruit, carnations, baby’s breath, and other seasonal fruits and flowers. You can also repurpose antique vessels, choose heirloom flowers, and stick to a vintage-inspired color palette to evoke sentiment and old-world charm.

One idea is to create a DIY fruit and floral arrangement. Place a smaller glass container inside a larger one, fill both with water, and slice and arrange fruit in the outer section. Cut flowers at an angle and remove any leaves from the stems, then add flowers to the center vase. Fill with water in both areas to cover the fruit and enough to cover most of the flower stems. This arrangement can be used in various ways, such as a centerpiece for a brunch table, an entryway decoration, a bathroom vanity addition, a dinner table centerpiece, an outdoor party decoration, a desk brightener, or a window sill display.

Another idea is to create a fruit centerpiece that is both beautiful and cost-effective. You can choose a selection of seasonal fruits and arrange them in a decorative bowl or basket, or choose one type of fruit and fill a clear vase or bowl with it. You can also mix a selection of fruits with some inexpensive flowers for a beautiful and cost-effective centerpiece. Additionally, you can combine fruits with some vegetables for a unique and budget-friendly centerpiece.

For a more vintage-inspired look, you can arrange branches of apple blossoms in a vase and surround the base with apples, or create a traditional cornucopia centerpiece filled with autumn fruits like apples, pears, and grapes.

When it comes to arranging flowers, you can group the florals together to create the desired shape, then use florist tape to secure the stems together. You can also use floral foam as a base for your flower arrangements to help the flowers stay in place and create fuller-looking centerpieces. Don’t forget to add filler flowers to create a fuller and more voluminous look, and use a hair tie to keep roses together to ensure your flower bouquet won’t budge.

Overall, using fresh flowers and fruits to create party decorations is a cost-effective and beautiful way to add a touch of nature to your event. With a little creativity and some inspiration, you can create stunning centerpieces and decorations that will impress your guests.

What are some creative ways to decorate a party with fresh flowers and fruits?

Credit: Google

Here are some creative party decor ways to decorate a party with fresh flowers and fruits:

  1. Fruit and Floral Arrangement: Create a beautiful and fragrant centerpiece by combining fresh fruits and flowers in a vase or bowl. This DIY project is easy to make and can last for up to a week with proper care. Choose a selection of seasonal fruits and flowers, and arrange them in a decorative bowl or basket for a stunning visual effect. Alternatively, you can arrange branches of cherry blossoms in a tall vase and surround the base with a ring of cherries for a stunning centerpiece that celebrates the beauty of spring.
  2. Lemon and Lavender: Fill a large glass jar with lemons and add sprigs of lavender for a beautiful and aromatic centerpiece. The bright colors of the fruits and the delicate lavender create a visually appealing and fragrant display.
  3. Kiwi and Orchids: Arrange slices of kiwi and stems of orchids in a tall, clear vase for a visually striking centerpiece. The vibrant green of the kiwi contrasts beautifully with the delicate orchids.
  4. Apple Blossom Arrangement: Arrange branches of apple blossoms in a vase and surround the base with apples for a wonderful way to celebrate the bounty of spring.
  5. Springtime Citrus Stack: Stack a variety of citrus fruits on a tiered stand for a lively and engaging centerpiece. The bright colors of the fruits create a visually appealing display that is perfect for spring and summer parties.
  6. Blooming Berry Basket: Fill a rustic basket with an assortment of berries and add some sprigs of fresh flowers for a charming centerpiece that celebrates the colors and flavors of spring and summer.
  7. Citrus and Greenery: Arrange slices of citrus fruits in a large glass vase and add some sprigs of inexpensive greenery for a beautiful and cost-effective centerpiece.
  8. Peachy Perfection: Create a simple, yet effective centerpiece by filling a rustic wooden crate with fresh, juicy peaches. The soft orange hue of the peaches against the natural wood creates a beautiful aesthetic, perfect for a summer wedding.
  9. Bountiful Berry Branches: Incorporate branches laden with berries into your centerpiece for a unique and visually striking display.
  10. Elegant Exotic Ensemble: Use exotic fruits such as dragon fruit, papaya, and kiwi to create a centerpiece that sparks curiosity and discussion among your guests.
  11. Cherry Charm: A bowl filled with fresh, red cherries makes for a simple yet charming centerpiece. Their vibrant color can add a pop to any table setting.
  12. Grapefruit Galore: Hollow out grapefruit and use it as a vase for a small bouquet of vibrant flowers. This creates a fun, unique centerpiece that’s sure to catch your guests’ eyes.
  13. Sunshine Citrus Stack: Stack a variety of citrus fruits on a tiered stand for a visually appealing centerpiece that’s also incredibly refreshing.

When it comes to using fresh fruit in flower creative party decor arrangements, it’s important to choose a mixture of flowers in one color to allow the fruit to really stand out. However, if you want the fruit to be a subtle accent, choose a variety of colors for the flowers. You can also use the fruit as a base for the arrangement and add flowers around it for a beautiful and unique display.For a fruit-themed party, consider making balloon fruits, decorating windows with yellow paper plates and green poster board, and creating a citrus slice banner. You can also make fruit-themed coloring pages and activity signs, and have a craft table where guests can create their own popsicle stick puppets using fruit templates.Incorporating fresh flowers and fruits into your party decorations is a cost-effective and creative way to add visual interest and a touch of nature to your event. With a little creativity and some inspiration, you can create stunning centerpieces and decorations that will impress your guests.

What are some popular fruits to use for party decorations?

Credit: Google

Popular fruits to use for creative party decor include lemons, oranges, blueberries, cherries, kiwis, apples, and peaches. These fruits can be arranged in vases or bowls, or used as decorative elements in flower arrangements. They can also be used to create balloon fruits, fruit-themed coloring pages, and activity signs. Exotic fruits such as dragon fruit and papaya can also be used to create visually striking centerpieces that spark curiosity and discussion among guests. Additionally, fruits such as cherries, grapes, and apples can be used to create traditional cornucopia centerpieces filled with autumn fruits, which are a fitting tribute to the season.

How to incorporate fresh flowers and fruits into a party theme?

Credit: Google

To incorporate fresh flowers and fruits into a party theme, you can consider the following creative ideas inspired by the sources provided:

  1. Fruit and Floral Arrangement: Create a stunning centerpiece by combining fresh fruits and flowers in a vase or bowl. This arrangement can be used on the brunch table, in the entryway, bathroom, dinner table, outdoor party, desk, or window sill to add a pop of color and a refreshing scent to the space.
  2. Colorful Decor: Use flowers and fruits that match the color scheme of your party to create a cohesive and visually appealing decor. Incorporate colorful flowers in centerpieces, chair sashes, food and drinks, tableware, table linens, straws, balloons, and lighting to bring your party theme to life.
  3. Theme Parties with Flowers: Consider hosting a themed party like a backyard barbecue, perfect patio/garden party, Hawaiian luau, or wine at nine, and use flowers and fruits to enhance the ambiance. For example, for a backyard barbecue, you can use Mason jars filled with daisies, decorate pies and cakes with flowers, and use colorful flowers like daisies, marigolds, roses, lilies, and sunflowers for the decor.
  4. Creative Arrangements: Experiment with unique ways to incorporate fruits and vegetables into flower arrangements. Use artichokes, mini pumpkins, mums, nuts, grapes, pears, pomegranates, apples, and more to create visually striking centerpieces that are both beautiful and edible. These arrangements can be used for various occasions like fall or Thanksgiving gatherings.

By incorporating fresh flowers and fruits creatively into your party theme, you can create a vibrant and inviting atmosphere that will impress your guests and make your event truly memorable.

What are some creative ways to use fresh flowers and fruits for a party photo booth?

Credit: Google

To incorporate fresh flowers and fruits into a party photo booth, there are several creative ways to consider. First, you can create a fruit and floral arrangement that can serve as a beautiful and fragrant backdrop for the photo booth. You can use a variety of fruits, such as red grapefruit, and pair them with flowers like carnations and baby’s breath. This arrangement can be placed on a table or stand, and can be used as a centerpiece or decoration for the party.

Another way to incorporate fresh flowers and fruits into a party photo booth is by using them as props. For example, you can provide guests with fresh flowers to hold or wear in their hair, or offer fruit-themed props such as pineapple or watermelon headbands. You can also create a fruit-filled backdrop, such as a wall covered in balloons and garlands in the shape of fruits, or a garland made of fresh flowers and fruits.

Additionally, you can use fresh fruits and flowers to create a festive and colorful atmosphere around the photo booth. For example, you can place a basket of fresh fruits near the photo booth, or arrange flowers around the area to create a beautiful and fragrant ambiance. You can also use fruit-themed tablecloths, napkins, or plates to add to the decor.

Overall, incorporating fresh flowers and fruits into a party photo booth can add a unique and natural touch to the party decor, and provide guests with a memorable and fun experience.

What are some creative ways to use fresh flowers and fruits for a party photo booth props?

Credit: Google

To incorporate fresh flowers and fruits into a party photo booth, you can consider the following creative ideas:

  1. Fruit and Floral Arrangement: Create a stunning centerpiece by combining fresh fruits and flowers in a vase or bowl. This arrangement can be used as a backdrop for the photo booth, providing a beautiful and fragrant setting for guests to take photos. You can use a variety of fruits, such as red grapefruit, and pair them with flowers like carnations and baby’s breath. This arrangement can last for up to a week, depending on the freshness of the fruit and the condition of the flowers.
  2. Fruit-themed Props: You can use fruits as props for the photo booth, such as plastic mug replicas with a frosty look or toy guns with orange caps on the ends. These props can add a fun and festive touch to the photos, and guests can pose with them mid-toast or as black-hat gunslingers of the Old West.
  3. Rustic Flowers: You can use rustic flowers, such as wildflowers or dried flowers, as props for the photo booth. These flowers can add a natural and country-style touch to the photos, and guests can pose with them in nests or as bouquets of country blooms.
  4. Farm-style Props: You can use farm-style props, such as old washtubs, washboards, and wooden tools, as background or props for the photo booth. These props can add a rustic and vintage touch to the photos, and guests can pose with them as if they were cowboys or cowgirls of the Old West.
  5. Fruit-filled Cocktails: You can serve fruit-filled cocktails or mocktails at the party, and encourage guests to take photos with them in the photo booth. These drinks can add a colorful and refreshing touch to the photos, and guests can pose with them mid-sip or as if they were toasting to the newlyweds.

By incorporating fresh flowers and fruits creatively into the party photo booth, you can create a fun and festive atmosphere that guests will enjoy and remember.

Conclusion: Creative Party Decor

Creating party decorations with fresh flowers and fruits can be a fun and budget-friendly way to add a touch of nature to your event. By following these tips and getting creative with what you have, you can impress your guests without spending any money.

FAQs: Creative Party Decor

Can I use any type of flowers and fruits for decorations?

Yes, you can use a variety of flowers and fruits for decorations. Just make sure they are fresh and in good condition.

How long will the decorations last?

Depending on the type of flowers and fruits used, decorations can last anywhere from a few hours to a few days. Keep them fresh by spritzing with water and storing in a cool place.

The Mystery of the First Seed: Who Planted It?

Unravel the mystery of the first seed and the origins of plant life. Explore the intriguing question of who planted the initial seed.

Introduction:

The world is full of plants, from towering trees to delicate flowers. But have you ever stopped to wonder where they all come from? The answer, of course, is that every plant grows from a seed. But who planted the first seed?

This question has puzzled scientists, philosophers, and theologians for centuries. While it may seem like a simple question, it touches on some of the deepest mysteries of life on Earth. In this blog post, we’ll explore the different theories and ideas about who planted the first seed, and what it means for our understanding of the natural world.

The Role of Seeds in Plant Growth

Before we dive into the mystery of the first seed, let’s take a closer look at how seeds work. A seed is a small, dormant embryo that contains all the genetic information needed to grow into a full-sized plant. When conditions are right, the seed will germinate, or sprout, and begin to grow.

Seeds can be incredibly resilient, able to survive for long periods of time in harsh conditions. They can also be incredibly diverse, with different seeds requiring different conditions to germinate. Some seeds, like those of the giant sequoia tree, can take years to germinate, while others, like those of the morning glory, can sprout in just a few days.

Theories About the First Seed

So who planted the first seed? There are several theories and ideas about how the first seed came to be. Here are a few of the most popular:

Divine Creation

One theory is that the first seed was planted by a divine being, such as a god or goddess. This idea is often found in religious texts and myths, where the creation of the first plant is attributed to a divine power.

Spontaneous Generation

Another theory is that the first seed was created through a process called spontaneous generation. This idea, which was popular in the past, suggests that living organisms could arise from non-living matter, such as soil or decaying matter.

Evolution

A third theory is that the first seed was the result of evolution. According to this theory, the first seed was created through a slow and gradual process of natural selection, where the most successful seeds were able to survive and reproduce.

The Implications of the First Seed

The mystery of the first seed has far-reaching implications for our understanding of the natural world. Here are a few of the most important:

The Origin of Life

The question of who planted the first seed is closely tied to the question of the origin of life. If the first seed was planted by a divine being, then life itself is a divine creation. If the first seed was the result of spontaneous generation or evolution, then life is a natural process that can be explained by science.

The Interconnectedness of Life

The mystery of the first seed also highlights the interconnectedness of life. Every plant, no matter how small or seemingly insignificant, is part of a vast web of life that stretches back to the very beginning of time.

The Importance of Conservation

Finally, the mystery of the first seed reminds us of the importance of conservation. Every seed, no matter how small, has the potential to grow into a plant that can support life and help to sustain the planet.

What is the origin of plant seeds?

Credit: Google

The origin of plant seeds is a fascinating topic in botany, as it represents a key innovation in the plant kingdom that has enabled the survival and diversification of plant life on land. According to scientific research, the first land plants evolved around 468 million years ago and reproduced using spores. The earliest seed-bearing plants, known as gymnosperms, appeared during the late Devonian period (416 million to 358 million years ago) and had no ovaries to contain the seeds. From these early gymnosperms, seed ferns evolved during the Carboniferous period (359 to 299 million years ago) and had ovules that were borne in a cupule, which likely protected the developing seed.

The “golden-trio hypothesis” suggests that a “seed program” arose from the spatiotemporal integration of three key components: assimilate flow, ABA-mediated stress responses, and stress-induced LEC1 expression. This hypothesis posits that the evolutionary innovation of seeds should be considered not as a simple event resulting from new genes, but rather as the outcome of a series of physiological and morphological innovations that emerged prior to and regardless of the genetic changes that occurred during seed evolution.

The seed is a complex structure that consists of the embryo, endosperm, and seed coat. The endosperm serves as a feeding tissue for the embryo, while the seed coat provides protection for the developing embryo. Seeds are diverse in their structure and function, with different plant lineages having evolved unique adaptations for seed dispersal and germination. For example, onion seeds have one cotyledon and radicle, while beans and other Leguminosae seeds lack endosperm and have two cotyledons.

Seed plants have endosperm of different origin, with flowering plants having endosperm, which is usually triploid (3n), whereas female gametophyte endosperm is haploid (n). The seed coat originates from the integument, which is the extra cover of the megasporangium(s). The seed represents enforced control of the sporophyte over the gametophyte, allowing for the survival and growth of the embryo under adverse conditions.

In conclusion, the origin of plant seeds represents a significant milestone in the evolution of plant life on land. Seeds have enabled the survival and diversification of plant life, allowing for the development of complex ecosystems and the evolution of new plant lineages. The “golden-trio hypothesis” provides a new perspective on the evolution of seeds, suggesting that the seed program arose from the integration of key physiological and morphological innovations. Further research is needed to fully understand the complex evolutionary history of plant seeds and their role in shaping the plant kingdom.

How do plants germinate from seeds?

Credit: YouTube

To germinate a seed, it needs to be exposed to the right conditions. These conditions include water, oxygen, and optimal temperature. When a seed is exposed to these conditions, water and oxygen are taken in through the seed coat. The embryo’s cells start to enlarge, and the seed coat breaks open. The root emerges first, followed by the shoot that contains the leaves and stem. Sunlight supports the germination process by warming the soil, although some seeds need direct contact with sunlight to germinate. Once leaves have sprouted, sunlight is the primary energy source for plant growth through the process of photosynthesis.

Seeds contain everything they need to begin a new life. Inside the seed coat, there is an embryonic (baby) plant composed of an embryonic root, stem, and leaves. In addition, the seed contains a food supply called the endosperm that is packed with nutrients to keep the seed nourished and allow it to grow. As the embryonic plant develops, the seed leaves, or cotyledons, absorb the food supply and continue to nourish the plant. Once the leaves appear, the plant begins to make its own food through photosynthesis.

To start seeds indoors, it’s important to have the right equipment, including something to start seeds in, a growing medium (soil), and light. Seeds should be started in a seed-starting mix that is made for germinating seeds, as soil from the garden or re-used potting soil from houseplants may contain diseases that can harm seedlings. The growing medium should be moist but not sopping wet, and containers should have drainage holes to prevent waterlogging. Once seedlings have germinated and grown a few inches tall, they will need to be moved to a sunny location or under grow lights to continue growing. It’s important to feed seedlings with liquid fertilizer a few weeks after they germinate, as most mixes contain few, if any, nutrients.

In summary, germinating seeds requires the right conditions, including water, oxygen, and optimal temperature. Seeds contain everything they need to begin a new life, including an embryonic plant and a food supply called the endosperm. To start seeds indoors, it’s important to have the right equipment, including something to start seeds in, a growing medium, and light. Seeds should be started in a seed-starting mix that is made for germinating seeds, and seedlings should be fed with liquid fertilizer a few weeks after they germinate. With the right conditions and care, seeds can grow into healthy, thriving plants.

What are the ideal conditions for germinating seeds?

The ideal conditions for germinating seeds include water, oxygen, and proper temperature. Water is necessary for the seed to absorb and initiate the germination process. Oxygen is required for the seed to respire and produce energy for growth. Proper temperature is essential for the seed to break dormancy and start the germination process. The optimal temperature range varies by plant species, with most plants requiring a range of 65-75 degrees Fahrenheit (18-24 degrees Celsius) for germination. Some seeds require light for germination, while others do not. Overwatering, planting seeds too deeply, and dry conditions can all cause poor germination. Seeds remain dormant until conditions are favorable for germination, and once exposed to the proper conditions, water and oxygen are taken in through the seed coat, and the embryo’s cells start to enlarge, leading to the emergence of the root or radicle and the shoot or plumule that contains the leaves and stem.

What are some common problems that can occur during seed germination?

Common problems that can occur during seed germination include dry soil, inadequate light, overwatering, and difficult seeds. Dry soil can prevent the seed from absorbing enough water to initiate germination, while overwatering can lead to rot and fungal growth. Inadequate light can also hinder germination, as some seeds require light to trigger the process. Difficult seeds, such as those with a hard coating, may need to be nicked or soaked overnight to aid in germination. Additionally, maintaining the correct temperature and humidity levels is crucial for successful seed germination. Seeds may fail to germinate if they are exposed to temperatures that are too hot or too cold, or if the humidity is too low. It is important to monitor the conditions of the seedlings closely and address any issues promptly to ensure successful germination.

How to prevent mold growth on seeds during germination?

To prevent mold growth on seeds during germination, it is important to maintain the right conditions for seed germination. Here are some tips:

  1. Sterilize containers and soil: Before starting your seeds, make sure to sterilize the containers, trays, and soil mix. This helps eliminate any potential mold spores or pathogens that could cause problems later. You can sterilize containers and trays by washing them with a diluted bleach solution or using a commercial disinfectant. Also, consider using a sterile seed starting mix or pasteurizing your own soil mix to reduce the risk of mold contamination.
  2. Proper drainage and air circulation: Good drainage and air circulation are crucial in preventing mold growth. Ensure that your seed containers have drainage holes and use well-draining soil to avoid excess moisture. Place a tray under the containers to catch any excess water and empty it promptly. Additionally, provide adequate air circulation by using a small fan or opening windows for a short period each day, if possible.
  3. Watering techniques: Overwatering is a common cause of mold growth in seedlings. Water your seeds and seedlings carefully, avoiding excessive moisture that can lead to fungal growth. Use a spray bottle or a gentle watering can with a fine nozzle to provide a light misting or bottom watering method. This helps keep the soil moist but not overly saturated.
  4. Maintain proper humidity levels: Mold thrives in humid environments, so it’s important to maintain proper humidity levels during seed germination and early growth. Consider using a hygrometer to monitor humidity levels in your seed starting area. If the humidity is consistently high, use a dehumidifier or improve ventilation to reduce moisture in the air.
  5. Remove mold immediately: If you spot any signs of mold growth on the soil surface or seedlings, it’s important to address it promptly. Carefully remove any affected seedlings, ensuring not to disturb the surrounding soil. Dispose of them properly to prevent the spread of mold spores. If the mold is limited to the soil surface, gently scrape it off without disturbing the seeds or seedlings.
  6. Use natural remedies: If you prefer a natural approach, you can try using organic antifungal treatments like cinnamon powder or chamomile tea. These natural remedies may help inhibit mold growth without harming your seedlings. However, it’s important to note that prevention and proper cultural practices are key to minimizing mold issues.

By following these tips, you can help prevent mold issues from affecting your seed starting success. Remember, mold prevention is easier than mold treatment, so it’s important to take proactive steps to maintain the right conditions for seed germination.

If every plant grows from a seed, then who planted the first seed?

Initial evolutionThe evolution of plants began with algal mats of unicellular archaeplastids through endosymbiosis.
DiversificationPlant evolution includes the transition from marine and freshwater green algae to terrestrial spore-bearing plants like bryophytes, lycopods, and ferns.
Development of seed-bearing plantsEvolution progressed from ferns to complex seed-bearing gymnosperms and angiosperms (flowering plants).

The question of who planted the first seed is a philosophical and scientific question that has puzzled people for centuries. From a scientific perspective, the answer is that the first seed was likely produced by a plant that evolved from a non-seed-bearing ancestor. The evolutionary history of plants suggests that the first land plants were likely to have been similar to modern-day mosses, liverworts, or hornworts, which are seedless plants. These plants evolved adaptations that allowed them to survive on land, such as the development of vascular tissues, roots, and leaves.

The first fossil seed plants are believed to have appeared around 360 million years ago, during the Devonian period. These seed plants replaced ferns and cycads and were the dominant plants during the Carboniferous period, also known as the Age of Fossil Forests. The evolution of seed plants allowed them to survive in a wider range of environments, as seeds are more resilient than spores and can survive in drier conditions.

The first seeds were likely to have been simple and similar to the seeds of modern-day gymnosperms, which are non-flowering plants that produce seeds in cones. Flowering plants, or angiosperms, evolved later and are characterized by the production of seeds enclosed in an ovary. The origin and rapid diversification of flowering plants is still a topic of ongoing research and is considered one of the great unsolved mysteries in evolutionary biology.

In summary, the first seed was likely to have been produced by a plant that evolved from a non-seed-bearing ancestor, and the first fossil seed plants appeared around 360 million years ago. The evolution of seeds allowed plants to survive in a wider range of environments and paved the way for the evolution of flowering plants, which are the most diverse group of plants on Earth.

What is the definition of a seed?

A seed is a small, embryonic plant enclosed in a protective outer covering, usually with a stored food supply. It is the product of sexual or asexual reproduction in plants, and it is the primary means by which plants propagate themselves. Seeds can vary widely in size, shape, and structure, depending on the plant species they come from. Some seeds are very small, while others are quite large. Some seeds are smooth and round, while others are irregularly shaped and have a rough texture. The outer covering of a seed, known as the seed coat, can be thin and delicate or thick and hard.

Seeds contain a tiny embryo, which is the beginning of a new plant. This embryo is made up of a shoot, or plumule, and a root, or radicle. The shoot will eventually grow into the stem and leaves of the plant, while the root will grow into the root system that anchors the plant in the soil and absorbs water and nutrients.

Seeds also contain a stored food supply, which is usually in the form of starch, protein, or oil. This food supply is used to sustain the embryo during germination, which is the process by which the seed begins to grow into a mature plant. Germination typically requires the presence of water, oxygen, and a suitable temperature.

In summary, a seed is a small, embryonic plant enclosed in a protective outer covering, usually with a stored food supply. It is the product of sexual or asexual reproduction in plants, and it is the primary means by which plants propagate themselves. Seeds can vary widely in size, shape, and structure, depending on the plant species they come from.

How do plants reproduce?

Credit: YouTube

Plant reproduction

Production of new offspring in plants

TypesSexual and Asexual reproduction
Sexual ReproductionInvolves the fusion of gametes, producing genetically diverse offspring.
Asexual ReproductionProduces genetically identical offspring without gamete fusion; includes methods like budding, fragmentation, spore formation, regeneration, and vegetative propagation.

Plants reproduce through a process called pollination, where the male reproductive organ (stamen) releases pollen, which is then carried by wind, water, or animals to the female reproductive organ (pistil) of the same or another plant. The pollen grain travels down the pistil and fertilizes the egg, which develops into a seed. The seed contains the genetic material of both the male and female parents and can be dispersed by wind, water, or animals to colonize a new habitat. This process of reproduction by seed is called sexual reproduction and is the main method of reproduction for most flowering plants.

However, some plants can also reproduce asexually through vegetative propagation, where an entire new plant can grow out of a portion of the plant. This can occur through methods such as budding, where a smaller version of the parent organism grows out of the parent, or through fragmentation, where fragments of the plant body regenerate and develop into whole new organisms. Asexual reproduction allows plants to produce offspring that are genetically identical to the parent, ensuring that the offspring have the same traits and characteristics as the parent.

In summary, plants can reproduce both sexually and asexually, with sexual reproduction being the main method for most flowering plants. The process of sexual reproduction involves pollination, fertilization, and seed development, while asexual reproduction involves the regeneration of plant fragments or specialized structures to produce new individuals.

What is the difference between a seed and a spore?

Credit: Google

A seed and a spore are both reproductive units in plants, algae, and fungi, but they differ in several ways. The main difference between spores and seeds is that spores are single cells, while seeds are multicellular. Spores are haploid, meaning they have only one set of chromosomes, while seeds are diploid and have two sets of chromosomes, one from each parent.

Spores are produced by meiosis in the sporangium of a diploid sporophyte, and under favorable conditions, they can develop into a new organism using mitotic division, producing a multicellular gametophyte, which eventually goes on to produce gametes. In contrast, seeds are produced by the fusion of the male gamete of the pollen tube with the female gamete formed by the megagametophyte within the ovule2.

Seeds contain within them a developing embryo (the multicellular sporophyte of the next generation), produced by the fusion of the male gamete of the pollen tube with the female gamete formed by the megagametophyte within the ovule. Spores, on the other hand, germinate to give rise to haploid gametophytes.

Seeds are mostly present inside a fruit, while spores are mostly dispersed by the wind and water. Seeds are produced by flowering plants, while spores are produced by fungi, algae, bacteria, and non-flowering plants.

In summary, spores are unicellular haploid reproductive units produced by meiosis in the sporangium of a diploid sporophyte, while seeds are multicellular diploid reproductive units produced by the fusion of the male and female gametes and contain within them a developing embryo.

Conclusion:

The mystery of the first seed is a fascinating and complex one, with far-reaching implications for our understanding of the natural world. While we may never know for sure who planted the first seed, the question itself reminds us of the beauty and complexity of life on Earth.

FAQs:

Q: Who planted the first seed?

A: There are several theories about who planted the first seed, including divine creation, spontaneous generation, and evolution.

Q: What is the origin of life?

A: The origin of life is closely tied to the question of who planted the first seed. If the first seed was planted by a divine being, then life is a divine creation. If the first seed was the result of spontaneous generation or evolution, then life is a natural process that can be explained by science.

Q: How do seeds work?

A: A seed is a small, dormant embryo that contains all the genetic information needed to grow into a full-sized plant. When conditions are right, the seed will germinate, or sprout, and begin to grow.

Flower Backdrop Decorations: Discover The Top 5 Flowers For Backdrop Decorations

Discover the top flower backdrops decoration business owners. Explore the most requested colors for stunning floral arrangements.

Introduction: Flower backdrop decorations

The Enchanting World of Flower Backdrops: A Guide for Event Decoration Business Owners

Welcome, event decoration business owners! If you’re looking to add a touch of elegance and charm to your events, flower backdrop decorations are a must-have in your repertoire. These stunning creations not only serve as a beautiful focal point but also create a memorable ambiance that leaves a lasting impression on guests. In this blog post, we’ll delve into our most popular flower backdrop and explore the colors that are in high demand among clients in the US.

Our Most Popular Flower Backdrop: The Enchanted Garden

Among our array of exquisite flower backdrop decorations, one that stands out as a perennial favorite is the Enchanted Garden design. This enchanting backdrop features a lush arrangement of delicate blooms in soft pastel hues, creating a dreamy and romantic atmosphere perfect for weddings, bridal showers, and other special occasions. The combination of roses, peonies, hydrangeas, and greenery evokes a sense of natural beauty and sophistication, making it a top choice for clients seeking a touch of whimsical charm.

Colors in Demand: Timeless Elegance and Modern Sophistication

When it comes to the colors that are most requested by clients for flower backdrop decorations, a blend of timeless elegance and modern sophistication reigns supreme. Soft blush pink, ivory, and cream tones continue to be popular choices for their romantic and classic appeal, adding a touch of femininity and grace to any event. Additionally, shades of dusty rose, mauve, and lavender are gaining popularity for their understated yet luxurious feel, perfect for creating a chic and modern ambiance.For those looking to make a bold statement, deep burgundy, navy blue, and emerald green are emerging as trendy options, adding a touch of drama and opulence to event decor. These rich and vibrant colors bring a sense of depth and sophistication to flower backdrops, making them ideal for upscale events and glamorous soirées.

What are some popular flower backdrop designs for events?

Credit: Google

Based on the search results, some popular flower backdrop decorations for events include:

  1. Enchanted Garden: This design features a lush arrangement of delicate blooms in soft pastel hues, creating a dreamy and romantic atmosphere perfect for weddings, bridal showers, and other special occasions.
  2. Faux Floral Walls: These backdrops offer up-to-the-minute style along with equal (or greater) value, flexibility, and ease of use. They are affordable, user-friendly, and able to stand up to event after event.
  3. Floral Moon Gate Arches: These arches are a modern and unique idea for people who don’t want a large wall of flowers. They use a color-blocking technique with blue, purple, pink, yellow and white peonies and hydrangeas.
  4. Pastel Wall of Flowers in Golden Frames: Putting flower walls in picture frames can treat them like works of art. This couple had three-paneled flower walls with a mixture of white roses and light pink hydrangeas. The center flower wall has a cross made of pink roses to honor the couple’s faith.
  5. Giant Flower Wall for a Wedding: This design combines glam and garden chic effortlessly, adding elegance to the ceremony venue for couples who want to add sophistication to their ceremony.
  6. Spaced Carnation Flower Wedding Backdrop: This layout will look great behind the head or sweetheart table or function as a beautiful whimsical background for a photo.
  7. Glamorous Wall of Flowers at a Ceremony: Adding candlelight to any room automatically brings an air of romance. So, placing candles along the base of your flower wall can create a breathtaking addition to your luxurious wedding.
  8. Yellow and White Flower Wall Backdrop: An intricate stripe floral design is one of the many ways to elevate your dessert area. Hiring the right florist can open up endless possibilities for your flower wall wedding backdrop.
  9. Dramatic Wall of Flowers at a Reception Entrance: Letting the unique architecture of your wedding venue influence your flower wall design can grab your guests’ attention before they even walk in. The placement of this flower wall also gives guests an idea of the type of environment they’re about to enter.
  10. Bohemian Wedding Grass Wall: Forgoing flowers altogether and having a pampas grass wall can play into a bohemian wedding theme. Adding a couple of bouquets can still add some flowers to the wedding.
  11. Eucalyptus Flower Wedding Wall: This design is an example of how flower walls don’t always have to include only flowers. Feel free to add greenery to your display.

These designs showcase the versatility of flower backdrop decorations, from traditional and elegant to modern and unique, and can cater to different themes, styles, and budgets.

How do you choose the right color for a flower backdrop?

Credit: Google

When choosing the right color for a flower backdrop decorations, it’s essential to consider the theme, venue, and client’s preferred color scheme. The venue, in particular, plays a significant role in determining the color palette. If the event is outdoors with a beautiful backdrop, such as lakes or mountains, you can choose colors that complement the surroundings. Additionally, the bride’s gown and wedding colors can influence the flower backdrop’s color scheme.

Popular flower colors for wedding backdrops include roses, peonies, and greenery. Roses are a classic choice due to their availability and low maintenance. Peonies and butterfly ranunculus are also popular for their delicate appearance and soft colors. Greenery, such as Italian ruscus, can add texture and depth to the backdrop.

When selecting colors, consider the season and availability of flowers. For example, summer weddings may feature bright and bold colors, while winter weddings may opt for more muted and soft tones. Incorporating seasonal blooms can add a touch of freshness and uniqueness to the backdrop.

Additionally, it’s essential to balance the colors in the overall design. For instance, if the bridesmaid dresses are darker, you can lighten up the floral or add texture to the bridesmaid bouquets to avoid blending everything together. If the couple has a favorite flower or two, you can create a palette centered around those blooms.

Lastly, consider the backdrop’s lighting and how it will affect the color. Ensure the backdrop is evenly lit to avoid unwanted shadows, especially when using a white backdrop. Adequate lighting can make the colors pop and create a visually appealing backdrop for photos.

What are some tips for decorating a flower backdrop for an event?

Credit: Google

Some tips for decorating a flower backdrop decorations for an event include:

  1. Customization: Flower walls can be extensively customized based on preferred aesthetics, color schemes, and types of flowers used. This allows for a personalized touch that aligns with the event’s theme and style.
  2. Placement: Flower walls can be strategically placed at the entrance, stage, or behind the bridal table at weddings. For personal events, they can serve as backdrops for photos or selfies, capturing memorable moments.
  3. Budget-Friendly Options: Creating a flower wall on a budget can be achieved by using floral tiles or mats that eliminate the need for assembling individual flowers onto foam boards or panels. This method saves time and cost while still creating a visually appealing backdrop.
  4. Color Scheme: Consider the color scheme of the event and choose flowers that complement or contrast with the overall theme. Mixing different hues and shades can add depth and visual interest to the backdrop.
  5. Versatility: Flower walls are major attention grabbers that stand out at events without occupying too much floor space. They can be used for various occasions, from weddings to corporate events, adding a touch of elegance and sophistication to the decor.
  6. Maintenance: Ensure that the flowers used for the backdrop are delivered in pristine condition to maintain their freshness and visual appeal throughout the event. Fresh blossoms can breathe life into an event, creating an immersive and captivating experience for guests.
  7. Design Elements: Layering flowers of different hues, adding greenery, or incorporating fairy lighting can enhance the beauty of the backdrop and create a visually impressive display. Draping vines or subdued lighting can amplify the visual allure of the flower backdrop, adding elegance and charm to the event decor.
  8. Event Type Consideration: Tailor the flower backdrop design to suit the type of event, whether it’s a wedding, birthday party, corporate event, or any other celebration. The backdrop should align with the event’s purpose and ambiance, creating a cohesive and visually appealing setting.

By considering these tips, event planners can create stunning and memorable flower backdrops that elevate the ambiance and aesthetics of any event.

What are some creative ways to incorporate a flower backdrop into an event theme?

Credit: Google

Here are some creative ways to incorporate a flower backdrop decorations into an event theme:

  1. As a Grand Entrance: Create a grand entrance that leaves a lasting impression on your guests by placing a flower wall at the entrance. This not only provides a warm welcome but also sets the tone for the entire event. Consider using flowers that match the theme or color scheme of your event for a cohesive look.
  2. Photo Booth Backdrop: A flower wall can serve as a stunning backdrop for a photo booth, adding a touch of elegance and fun, encouraging guests to take photos they’ll cherish forever. You can even add props like frames or themed accessories to make the photo booth more interactive.
  3. Stage Backdrop for Performances: If your event includes performances or speeches, a flower wall can serve as a beautiful stage backdrop. It not only enhances the visual appeal but also adds a layer of sophistication to the performances.
  4. As Table Centerpieces: Lay them flat on tables as unique and eye-catching centerpieces. This is a great way to incorporate floral elements into your event without overwhelming the space.
  5. Room Dividers: In larger venues, flower walls can act as room dividers, helping to separate different areas for various activities. This is particularly useful for events that have multiple components, such as a ceremony and a reception.
  6. Flower Corners: For subtle hints of color, flower corners are one way to incorporate blooms into the wedding decor without them taking center stage. This is a great way to add a touch of elegance to the event without going overboard on floral arrangements.
  7. Top 5 Flowers for Backdrop Decorations: Roses, orchids, sunflowers, peonies, and hydrangeas are some of the top flowers for backdrop decorations that can elevate your event. These flowers can create a memorable and visually stunning display, depending on the occasion and the desired ambiance.
  8. Flower Wall Backdrop on a Budget: Creating a flower wall backdrop on a budget is possible by using floral tiles or mats that eliminate the need for assembling individual flowers onto foam boards or panels. This method saves time and cost while still creating a visually appealing backdrop for photos.

These creative ways to incorporate a flower backdrop into an event theme can add a touch of elegance, sophistication, and fun to any event, whether it’s a wedding, corporate gathering, or personal celebration.

How do you choose the right size flower backdrop for an event?

Credit: Google

To choose the right size flower backdrop decorations for an event, consider the following tips:

  1. Measure the space: Measure the area where the flower backdrop will be placed to ensure it fits properly. This will help you determine the height and width needed for the backdrop.
  2. Consider the number of guests: If the event has a large number of guests, a larger backdrop may be necessary to accommodate group photos and provide a visually appealing background for all attendees.
  3. Think about the event theme: The flower backdrop should complement the overall event theme and color scheme. Choose a size and design that enhances the ambiance and aesthetic of the event.
  4. Plan for the venue: Take into account the size and layout of the venue when selecting a flower backdrop. A larger venue may require a larger backdrop to make a significant impact, while a smaller venue may only need a smaller backdrop to avoid overwhelming the space.
  5. Consider the purpose: The purpose of the flower backdrop can also influence its size. For example, a backdrop used for a photo booth may need to be larger to accommodate multiple people in the photo, while a backdrop used as a stage decoration may be smaller and more focused on detail.
  6. Use floral tiles or mats: For a more budget-friendly and time-efficient option, consider using floral tiles or mats. These pre-made panels can be easily customized with additional flowers and colors to create a unique and visually appealing backdrop.
  7. Consider customizing the size: Many floral backdrop providers offer custom sizing options to fit specific event needs. This can help ensure the backdrop is the right size and design for the event.
  8. Think about the backdrop’s functionality: Consider the backdrop’s functionality, such as its use as a photo backdrop or stage decoration. This can help determine the appropriate size and design needed for the event.

By considering these tips, you can choose the right size flower backdrop that complements the event theme, fits the venue, and accommodates the number of guests. A well-chosen flower backdrop can create a memorable and visually appealing experience for all attendees.

What are some tips for maintaining a flower backdrop throughout an event?

Credit: Google

To maintain a flower backdrop decorations throughout an event, consider the following tips:

  1. Proper hydration: Ensure the flowers are properly hydrated and stored in water or oasis foam. Consider using water tubes or vials for individual stems to maximize their longevity.
  2. Temperature control: Plan for proper temperature control to prevent wilting, especially for outdoor events. Flowers are sensitive to extreme temperatures and may wilt if not properly maintained.
  3. Gentle handling: Handle the flowers gently to avoid damaging them. Avoid touching the petals and stems as much as possible to prevent bruising or breaking.
  4. Regular checks: Regularly check the flowers for signs of wilting or drooping. Remove any wilted flowers and replace them with fresh ones to maintain the overall appearance of the backdrop.
  5. Avoid direct sunlight: Keep the flower backdrop away from direct sunlight to prevent the flowers from drying out and wilting. If the event is outdoors, consider using a shade or tent to protect the backdrop.
  6. Use floral preservatives: Add floral preservatives to the water or oasis foam to help extend the life of the flowers. These preservatives provide the flowers with necessary nutrients and help prevent bacterial growth.
  7. Keep the backdrop clean: Regularly clean the backdrop to remove any dust or debris that may accumulate. This will help keep the flowers looking fresh and vibrant throughout the event.
  8. Consider artificial flowers: If maintaining fresh flowers throughout the event is challenging, consider using artificial flowers. Artificial flower walls can reduce the ecological footprint while still providing the aesthetic appeal of flowers.
  9. Work with a professional: Consider working with a professional floral stylist who can help maintain the flower backdrop throughout the event. They have the expertise and experience to ensure the flowers look fresh and vibrant throughout the event.

By following these tips, you can maintain a beautiful and vibrant flower backdrop throughout your event, providing a stunning visual focal point for your guests to enjoy.

What are some common mistakes to avoid when creating a flower backdrop for an event?

Credit: Google

To create a stunning flower backdrop for an event, there are several common mistakes to avoid.

  1. Not considering the event theme: The flower backdrop should complement the overall event theme and color scheme. Choosing flowers that clash with the event’s aesthetic can detract from the overall impact.
  2. Ignoring the venue’s layout: The size and layout of the venue should be taken into account when selecting a flower backdrop. A backdrop that is too large or small for the space can look out of place and detract from the overall ambiance.
  3. Forgetting about maintenance: Proper hydration, temperature control, gentle handling, and regular checks are essential for maintaining the freshness and longevity of the flowers. Neglecting these factors can result in wilted or damaged flowers, detracting from the overall impact of the backdrop.
  4. Not planning for lighting: Direct sunlight or inadequate lighting can cause the flowers to wilt or fade, detracting from the overall impact of the backdrop. Proper lighting should be planned to ensure the flowers look their best throughout the event.
  5. Skimping on quality: Using low-quality flowers or artificial flowers can detract from the overall impact of the backdrop. Investing in high-quality flowers and materials can ensure the backdrop looks stunning and lasts throughout the event.
  6. Ignoring the purpose of the backdrop: The purpose of the backdrop, such as a photo booth or stage decoration, should be taken into account when selecting the size and design. A backdrop that is too small or large for its intended purpose can detract from the overall impact.
  7. Not considering the budget: Flower backdrops can be expensive, but there are budget-friendly options available. Using floral tiles or mats, or incorporating artificial flowers, can reduce the ecological footprint while still providing the aesthetic appeal of flowers.

By avoiding these common mistakes, event planners can create a stunning and memorable flower backdrop that complements the event theme, fits the venue, and accommodates the needs of the guests.

How often should you water a flower backdrop during an event?

Credit: Google

To maintain the freshness and beauty of a flower backdrop during an event, it’s important to water the flowers regularly. The frequency of watering depends on several factors, including the type of flowers, the venue, and the weather conditions.

For most events, watering the flower backdrop once or twice a day should be sufficient. However, it’s important to check the soil moisture level regularly and adjust the watering schedule accordingly. If the soil feels dry to the touch, it’s a sign that the flowers need to be watered.

When watering the flower backdrop, it’s best to use a watering can or a hose with a fine nozzle. This will allow you to water the flowers gently and evenly, without damaging the petals or the backdrop structure.

In addition to regular watering, it’s also important to ensure that the flowers are receiving enough light and ventilation. Avoid placing the flower backdrop in direct sunlight or in a crowded area, as this can cause the flowers to wilt or become damaged.

Overall, maintaining a flower backdrop during an event requires careful planning, attention to detail, and regular care. By following these tips and paying close attention to the needs of the flowers, you can ensure that your flower backdrop looks beautiful and vibrant throughout the event.

What are some tips for transporting a flower backdrop to an event venue?

Credit: Google

To transport a flower backdrop decorations to an event venue, consider the following tips:

  1. Disassemble the backdrop: Disassembling the backdrop into smaller parts can make it easier to transport. This can include removing individual flowers or sections of the backdrop.
  2. Protect the flowers: When transporting the backdrop, make sure to protect the flowers from damage. This can include using bubble wrap or other protective materials to keep the flowers safe during transport.
  3. Transport in a cool vehicle: Flowers can wilt in hot temperatures, so it’s important to transport the backdrop in a cool vehicle. This can include using air conditioning or a cooler to keep the flowers at a safe temperature.
  4. Reassemble at the venue: Once you arrive at the venue, reassemble the backdrop carefully. Make sure to secure the flowers in place and adjust the backdrop to fit the space.
  5. Check for damage: After transporting the backdrop, check for any damage to the flowers or the backdrop structure. If any damage is found, make repairs as needed before the event.

By following these tips, you can ensure that your flower backdrop arrives at the event venue in good condition and is ready to be used as a beautiful and memorable decoration.

How can you protect a flower backdrop during transportation?

Credit: Google

To protect a flower backdrop decorations during transportation, consider the following tips:

  1. Disassemble the backdrop: Disassemble the backdrop into smaller parts, such as individual flowers or sections of the backdrop. This can make it easier to transport and reduce the risk of damage.
  2. Use a sturdy container: Use a sturdy container, such as a box or crate, to transport the backdrop. This can help protect the flowers from damage during transportation.
  3. Secure the flowers: Secure the flowers in place using floral foam, wire, or other materials. This can help prevent the flowers from moving around during transportation and reduce the risk of damage.
  4. Protect the backdrop: Use bubble wrap, blankets, or other protective materials to wrap the backdrop and protect it from damage during transportation.
  5. Transport in a cool vehicle: Flowers can wilt in hot temperatures, so it’s important to transport the backdrop in a cool vehicle. This can include using air conditioning or a cooler to keep the flowers at a safe temperature.

By following these tips, you can ensure that your flower backdrop arrives at the event venue in good condition and is ready to be used as a beautiful and memorable decoration.

Conclusion: Elevate Your Events with Stunning Flower Backdrops

As event decoration business owners, incorporating flower backdrops into your offerings can elevate the ambiance of any event and set you apart from the competition. Whether you opt for the enchanting beauty of the Enchanted Garden backdrop or experiment with a variety of colors to suit different themes and preferences, the key is to create a visually captivating experience that leaves a lasting impression on your clients and their guests.So, embrace the enchanting world of flower backdrops, explore the endless possibilities of color palettes, and let your creativity bloom as you transform ordinary events into extraordinary experiences. Your clients will thank you for the magical touch you bring to their special occasions, making your event decoration business a sought-after destination for unforgettable celebrations.

Which turf looks the best?

Discover the top turf grass varieties for creating a lush, green lawn. Compare cool and warm season grasses to find the perfect low-maintenance option with superior aesthetics.

Introduction:

When it comes to creating a beautiful and functional lawn, choosing the right turf is crucial. With so many options available, it can be overwhelming to determine which type of turf is best for your US property. In this blog post, we’ll explore some of the most popular turf options and their benefits to help you make an informed decision.

Bermuda Grass

Bermuda grass is a popular choice for warm-season turf in the southern United States. It’s a drought-tolerant grass that thrives in full sun and high temperatures. Bermuda grass has a fine texture and a deep root system, making it an excellent choice for high-traffic areas such as sports fields and backyards. It’s also a low-maintenance grass that requires minimal watering and fertilization.

Zoysia Grass

Zoysia grass is a warm-season turf that’s known for its thick, lush blades. It’s a slow-growing grass that forms a dense mat, making it an excellent choice for areas with heavy foot traffic. Zoysia grass is also drought-tolerant and requires minimal maintenance, making it a popular choice for homeowners.

Fescue Grass

Fescue grass is a cool-season turf that’s commonly used in the northern United States. It’s a versatile grass that thrives in both sun and shade, making it an excellent choice for areas with mixed lighting conditions. Fescue grass has a fine texture and a deep root system, making it an excellent choice for high-traffic areas. It’s also a low-maintenance grass that requires minimal watering and fertilization.

St. Augustine Grass

St. Augustine grass is a warm-season turf that’s commonly used in the southern United States. It’s a fast-growing grass that forms a dense mat, making it an excellent choice for areas with heavy foot traffic. St. Augustine grass has a coarse texture and a shallow root system, making it susceptible to drought. It requires regular watering and fertilization to maintain its lush appearance.

Centipede Grass

Centipede grass is a warm-season turf that’s commonly used in the southeastern United States. It’s a low-maintenance grass that requires minimal watering and fertilization. Centipede grass has a coarse texture and a shallow root system, making it susceptible to drought. It’s also a slow-growing grass that forms a thin mat, making it an excellent choice for areas with low foot traffic.

What are the different types of turf available in the us market?

Credit: Google

There are several types of turf available in the US market, including natural turf and artificial turf.

Natural turf is categorized into several types based on product types, including Bermuda, Zoysia, Fescue, and others. Bermuda and Zoysia are popular choices for warm-season turf, while Fescue is a cool-season turf that thrives in both sun and shade. Each type of natural turf has its own unique benefits and requires different levels of maintenance.

Artificial turf is another popular option in the US market. It is made from synthetic fibers that imitate the look and feel of natural grass. Artificial turf is low-maintenance and can be used in a variety of applications, including sports venues, residential lawns, and commercial buildings. Some of the key players in the artificial turf market include DuPont, FieldTurf, Shaw Industries Group, Inc., ACT Global, and TigerTurf.

Artificial turf is made from several types of materials, including polyethylene, polypropylene, nylon, and hybrid (polypropylene + polyethylene)5. Nylon is the strongest and most resilient synthetic fiber, making it an excellent choice for artificial turf. However, it is also the most expensive. Polyethylene and polypropylene are less expensive than nylon but are not as strong or resilient.

Artificial turf is finding new applications beyond traditional sports venues. It is being used in urban landscapes, on rooftops, balconies, and indoor spaces, and is becoming a popular choice for event venues, sustainable landscaping practices, and the pet industry. However, heat retention in artificial turf poses a significant challenge, and innovative cooling technologies are being explored to mitigate this issue.

In conclusion, there are several types of turf available in the US market, each with its own unique benefits and applications. Whether you prefer natural turf or artificial turf, there are many options to choose from to create a beautiful and functional lawn or sports field.

What are the differences between natural and artificial turf?

Credit: Google

Natural turf and artificial turf are two popular options for lawns, sports fields, and other applications. While both have their advantages and disadvantages, there are significant differences between the two.

Natural turf, also known as natural grass, is a living organism that requires regular maintenance, including mowing, watering, and fertilizing. It provides a natural aesthetic and is often preferred for its softness and coolness in hot weather. However, natural grass can be affected by weather conditions, and its growth and color can vary throughout the year.

Artificial turf, on the other hand, is a synthetic surface that mimics the look and feel of natural grass. It is made from synthetic fibers that are tufted into a backing material and then filled with infill material to provide cushioning and stability. Artificial turf requires minimal maintenance, including occasional rinsing and brushing, and provides a consistent playing surface year-round. However, it can be hotter than natural grass in hot weather, and some people may prefer the natural aesthetic of real grass.

One of the key differences between natural and artificial turf is their impact on the environment. Natural grass absorbs carbon dioxide and releases oxygen, while artificial turf is made from non-biodegradable materials that can contribute to pollution. Natural grass also allows for rainwater to seep into the soil, while artificial turf can cause stormwater runoff, which can carry pollutants into waterways.

Another difference is their cost. While natural grass has a lower upfront cost, it requires ongoing maintenance expenses, including watering, fertilizing, and mowing. Artificial turf has a higher upfront cost but requires minimal maintenance expenses over its lifespan, which can make it a more cost-effective option in the long run.

In terms of performance, artificial turf provides a consistent playing surface that is less affected by weather conditions, making it a popular choice for sports fields. However, some athletes may prefer the softer surface and natural feel of natural grass.

Overall, the choice between natural and artificial turf depends on various factors, including personal preference, cost, maintenance, environmental impact, and performance. It is essential to consider these factors when deciding which option is best for your specific needs and goals.

What are the environmental impacts of using artificial turf?

The environmental impacts of using artificial turf are significant and worth considering before opting for it in your backyard or sports field. Here are some key environmental impacts highlighted in the sources provided:

  1. Heat Retention: Artificial turf can become extremely hot in summer, posing a risk of burns to children and radiating heat that can impact the surrounding environment, leading to increased energy consumption for cooling homes and buildings1.
  2. Loss of Biodiversity: Artificial turf lacks the biodiversity found in natural grass, impacting the soil’s carbon storage and the living systems below the ground. This lack of biodiversity can disrupt the soil fauna and critters, affecting the ecosystem’s balance and carbon storage capacity1.
  3. Disposal and Solid Waste Pollution: Artificial turf typically lasts for 8 to 10 years and is disposed of in landfills after use, contributing to solid waste pollution. Components of the turf system may not be easily recyclable, leading to environmental concerns related to waste management5.
  4. Microplastic Pollution: Migration of rubber and plastic particles from artificial turf into the environment can contribute to microplastic pollution, impacting wildlife habitats and ecosystems. This pollution can have long-lasting effects on the environment and wildlife5.
  5. Climate Change Impact: Choosing artificial turf over natural grass eliminates the potential for carbon capture in healthy soil ecosystems, contributing to the urban heat island effect. This loss of green space and carbon storage can have implications for climate change mitigation efforts
  6. Health Concerns: Artificial turf can trap heat, leading to concerns about heat-related illnesses and skin burns for athletes playing on these fields. The surface temperature of artificial turf can be significantly higher than natural grass, posing risks to athletes’ health and safety5.

In conclusion, while artificial turf offers benefits like low maintenance and consistent playing surfaces, it is essential to consider its environmental impacts, including heat retention, loss of biodiversity, waste disposal issues, microplastic pollution, climate change implications, and health concerns. Understanding these impacts can help individuals and communities make informed decisions when choosing between natural and artificial turf for their outdoor spaces.

How does the environmental impact of artificial turf compare to natural grass?

The environmental impact of artificial turf compared to natural grass depends on several factors, including maintenance, carbon footprint, air pollutants, eutrophication, and ecotoxic emissions.

According to a study by Zurich University of Applied Sciences, natural turf causes 60% and 45% of the greenhouse gas emissions of natural turf, naturally drained and with a drainage layer, respectively, due to maintenance. On the other hand, artificial turf with and without infill only causes 8% and just over 1% of the environmental impact from maintenance3. However, renovation causes 45% to 48% and disposal 20% to 23% of the greenhouse gas emissions of artificial turf.

In terms of air pollutants and the eutrophication of seas and soils, the environmental impact of artificial turf is significantly lower than that of natural turf, mainly due to the maintenance of natural turf, including the burning of diesel during lawn-mowing and the use of artificial fertilisers. However, natural turf and artificial turf differ most in terms of ecotoxic emissions, with plant protection products used on natural turf releasing toxic effects into the environment.

A preliminary life cycle assessment suggested that the environmental impacts of artificial turf fields were lower than equivalent grass fields. However, artificial turf can become extremely hot in summer, posing a risk of burns to children and radiating heat that can impact the surrounding environment, leading to increased energy consumption for cooling homes and buildings. Artificial turf also lacks the biodiversity found in natural grass, impacting the soil’s carbon storage and the living systems below the ground.

In conclusion, while artificial turf may have lower environmental impacts in some areas, such as air pollutants and eutrophication, it can have higher impacts in others, such as ecotoxic emissions and heat retention. Natural grass, on the other hand, has higher maintenance costs but contributes to carbon sequestration, helps maintain a healthier ecosystem, and provides a natural aesthetic. Ultimately, the choice between natural and artificial turf depends on the specific needs and priorities of the user, including factors such as maintenance costs, environmental impact, and aesthetic preferences.

What are the specific environmental impacts of artificial turf?

The specific environmental impacts of artificial turf include:

  1. Heat Retention: Artificial turf can become extremely hot in summer, posing a risk of burns to children and radiating heat that can impact the surrounding environment, leading to increased energy consumption for cooling homes and buildings.
  2. Lack of Biodiversity: Artificial turf does not support the biodiversity found in natural grass, impacting the carbon in the soil and the living systems below the ground. This lack of biodiversity disrupts the soil fauna and critters, affecting the ecosystem’s balance and carbon storage capacity.
  3. Microplastic Pollution: Migration of rubber and plastic particles from artificial turf into the environment can contribute to microplastic pollution, impacting wildlife habitats and ecosystems. This pollution can have long-lasting effects on the environment and wildlife5.
  4. Environmental Damage: Artificial turf can cause environmental damage, including the consumption of raw materials and energy, emissions to air, water, and land. The lack of transpiration and heat trapping in the plastic and rubber materials elevate the surface temperature of artificial turf, especially under direct sunlight.
  5. Greenhouse Gas Emissions: The production and transportation of artificial turf release large amounts of greenhouse gases. If the components of artificial turf are not recycled at the end of its life, the greenhouse gas emissions from the artificial turf field would nearly double.
  6. Infill Concerns: The infill used in artificial turf, such as silica sand and granulated rubber made from old car tires, can contribute to environmental issues. Sharp edges in the infill material can break off grass blades, and loose infill material can spread and impact aquatic environments.
  7. Soil and Groundwater Contamination: The use of chemicals on natural grass fields for maintenance can cause soil and groundwater contamination. Artificial turf eliminates the need for chemicals, reducing the risk of contamination.

These specific environmental impacts highlight the importance of considering the broader implications of choosing artificial turf over natural grass, especially in terms of sustainability, biodiversity, pollution, and resource consumption.

What are the health risks associated with artificial turf?

Artificial turf has been associated with several health risks, including skin abrasions, bacterial infections, and heat-related illnesses. Turf burns, or skin abrasions, are more common on artificial turf than on natural grass and can increase the risk of bacterial infections. Studies have implicated artificial turf as a source of methicillin-resistant Staphylococcus aureus (MRSA) in athletes.

In sunny, warm weather, artificial turf can become much hotter than natural grass, raising concerns of heat-related illness and skin burns for athletes playing on the fields. Heat-related illness can be a life-threatening emergency.

Chemicals identified in artificial turf, including polycyclic aromatic hydrocarbons (PAHs), phthalates, and per- and polyfluoroalkyl substances (PFAS), are known carcinogens, neurotoxicants, mutagens, and endocrine disruptors. However, few studies have looked directly at health outcomes of exposure to these chemicals in the context of artificial turf.

Ecotoxicology studies in invertebrates exposed to crumb rubber have identified risks to organisms whose habitats have been contaminated by artificial turf. Chicken eggs injected with crumb rubber leachate also showed impaired development and endocrine disruption.

The only human epidemiology studies conducted related to artificial turf have been highly limited in design, focusing on cancer incidence. In addition, government agencies have begun their own risk assessment studies to aid community decisions.

Additional studies in in vitro and in vivo translational models, ecotoxicological systems, and human epidemiology are strongly needed to consider exposure from both field use and runoff, components other than crumb rubber, sensitive windows of development, and additional physiological endpoints. Identification of potential health effects from exposures due to spending time at artificial turf fields and adjacent environments that may be contaminated by runoff will aid in risk assessment and community decision making on the use of artificial turf.

Which turf looks the best?

When it comes to choosing the best turf for your needs, there are several factors to consider, including the type of turf, its appearance, durability, and environmental impact.

If you are looking for a natural-looking turf, you can choose one that includes various colors to mimic the look of real grass. High-quality artificial grass will have a blend of different shades of green, and some may also include brown or tan fibers to resemble dead grass and provide a more natural appearance.

Durability is another important factor to consider. The best artificial grass is specifically designed to resist matting and laying flat, with turf fibers that return to an upright position when you walk across them. This is partly due to the structure of the fibers and partly to the infill that’s used. Rounded silica sand infill and T°Cool’s Evaporative Cooling Infill are recommended for their ability to keep the synthetic turf springy and cool, just like the real thing.

A quality turf drainage system is also essential to ensure that water and pet urine can pass through the turf and into the sub-base below. There are two types of turf backings or drainage systems: 100% permeable and hole-punched. The 100% permeable backing allows water and pet urine to pass directly through any point in the turf, while hole-punched backing has drainage holes every few inches and is best for dry areas that seldom see excess runoff.

Antimicrobial properties are also important if you have pets or children on your lawn often. Antimicrobial additives can be added during the manufacturing process to help prevent the buildup of odors from pet urine, as well as germs and bacteria, keeping your backyard denizens clean and healthy.

When it comes to the appearance of your turf, you can choose from a variety of colors and textures to match the natural grass in your area. A close-up photo or sample of grass from a neighboring lawn can be used as a guide when choosing a color and texture of artificial grass for your lawn.

In terms of environmental impact, artificial turf has both advantages and disadvantages. While it does not require water or pesticides, it can contribute to microplastic pollution and may not provide the same ecological benefits as natural grass. However, some artificial turf products are made from eco-friendly materials, such as recycled plastic, and can be recycled at the end of their life.

In conclusion, when choosing the best turf for your needs, it is important to consider factors such as appearance, durability, drainage, antimicrobial properties, and environmental impact. By carefully evaluating your options, you can find a turf that meets your needs and enhances the beauty and functionality of your outdoor space.

How to maintain artificial turf to keep it looking fresh?

Credit: Google

To maintain artificial turf and keep it looking fresh, follow these key steps:

  1. Regular Cleaning: Remove debris like leaves, twigs, and dirt by using a leaf blower, stiff broom, or garden vacuum. This helps prevent the buildup of dirt and keeps the turf looking clean and vibrant.
  2. Deep Cleaning: Periodically perform a deeper clean by using a flexible lawn rake or power brush to agitate the turf fibers, keeping them upright and removing deeper debris. Rinse the turf with a garden hose to wash away dust and pollen, ensuring proper drainage.
  3. Stain Removal: Address stains promptly to prevent them from setting in. Blot liquid spills with a clean, dry cloth and use a mixture of mild detergent and water to gently scrub the stain. For tougher stains like oil-based stains, gum, or pet waste, use appropriate cleaning solutions or methods.
  4. Odor Management: Artificial turf can trap odors, especially from pet urine. Use a water-vinegar mixture to neutralize odors and disinfect the turf. Regular rinsing with water and applying natural deodorizers can also help maintain a fresh-smelling lawn.
  5. Preventive Measures: Implement preventive measures to extend the lifespan and preserve the aesthetics of your artificial turf. This includes periodic inspection for wear, damage, or drainage issues, using pet-friendly cleaning products, checking the infill level, and preventing weed growth.
  6. Proper Maintenance Tools: Use the right tools for maintenance, such as a leaf blower, rake, brush, and hose with a light pressure setting. These tools help in keeping the turf clean and well-maintained.

By following these maintenance tips, you can ensure that your artificial turf remains in excellent condition, looking fresh and vibrant year-round. Regular care and attention will help preserve the longevity and appearance of your synthetic lawn, making it a worthwhile investment for any homeowner or facility manager.

What are the benefits of using artificial turf over natural grass?

Artificial turf offers several benefits over natural grass, including:

  1. Reduced Maintenance: Artificial turf requires minimal maintenance compared to natural grass, which needs regular mowing, watering, and fertilizing. This saves time and money for homeowners and facilities managers.
  2. Durability: Artificial turf is highly durable and can withstand heavy foot traffic, making it an excellent choice for sports fields, playgrounds, and high-traffic areas.
  3. All-weather Use: Artificial turf is weather-resistant and can be used all year round, regardless of rain or sun. It drains quickly and efficiently, preventing floods or standing water.
  4. Extensive Uses: Artificial turf can be used in various settings beyond gardens, such as decks, swimming areas, roof terraces, play areas, offices, exhibition spaces, balconies, dining establishments, hotels, gyms, and more.
  5. Safe for Children and Pets: Artificial turf is soft, cushioned, and free from chemicals and pesticides, making it safer for children and pets. Some brands also contain anti-bacterial properties to prevent the spread of germs and bacteria.
  6. Cost-effective: Artificial turf is a cost-effective solution in the long run, as it does not require watering, fertilizing, or mowing. It is also immune to climate challenges and can be used in indoor spaces.
  7. Aesthetically Pleasing: Artificial turf can be customized to your preferences, with various colors, heights, densities, textures, and designs available. It can mimic the look of natural grass while providing a consistent and clean appearance.
  8. Environmentally Friendly: Artificial turf can be produced using recycled materials, reducing its environmental impact. It also eliminates the need for harsh fertilizers, which can harm the local environment.
  9. Consistent Finish: Artificial turf provides a clean and consistent finish, reducing maintenance costs and eliminating patchiness, discoloration, weeds, or mud.
  10. Proper Drainage: Artificial turf is designed with small holes for proper drainage, making it a safer and more convenient option for outdoor activities.

However, there are also some downsides to artificial turf, such as the initial cost of installation and the potential for heat absorption in hot weather. It is essential to weigh the pros and cons and consider your specific needs and circumstances when deciding between artificial turf and natural grass.

Conclusion:

Choosing the right turf for your US lawn depends on several factors, including your location, climate, and maintenance preferences. Bermuda grass, Zoysia grass, Fescue grass, St. Augustine grass, and Centipede grass are all popular options that offer unique benefits. By considering these factors and working with a local turf expert, you can create a beautiful and functional lawn that meets your needs and exceeds your expectations.

FAQs:

What is the best turf for high-traffic areas?

Bermuda grass, Zoysia grass, and Fescue grass are all excellent choices for high-traffic areas due to their dense root systems and ability to withstand heavy foot traffic.

What is the best turf for drought-prone areas?

Bermuda grass and Zoysia grass are both drought-tolerant turfs that require minimal watering and maintenance.

What is the best turf for shady areas?

Fescue grass is a cool-season turf that thrives in both sun and shade, making it an excellent choice for areas with mixed lighting conditions.

What is the best low-maintenance turf?

Centipede grass is a low-maintenance turf that requires minimal watering and fertilization.

What is the best turf for sports fields?

Bermuda grass is a popular choice for sports fields due to its ability to withstand high foot traffic and maintain its lush appearance.

Transforming Bridesmaids Bouquets into Stunning Bridal Cascades: A DIY Guide

Discover how to turn bridesmaids’ bouquets into breathtaking bridal cascades with this step-by-step DIY guide. Elevate your wedding florals effortlessly!

Introduction: Bridesmaids Bouquets

Are you looking to add a touch of elegance and uniqueness to your bridal bouquet? One creative and budget-friendly way to achieve this is by transforming your bridesmaids’ bouquets into a stunning cascading arrangement. In this blog post, we will guide you through the process of turning ordinary bouquets into a show-stopping bridal cascade that will leave everyone in awe.

How to Transform Bridesmaids Bouquets into Bridal Cascades

Step 1: Selecting the Bouquets

Start by choosing the bridesmaids’ bouquets that you want to transform. Opt for bouquets with a similar color palette or flowers that complement each other well.

Step 2: Disassembling the Bouquets

Carefully deconstruct each bridesmaid bouquet, separating the flowers and greenery. Be gentle to preserve the integrity of the blooms.

Step 3: Creating the Cascade

Begin by selecting a focal flower for the cascade. Build around it with the other flowers and greenery, allowing them to flow downwards in a natural cascade.

Step 4: Securing the Cascade

Use floral wire and tape to secure the cascade together. Make sure it is sturdy and will hold up throughout the day.

Step 5: Finishing Touches

Add any additional flowers or greenery to fill out the cascade and give it a polished look. Trim any excess stems for a clean finish.

What is a bridal cascading bouquet?

Credit: Google

A bridesmaids bouquets is a traditional and stylish form of bridal bouquet where the flowers are arranged to look as if they are flowing over the bride’s hands and down towards her feet. This style of bouquet can be extremely large, but the smaller modern versions are often known as teardrop or trail bouquets. Cascading bouquets were originally dubbed “shower bouquets” and over the years have also been called teardrop bouquets and trail as they are rounded at the top and trail downwards into a point – like an upside-down teardrop1. This is a bold style perfect for brides who desire to make a dramatic statement with their florals.

What are some other types of bridal bouquets?

Credit: Google

There are several types of bridal bouquets to choose from, each with its unique style and design. Here are some of the most popular types of bridal bouquets:

  1. Hand-tied Bouquet: A hand-tied bouquet is a simple and elegant style of bridal bouquet that consists of a bunch of flowers with stems grouped together in an unstructured way. It is typically tied with a ribbon and can be made with a variety of flowers and greenery.
  2. Nosegay Bouquet: A nosegay bouquet is a more structured bouquet that consists of a small, tightly packed group of flowers. The stems are all cut to the same length and wrapped tightly in ribbon or lace, giving it a stiff backing to hold its shape.
  3. Biedermeier Bouquet: A Biedermeier bouquet is a unique style of bouquet that features flowers arranged in tight concentric circles of contrasting colored flowers, creating a dramatic effect. It is similar to a nosegay in structure but has a more artistic and unique look.
  4. Pomander Bouquet: A pomander bouquet, also known as a kissing ball, is a spherical or ball-shaped bouquet carried by a loop of ribbon. It is an unusual choice for a bride but can be a fun and unique option for bridesmaids or flower girls.
  5. Composite Bouquet: A composite bouquet is constructed using hundreds of single petals all wired together on a single stem to look like one large flower. This can be an expensive option but adds an elegant and unique touch to your wedding ensemble.
  6. Presentation Bouquet: A presentation bouquet, also known as an arm sheath or pageant bouquet, is a striking alternative to traditional bouquet shapes. The bride carries a number of long-stemmed flowers such as calla lilies, delphiniums, or long-stemmed roses, cradled in her arms in the style of an actress presented with flowers at the end of a show.
  7. Cascade Bouquet: A cascade or shower bouquet is a traditional and stylish form of bouquet where the flowers are arranged to look as if they are flowing over the bride’s hands and down towards her feet. This style of bouquet can be extremely large, but the smaller modern versions are often known as teardrop or trail bouquets.
  8. Basket Bouquet: A basket bouquet is a popular choice for outdoor or garden weddings, partly because of its rustic charm, and partly because the flowers can be arranged in an oasis inside the basket. This means that the flowers won’t wilt as quickly as with other styles of bouquet.
  9. Tussy Mussy Bouquet: A tussy mussy bouquet is simply a nosegay style bouquet carried in a small vase. The vase can be made from metal, porcelain, or any other material that works with your wedding scheme. Some tussy mussy bouquets come with a small chain to make carrying them easier.
  10. Fan Bouquet: A fan bouquet is perfect for a vintage wedding, and consists of a simple plastic fan intertwined with flowers and leaves. This gives a very striking shape, and it stands out from traditional bridal bouquets.

When choosing a bridal bouquet, it’s essential to consider the style and design of your wedding dress, the venue, and your personal preferences. A bridal bouquet is a significant accessory that can complement your overall look and add a touch of elegance and beauty to your wedding day.

Turning bridesmaids bouquet to bridal cascading

Credit: Google

A bridal cascading bouquet is a traditional and elegant style of bouquet where the flowers and greenery are arranged to flow downwards from a rounded top, creating a waterfall-like effect. This style of bouquet is often referred to as a cascade bouquet, shower bouquet, or teardrop bouquet. Cascading bouquets can be large or small, and the flowers used can vary depending on the bride’s preference. They can be made with a mix of dried and fresh flowers, and the size and grandeur of the bouquet can be balanced with a simple wedding dress and accessories.

Transforming a bridesmaid’s bouquet into a bridal cascading bouquet can be a creative and cost-effective way to create a unique and personalized bridal bouquet. To do this, the bridesmaid’s bouquet can be carefully disassembled, and the flowers and greenery can be rearranged into a cascading shape. This can be achieved by selecting a focal flower and building around it with the other flowers and greenery, allowing them to flow downwards in a natural cascade. The cascade can then be secured with floral wire and tape, and any additional flowers or greenery can be added to fill out the bouquet and give it a polished look.

When transforming a bridesmaid’s bouquet into a bridal cascading bouquet, it’s essential to consider the size and weight of the bouquet, as cascading bouquets can be heavier than other styles of bouquets. It’s also important to consider the style and design of the wedding dress, as a cascading bouquet can create a dramatic and elegant look that complements a simple and sophisticated wedding dress.

In summary, transforming a bridesmaid’s bouquet into a bridal cascading bouquet can be a creative and cost-effective way to create a unique and personalized bridal bouquet. By carefully disassembling the bridesmaid’s bouquet and rearranging the flowers and greenery into a cascading shape, a beautiful and elegant bridal bouquet can be created that complements the style and design of the wedding dress.

Credit: Google

What are some tips for carrying a bridal cascading bouquet?

Carrying a bridal cascading bouquet can be a bit challenging, as it is larger and heavier than other types of bouquets. Here are some tips to help you carry your bouquet without getting it dirty:

  • Hold it with both hands: Hold the bouquet with both hands, one hand on the base and the other hand on the stems. This will help distribute the weight of the bouquet and prevent it from tilting or drooping.
  • Keep it close to your body: Keep the bouquet close to your body, as this will help prevent it from getting caught on anything or being knocked over.
  • Avoid touching the flowers: Try to avoid touching the flowers as much as possible, as this can damage them and cause them to wilt.
  • Use a bouquet holder: Consider using a bouquet holder, as this can help support the weight of the bouquet and prevent it from getting damaged.
  • Practice walking with it: Practice walking with the bouquet before the wedding day, as this will help you get a feel for its weight and movement.

How to accessorize a bridal cascading bouquet?

When it comes to accessorizing a bridal cascading bouquet, there are several options to consider. Here are some popular accessories that can complement the beauty of a cascading bouquet:

  • Ribbons and bows: Adding a ribbon or bow around the base of the bouquet can add a touch of elegance and sophistication. You can choose a ribbon that matches the color scheme of your wedding or opt for a contrasting color to make the bouquet stand out.
  • Pearls and crystals: Incorporating pearls or crystals into the bouquet can add a touch of glamour and sparkle. You can add pearls or crystals to the ribbon or bow, or use them to accentuate the flowers and greenery.
  • Fresh or dried flowers: Adding fresh or dried flowers to the bouquet can add texture and interest. You can use flowers that complement the colors of the bouquet or choose flowers that have a special meaning to you.
  • Feathers and branches: Incorporating feathers or branches into the bouquet can add a natural and organic feel. You can use feathers or branches that match the color scheme of your wedding or choose ones that add a pop of color.

What are some popular color schemes for bridal cascading bouquets?

Choosing the right color scheme for a bridal cascading bouquet is important, as it can help tie together the overall look and feel of your wedding. Here are some tips to help you choose the right color scheme:

  • Consider the color scheme of your wedding: Your bridal cascading bouquet should complement the overall color scheme of your wedding. Consider the colors of your bridesmaids’ dresses, the decorations, and the flowers in your venue.
  • Choose colors that complement your skin tone: The colors in your bouquet should complement your skin tone. If you have a warm skin tone, opt for colors like orange, yellow, and red. If you have a cool skin tone, opt for colors like blue, purple, and green.
  • Think about the time of year: The time of year can also influence the color scheme of your bouquet. For example, if you’re getting married in the fall, you might opt for colors like orange, red, and yellow. If you’re getting married in the spring, you might opt for colors like pink, purple, and yellow.

How to choose the right color scheme for a bridal cascading bouquet?

Credit: Google

When choosing the right color scheme for a bridesmaids bouquets, there are several factors to consider. First, consider the color scheme of your wedding, including the dresses of the bridesmaids and the overall theme of the wedding. The bouquet should reflect the overall wedding theme, but it does not need to include all the colors used in the wedding decorations.

Second, consider the season of your wedding. Certain colors are more abundant during different times of the year. For example, red roses are abundant in the winter months due to Christmas and Valentine’s Day, while mums are prevalent in the Fall and peonies, in their blush hues, are found in late Spring early Summer. You can still have all white in your bouquet and then add some of the seasonal colors to complement.

Third, consider the shape and size of the bouquet. The color is just one element of the design, and talking to your florist and having their artistic suggestions will guide you in making the best choices.

Some popular color schemes for bridal cascading bouquets include soft pink peonies and greens, pale peach peonies and tulips, and shades of burgundy with trailing berries. These color schemes are elegant and sophisticated, perfect for a bridal cascading bouquet.

To accessorize a bridal cascading bouquet, consider adding ribbons or pearls to the stems for a touch of elegance and sophistication. Incorporating feathers or branches can add a natural and organic feel. For a more subtle vibe, consider using a smaller number of flowers, such as pale peach peonies and tulips, and adding a fabulous feminine touch with ribbon.

To carry a bridal cascading bouquet without getting it dirty, hold it with both hands, one hand on the base and the other hand on the stems, to distribute the weight and prevent it from tilting or drooping. Keep it close to your body, avoid touching the flowers, and use a bouquet holder if necessary. Practice walking with the bouquet before the wedding day to get a feel for its weight and movement.

In summary, when choosing the right color scheme for a bridal cascading bouquet, consider the color scheme of your wedding, the season of your wedding, and the shape and size of the bouquet. Accessorize the bouquet with ribbons or pearls, and practice carrying it before the wedding day to ensure it stays clean and beautiful throughout the ceremony.

What are some popular color combinations for a bridal cascading bouquet?

Some popular color combinations for a bridal cascading bouquet include:

  1. Red and white: A classic and timeless color combination that adds elegance and sophistication to the bouquet.
  2. Pink and white: Soft and romantic, this color combination is perfect for a feminine and delicate cascading bouquet.
  3. Shades of burgundy: Rich and luxurious, burgundy paired with cream or pastel colors creates a stunning and dramatic bouquet.
  4. Blush and ivory: A timeless and elegant color scheme that exudes sophistication and grace.
  5. Coral and peach: Vibrant and cheerful, coral and peach tones add a pop of color and energy to the cascading bouquet.
  6. Pastel colors: Soft pink, lavender, and mint green create a delicate and dreamy cascading bouquet perfect for a romantic wedding.
  7. Earthy tones: Olive green, burnt orange, and deep browns bring a natural and rustic feel to the bouquet, ideal for a boho or outdoor wedding.

These color combinations can be customized to suit your wedding theme, personal style, and the season of your wedding.

Conclusion: Bridesmaids Bouquets

Transforming bridesmaids’ bouquets into a stunning bridal cascade is a creative way to elevate your wedding florals and add a personal touch to your bouquet. By following our step-by-step guide, you can create a cascading arrangement that will be the highlight of your wedding day.

FAQs: Bridesmaids Bouquets

Can I use different types of flowers for the bridal cascade?

Yes, you can mix and match different types of flowers to create a unique and personalized bridal cascade.

How far in advance should I transform the bouquets?

It is recommended to transform the bouquets a day or two before the wedding to ensure they look fresh and vibrant on the big day.

Do I need any special tools for this DIY project?

You will need floral wire, floral tape, scissors, and possibly some ribbon or decorative elements to complete the transformation.