Discover essential epoxy flooring maintenance tips to keep your floors pristine. Learn cleaning techniques, scratch repair, UV protection, and avoid common mistakes.
Description
Epoxy floors are celebrated for their durability and glossy finish, but even the toughest surfaces require proper care to retain their beauty. Whether you’ve installed epoxy in your garage, kitchen, or commercial space, this guide dives into actionable strategies to maintain its longevity. From daily cleaning routines to tackling stubborn stains and preventing UV damage, learn how to protect your investment and avoid costly repairs.
Credit:YouTube
Epoxy Flooring Maintenance: A Comprehensive Guide
Why Epoxy Floor Maintenance Matters
Epoxy floors resist stains, chemicals, and heavy foot traffic, but neglect can lead to dullness, scratches, or peeling. Proper maintenance:
Extends lifespan (up to 20+ years).
Preserves aesthetics for homes and businesses.
Prevents bacterial growth in high-moisture areas.
Daily and Weekly Cleaning Tips
Sweep or Dust Mop Daily: Grit and debris act like sandpaper, causing micro-scratches. Use microfiber mops for dust-free cleaning.
pH-Neutral Cleaners: Avoid vinegar or ammonia, which degrade the epoxy’s topcoat. Opt for mild detergents diluted in warm water.
Soft-Bristle Brushes: For textured floors, gently scrub to dislodge dirt without damaging the surface.
Handling Spills and Stains
Oil/Grease: Absorb immediately with kitty litter, then clean with a degreaser.
Acidic Substances (e.g., citrus, soda): Wipe within 10 minutes to prevent etching.
Paint or Adhesives: Use a plastic scraper and acetone sparingly.
Preventing Scratches and Damage
Felt Pads: Attach to furniture legs.
Avoid Sharp Objects: Lift heavy equipment instead of dragging.
Rugs in High-Traffic Zones: Use non-rubber-backed mats to prevent discoloration.
UV Protection for Epoxy Floors
Sunlight causes yellowing in pigmented epoxies. Combat this by:
Installing UV-blocking window films.
Using polyurethane topcoats with UV inhibitors.
Choosing metallic epoxy (naturally UV-resistant) for sunlit areas.
When to Recoat Your Epoxy Floor
Recoat every 3–5 years depending on traffic. Signs include:
Fading or dullness.
Minor chips or peeling.
Loss of slip resistance.
Common Maintenance Mistakes to Avoid
Using Abrasive Tools: Steel wool or hard-bristle brushes create scratches.
Ignoring Spills: Even water can leave spots if left untreated.
Over-Wetting: Excess moisture seeps into seams, causing delamination.
FAQs
Q: Can I use vinegar to clean epoxy floors?
A: No. Vinegar’s acidity breaks down the epoxy’s protective layer. Stick to pH-neutral cleaners.
Q: How often should I deep-clean epoxy floors?
A: Monthly. Use an auto-scrubber or soft-bristle machine for large areas.
Q: Can scratches be repaired without recoating?
A: Light scratches buff out with polishing compounds. Deeper ones may require a fresh topcoat.
Q: Does epoxy yellow over time?
A: Only non-UV-resistant formulas. Choose aliphatic polyurethane topcoats for sunlight exposure.
Q: Is epoxy safe for pet paws?
A: Yes! Epoxy is non-porous and resistant to pet stains. Ensure proper curing before use.
Conclusion
Epoxy flooring is a long-term investment that thrives with consistent care. By adopting simple habits like daily sweeping, prompt spill cleanup, and UV protection, you’ll maintain its luxurious appeal for decades. For complex issues like recoating, consult professionals to avoid costly errors. Explore our guides on DIY epoxy projects and metallic epoxy floors to elevate your space further.
Discover how to create stunning metallic epoxy floors on a budget. Step-by-step guide for beginners to mimic marble or granite finishes.
Metallic Epoxy Floors: The Secret to Affordable Luxury Under Your Feet
Introduction Tired of dull, outdated floors but worried about the cost of high-end materials like marble or granite? Enter metallic epoxy floors—the DIY-friendly solution that delivers jaw-dropping, luxurious finishes without breaking the bank. Whether you’re revamping your garage, basement, or living room, this step-by-step guide will show you how even beginners can create showstopping floors that look like they cost a fortune. Ready to transform your space? Let’s dive in!
Credit: Google
Why Choose Metallic Epoxy Floors?
The Budget-Friendly Luxury Secret
Metallic epoxy floors combine durability with artistic flair. Unlike traditional stone or tile, epoxy is:
Affordable: Costs 60–70% less than natural stone.
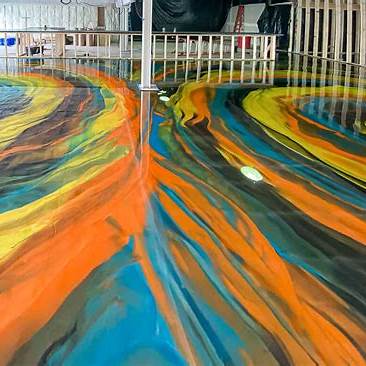
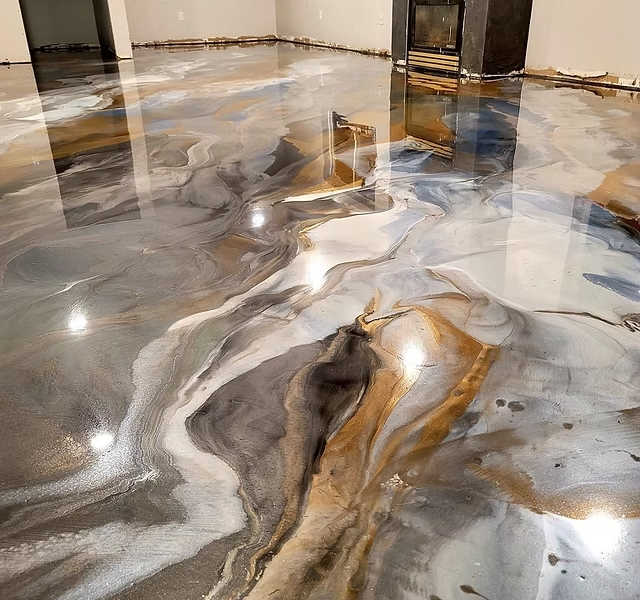
Customizable: Create marble veins, granite speckles, or cosmic designs.
Durable: Resists stains, scratches, and moisture.
Perfect for Beginners
You don’t need professional skills! With the right tools and patience, you’ll achieve a flawless finish.
Pro Tip: Buy 10–20% extra epoxy to account for mistakes.
Step-by-Step Tutorial: Mimicking Marble & Granite
Step 1: Prep Your Surface
Keyword: How to prepare floors for metallic epoxy
Clean thoroughly: Remove grease, dust, and debris.
Etch the concrete: Use a grinder or etching solution for better adhesion.
Repair cracks: Fill gaps with epoxy filler.
Why It Matters: Skipping prep leads to peeling or bubbles.
Step 2: Apply the Base Coat
Mix epoxy resin and hardener as directed.
Pour onto the floor and spread with a squeegee.
Let cure for 12–24 hours.
Credit:YouTube
Step 3: Create the Metallic Effect
Keyword: Achieving metallic swirls on epoxy floors
Mix metallic pigments into a clear epoxy layer.
Pour small sections and use a heat gun to create swirls (marble effect) or speckles (granite).
Work quickly—epoxy sets fast!
Credit:YouTube
Step 4: Seal with a Topcoat
Apply a UV-resistant topcoat to protect against yellowing.
Let cure for 48 hours before walking.
Pro Tips for Beginners
Practice First: Test techniques on a spare board.
Work in Teams: Epoxy dries fast—divide tasks.
Avoid Overworking: Less blending = more natural veins.
Maintenance & Longevity
Clean with pH-neutral soap.
Reapply topcoat every 3–5 years.
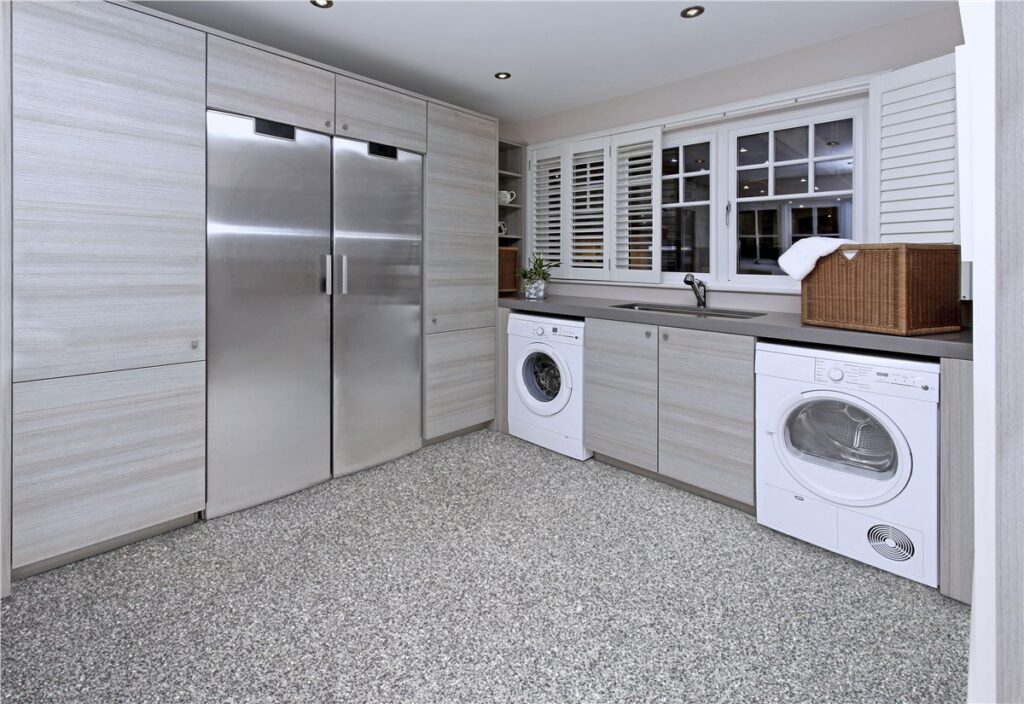
Epoxy flooring is a versatile and durable option for various spaces, including small areas like bathrooms, laundry rooms, and closets. Its seamless application creates a smooth, continuous surface that can make compact rooms appear larger. Additionally, epoxy’s durability and resistance to moisture make it a practical choice for spaces like bathrooms and laundry rooms.
FAQs: Metallic epoxy floors
Is epoxy flooring suitable for small spaces?
Yes, epoxy flooring is ideal for small areas. Its seamless application creates a smooth, continuous surface that can make compact rooms appear larger. Additionally, epoxy’s durability and resistance to moisture make it a practical choice for spaces like bathrooms and laundry rooms.
What are the benefits of using epoxy flooring in small areas?
Epoxy flooring offers several advantages: Durability: It withstands heavy foot traffic and resists scratches and abrasions. Moisture Resistance: Ideal for areas prone to spills or humidity, such as bathrooms and laundry rooms. Aesthetic Appeal: Available in various colors and finishes, epoxy can enhance the look of any small space. Easy Maintenance: Its smooth surface makes cleaning simple, requiring only regular sweeping and occasional mopping.
How long does epoxy flooring last in residential settings?
In residential environments, epoxy floors can last between 5 to 20 years, depending on factors like foot traffic and maintenance. Proper installation and regular care can significantly extend the lifespan of your epoxy flooring.
Can I install epoxy flooring myself in a small space?
While DIY installation is possible, achieving a flawless finish requires careful surface preparation and application. For small areas, hiring a professional ensures proper installation and longevity of the flooring.
Are there design options suitable for small spaces?
Absolutely. Opting for light colors can make a room feel more spacious, and incorporating subtle patterns or a glossy finish can add depth and reflect light, enhancing the overall appearance of the space.
Is epoxy flooring slippery?
Epoxy floors can be slippery when wet due to their glossy finish. To mitigate this, consider adding non-slip additives or choosing a textured finish, especially in areas prone to moisture like bathrooms.
How do I maintain epoxy flooring in small spaces?
Maintenance is straightforward: Regular Cleaning: Sweep or vacuum to remove debris. Mopping: Use a damp mop with mild detergent as needed. Avoid Harsh Chemicals: Steer clear of abrasive cleaners that can damage the surface. By following these simple steps, your epoxy flooring will remain in excellent condition for years.
Conclusion: Metallic epoxy floors
Epoxy flooring is a practical and stylish solution for small spaces, offering both aesthetic and functional benefits. Whether you’re renovating a bathroom, laundry room, or closet, epoxy can enhance the space’s appearance and durability.
For a visual demonstration of epoxy application techniques, you might find this video helpful:
Discover how epoxy flooring small spaces can transform small spaces like bathrooms, laundry rooms, and closets with design tips and practical benefits.
Introduction: Epoxy Flooring for Small Spaces
Epoxy flooring has become a popular choice for homeowners looking to enhance the aesthetics and functionality of their living spaces. Its durability, versatility, and ease of maintenance make it an excellent option, especially for small areas like bathrooms, laundry rooms, and closets. In this guide, we’ll explore creative ways to incorporate epoxy flooring into compact spaces, offering design tips and highlighting practical benefits to help you make informed decisions.
Credit:YouTube
Why Choose Epoxy Flooring for Small Spaces?
Epoxy flooring is a resinous material applied over concrete surfaces, creating a seamless and durable finish. It’s renowned for its resistance to moisture, stains, and wear, making it particularly suitable for areas prone to spills and high foot traffic. In small spaces, where every design element counts, epoxy flooring offers both functional and aesthetic advantages.
Design Tips to Transform Compact Areas
1. Opt for Light Colors
Light-colored epoxy floors can make a small room appear larger and more open. Shades like soft gray, beige, or pastel tones reflect light, creating an airy atmosphere. This approach is especially effective in windowless spaces like some bathrooms or closets.
2. Incorporate Reflective Finishes
A glossy epoxy finish enhances light reflection, further amplifying the sense of space. This sheen not only adds a touch of elegance but also contributes to a brighter environment, which is beneficial in compact areas.
3. Utilize Seamless Designs
Epoxy flooring provides a continuous surface without grout lines or seams, which can make a room feel fragmented. This seamless appearance contributes to a more expansive look, ideal for small spaces.
4. Add Subtle Patterns
Introducing gentle marbling or understated patterns can add depth and interest to the floor without overwhelming the space. These designs can create a focal point, drawing attention and adding character to the room.
5. Consider 3D Effects
For the adventurous, 3D epoxy flooring can create an illusion of depth, making the floor appear as though it extends beyond its actual dimensions. This technique can be a conversation starter and add a unique touch to your home.
Credit: Google
Practical Benefits of Epoxy Flooring in Small Areas
Waterproofing
Epoxy flooring is inherently water-resistant, making it an excellent choice for bathrooms and laundry rooms where moisture is a concern. This property helps prevent water damage and mold growth, ensuring longevity.
Easy Maintenance
The smooth, non-porous surface of epoxy floors makes cleaning a breeze. Regular sweeping and occasional mopping are typically all that’s needed to keep the floor looking pristine. This low-maintenance aspect is particularly appealing for busy households.
Durability
Epoxy floors are highly durable and can withstand significant wear and tear. This resilience is beneficial in high-traffic small spaces, ensuring that the flooring remains intact and attractive over time.
Chemical Resistance
In areas like laundry rooms, where detergents and cleaning agents are frequently used, epoxy flooring’s resistance to chemicals prevents staining and degradation, maintaining its appearance and integrity.
Room-Specific Applications
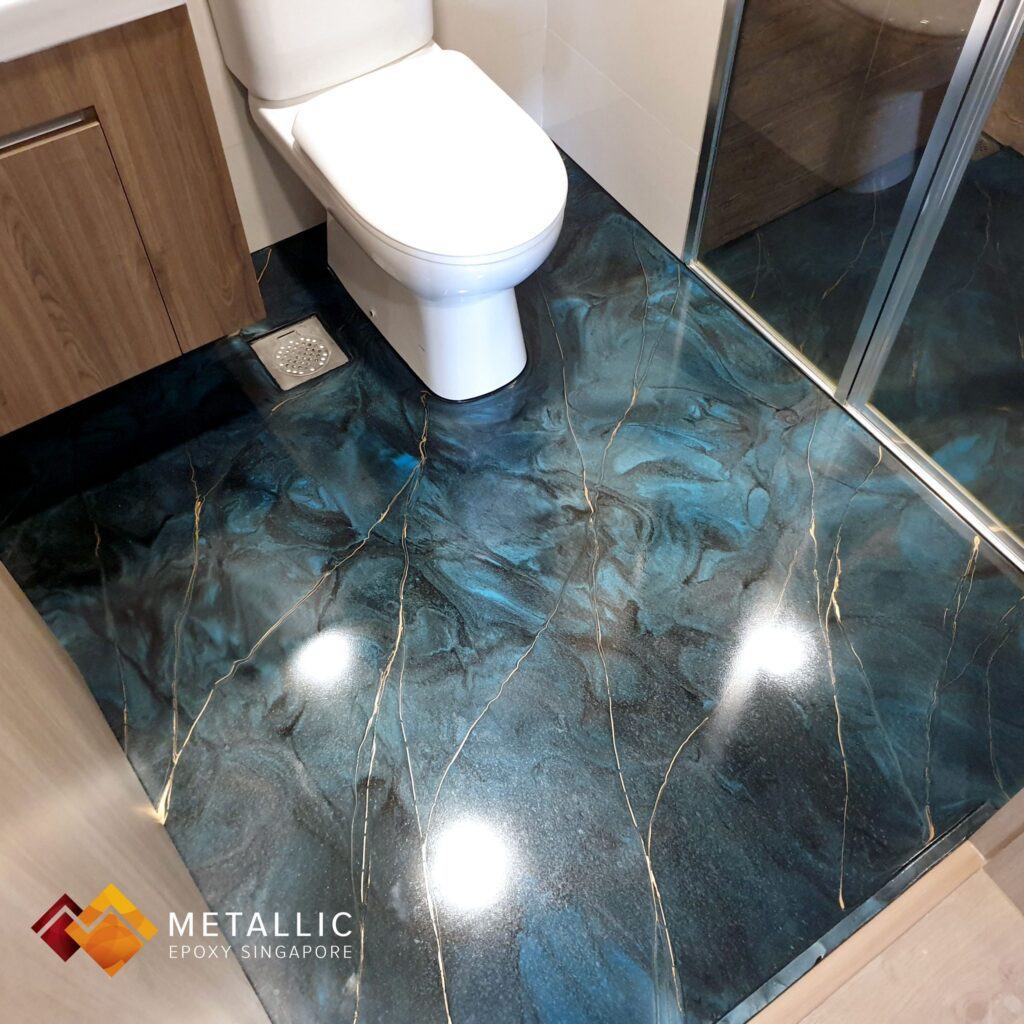
Bathrooms
In bathrooms, epoxy flooring offers a sleek and modern look. Its waterproof nature protects against spills and splashes, while the seamless design prevents dirt accumulation in crevices, promoting a hygienic environment.
Credit: Google
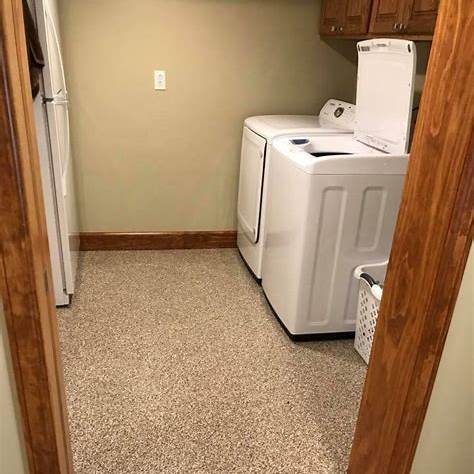
Laundry Rooms
Laundry rooms benefit from epoxy’s resistance to moisture and chemicals. The durable surface can handle the movement of heavy appliances, and any detergent spills can be easily wiped away without leaving stains.
Credit: Google
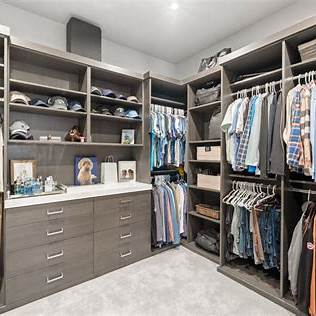
Closets
Transforming a closet with epoxy flooring can add a polished touch. The smooth surface makes it easy to clean, ensuring that dust and debris don’t accumulate, keeping your storage areas tidy.
Installation Considerations
While epoxy flooring offers numerous benefits, proper installation is crucial to achieve the desired results. It’s essential to ensure that the existing floor is adequately prepared, clean, and free of moisture before application. Depending on the complexity and size of the area, hiring a professional installer might be advisable to ensure a flawless finish.
Credit: Google
FAQ: Epoxy Flooring for Small Spaces
Epoxy flooring is a versatile and durable option for various spaces, including small areas like bathrooms, laundry rooms, and closets. Here are some frequently asked questions to help you understand its applications and benefits:
Is epoxy flooring suitable for small spaces?
Yes, epoxy flooring is ideal for small areas. Its seamless application creates a smooth, continuous surface that can make compact rooms appear larger. Additionally, epoxy’s durability and resistance to moisture make it a practical choice for spaces like bathrooms and laundry rooms.
What are the benefits of using epoxy flooring in small areas?
Epoxy flooring offers several advantages: Durability: It withstands heavy foot traffic and resists scratches and abrasions. Moisture Resistance: Ideal for areas prone to spills or humidity, such as bathrooms and laundry rooms. Aesthetic Appeal: Available in various colors and finishes, epoxy can enhance the look of any small space. Easy Maintenance: Its smooth surface makes cleaning simple, requiring only regular sweeping and occasional mopping.
How long does epoxy flooring last in residential settings?
In residential environments, epoxy floors can last between 5 to 20 years, depending on factors like foot traffic and maintenance. Proper installation and regular care can significantly extend the lifespan of your epoxy flooring.
Can I install epoxy flooring myself in a small space?
While DIY installation is possible, achieving a flawless finish requires careful surface preparation and application. For small areas, hiring a professional ensures proper installation and longevity of the flooring.
Are there design options suitable for small spaces?
Absolutely. Opting for light colors can make a room feel more spacious, and incorporating subtle patterns or a glossy finish can add depth and reflect light, enhancing the overall appearance of the space.
Is epoxy flooring slippery?
Epoxy floors can be slippery when wet due to their glossy finish. To mitigate this, consider adding non-slip additives or choosing a textured finish, especially in areas prone to moisture like bathrooms. ascentepoxy.com
How do I maintain epoxy flooring in small spaces?
Maintenance is straightforward: Regular Cleaning: Sweep or vacuum to remove debris. Mopping: Use a damp mop with mild detergent as needed. Avoid Harsh Chemicals: Steer clear of abrasive cleaners that can damage the surface.
By following these simple steps, your epoxy flooring will remain in excellent condition for years.
Epoxy flooring is a practical and stylish solution for small spaces, offering both aesthetic and functional benefits. Whether you’re renovating a bathroom, laundry room, or closet, epoxy can enhance the space’s appearance and durability.
Conclusion: Epoxy Flooring for Small Spaces
Epoxy flooring presents a versatile and practical solution for small spaces, combining aesthetic appeal with functional benefits. By carefully selecting design elements and understanding the advantages epoxy brings, you can transform compact areas into stylish and efficient parts of your home.
Transform your space with epoxy flooring! This beginner-friendly guide covers tools, tips, and step-by-step instructions for a flawless DIY project.
Introduction: Epoxy Flooring
Have you ever walked into a garage or kitchen with that glossy, mirror-like floor and thought, “Wow, how do they do that?” Chances are, it’s epoxy flooring —a durable, stylish, and surprisingly easy-to-install option for DIY enthusiasts. Whether you’re dreaming of a sleek garage floor, a vibrant basement makeover, or even a modern living room upgrade, epoxy flooring has got you covered.
As someone who recently dove into the world of epoxy flooring (and made a few mistakes along the way), I can confidently say this: if I can do it, so can you! In this guide, I’ll share everything I’ve learned about epoxy flooring—from understanding what it is to completing your first project like a pro. Let’s get started!
What Exactly Is Epoxy Flooring?
Before we jump into the fun part (the actual installation), let’s break down what epoxy flooring really is. Simply put, epoxy flooring is a type of surface coating made from two main ingredients: resin and hardener. When mixed together, these components create a chemical reaction that forms a super-strong, adhesive layer.
This makes epoxy flooring perfect for areas that see a lot of action—like garages, workshops, or even commercial spaces. It’s tough enough to handle heavy foot traffic, spills, and even dropped tools without showing signs of wear. And the best part? You don’t need to be a professional to install it. With a little patience and the right tools, anyone can achieve stunning results.
Credit: YouTube
Why Should You Choose Epoxy Flooring for Your DIY Project?
Durability That Won’t Quit
One of the biggest reasons people love epoxy flooring is its incredible durability. Unlike traditional paint or carpet, epoxy doesn’t chip, peel, or fade easily. It’s resistant to stains, chemicals, and even scratches. For busy households or workspaces, this means less maintenance and fewer repairs over time.
Endless Design Possibilities
Another reason epoxy flooring is so popular? The design options are practically limitless. Want a sleek, industrial look for your man cave? Go for a matte gray finish. Dreaming of something bold and eye-catching? Add colorful flakes or metallic pigments for a custom touch. Whatever your style, epoxy flooring lets you express it.
Budget-Friendly Solution
Let’s face it—home improvement projects can get expensive. But epoxy flooring is one of the most cost-effective options out there. Compared to materials like hardwood or tile, epoxy is affordable, especially when you factor in the savings from doing it yourself. Plus, it lasts for years, making it a smart long-term investment.
Getting Started: Tools and Materials You’ll Need
Now that you know why epoxy flooring is worth the effort, let’s talk about what you’ll need to get started. Here’s a quick checklist:
Epoxy Resin and Hardener Kit : Look for kits specifically designed for floors. Brands like Rust-Oleum and GarageTek are great for beginners.
Concrete Grinder/Polisher : Essential for prepping the surface. If you don’t own one, you can rent it from a local hardware store.
Roller Brushes and Paint Trays : These will help you apply the epoxy evenly.
Protective Gear : Don’t forget gloves, goggles, and a mask—safety first!
Drop Cloths and Painter’s Tape : Use these to protect walls and edges during application.
Pro Tip: Always read the manufacturer’s instructions carefully before starting. Each product may have specific mixing ratios and drying times, so pay attention to those details.
Step-by-Step Guide to Installing Epoxy Flooring
Step 1: Prep the Surface
The secret to a successful epoxy flooring project lies in preparation. Start by cleaning the area thoroughly using a degreaser to remove oil, dirt, and grime. Next, use a concrete grinder to roughen up the surface. This step ensures better adhesion between the epoxy and the floor.
Trust me, I skipped this step the first time around, and it showed. The epoxy didn’t stick properly, and I had to start all over again. Lesson learned: prep work is non-negotiable!
Step 2: Fix Cracks and Imperfections
Inspect the floor for cracks or chips. Use a patching compound to fill them in and let it dry completely before moving forward. Smooth out any uneven spots with sandpaper for a flawless base.
Step 3: Mix the Epoxy Components
Follow the instructions provided with your epoxy kit to mix the resin and hardener correctly. Stir slowly and consistently to avoid creating air bubbles, which can ruin the final appearance.
Step 4: Apply the Base Coat
Using a roller brush, apply the first layer of epoxy evenly across the floor. Work in small sections to maintain consistency. Allow this coat to dry according to the recommended time frame (usually 12-24 hours).
Step 5: Add Decorative Elements (Optional)
If you’d like to add color flakes or metallic pigments, sprinkle them onto the wet base coat. These elements not only enhance the visual appeal but also provide additional texture.
Step 6: Seal the Floor
Once the base coat has dried, apply a clear topcoat sealer to lock everything in place. This final layer adds extra shine and protection against scratches and UV damage.
Credit: Google
Common Mistakes to Avoid
Even seasoned DIYers make mistakes, so here are some common errors to watch out for:
Skipping Surface Prep : Failing to clean and grind the floor properly will result in poor adhesion.
Rushing the Process : Patience is key. Don’t rush the drying times between coats.
Overmixing the Epoxy : Too much agitation can introduce air bubbles, leading to an uneven finish.
Maintenance Tips for Longevity
Once your epoxy flooring is installed, follow these simple maintenance tips to keep it looking great:
Sweep regularly to prevent dirt buildup.
Mop with mild soap and water every few weeks.
Avoid dragging heavy furniture directly on the floor; use felt pads instead.
FAQs: Epoxy Flooring
1. What is epoxy flooring, and how does it work?
Epoxy flooring is a durable surface coating made from resin and hardener. When mixed, these components form a strong, adhesive layer that bonds to concrete surfaces. It’s ideal for high-traffic areas due to its resistance to stains, chemicals, and wear.
2. Is epoxy flooring suitable for beginners?
Yes! While it may seem complex, epoxy flooring is beginner-friendly if you follow proper preparation steps and use quality materials. With patience and the right tools, anyone can achieve professional-looking results.
3. How long does epoxy flooring last?
When applied correctly, epoxy flooring can last 10–20 years or more, depending on usage and maintenance. Regular cleaning and avoiding abrasive damage will extend its lifespan significantly.
4. Can I apply epoxy flooring over existing concrete?
Yes, as long as the surface is clean, dry, and properly prepared. This includes grinding the concrete to create a rough texture for better adhesion and repairing any cracks beforehand.
5. How much does it cost to install epoxy flooring?
On average, DIY epoxy flooring costs between $3–$6 per square foot, while professional installation ranges from $5–$12 per square foot.
Conclusion: Epoxy Flooring
Transforming your space with epoxy flooring is a rewarding DIY project that combines creativity with practicality. From its unmatched durability to its aesthetic versatility, epoxy flooring checks all the boxes for modern homeowners. Armed with the knowledge and confidence gained from this guide, you’re ready to embark on your journey toward creating a stunning, long-lasting floor.
So why wait? Grab your tools, roll up your sleeves, and start your epoxy flooring adventure today!