

Transform your space with epoxy flooring! This beginner-friendly guide covers tools, tips, and step-by-step instructions for a flawless DIY project.
Introduction: Epoxy Flooring
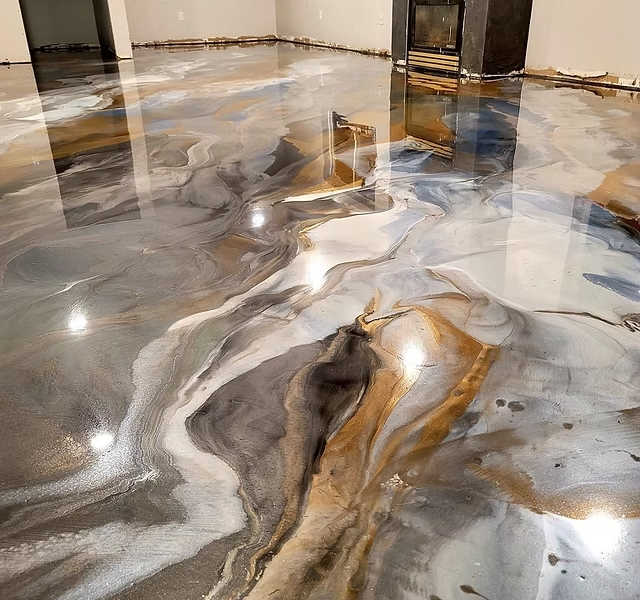
Have you ever walked into a garage or kitchen with that glossy, mirror-like floor and thought, “Wow, how do they do that?” Chances are, it’s epoxy flooring —a durable, stylish, and surprisingly easy-to-install option for DIY enthusiasts. Whether you’re dreaming of a sleek garage floor, a vibrant basement makeover, or even a modern living room upgrade, epoxy flooring has got you covered.
As someone who recently dove into the world of epoxy flooring (and made a few mistakes along the way), I can confidently say this: if I can do it, so can you! In this guide, I’ll share everything I’ve learned about epoxy flooring—from understanding what it is to completing your first project like a pro. Let’s get started!
What Exactly Is Epoxy Flooring?
Before we jump into the fun part (the actual installation), let’s break down what epoxy flooring really is. Simply put, epoxy flooring is a type of surface coating made from two main ingredients: resin and hardener. When mixed together, these components create a chemical reaction that forms a super-strong, adhesive layer.
This makes epoxy flooring perfect for areas that see a lot of action—like garages, workshops, or even commercial spaces. It’s tough enough to handle heavy foot traffic, spills, and even dropped tools without showing signs of wear. And the best part? You don’t need to be a professional to install it. With a little patience and the right tools, anyone can achieve stunning results.

Why Should You Choose Epoxy Flooring for Your DIY Project?
Durability That Won’t Quit
One of the biggest reasons people love epoxy flooring is its incredible durability. Unlike traditional paint or carpet, epoxy doesn’t chip, peel, or fade easily. It’s resistant to stains, chemicals, and even scratches. For busy households or workspaces, this means less maintenance and fewer repairs over time.
Endless Design Possibilities
Another reason epoxy flooring is so popular? The design options are practically limitless. Want a sleek, industrial look for your man cave? Go for a matte gray finish. Dreaming of something bold and eye-catching? Add colorful flakes or metallic pigments for a custom touch. Whatever your style, epoxy flooring lets you express it.
Budget-Friendly Solution
Let’s face it—home improvement projects can get expensive. But epoxy flooring is one of the most cost-effective options out there. Compared to materials like hardwood or tile, epoxy is affordable, especially when you factor in the savings from doing it yourself. Plus, it lasts for years, making it a smart long-term investment.
Getting Started: Tools and Materials You’ll Need
Now that you know why epoxy flooring is worth the effort, let’s talk about what you’ll need to get started. Here’s a quick checklist:
- Epoxy Resin and Hardener Kit : Look for kits specifically designed for floors. Brands like Rust-Oleum and GarageTek are great for beginners.
- Concrete Grinder/Polisher : Essential for prepping the surface. If you don’t own one, you can rent it from a local hardware store.
- Roller Brushes and Paint Trays : These will help you apply the epoxy evenly.
- Protective Gear : Don’t forget gloves, goggles, and a mask—safety first!
- Drop Cloths and Painter’s Tape : Use these to protect walls and edges during application.
Pro Tip: Always read the manufacturer’s instructions carefully before starting. Each product may have specific mixing ratios and drying times, so pay attention to those details.
Step-by-Step Guide to Installing Epoxy Flooring
Step 1: Prep the Surface
The secret to a successful epoxy flooring project lies in preparation. Start by cleaning the area thoroughly using a degreaser to remove oil, dirt, and grime. Next, use a concrete grinder to roughen up the surface. This step ensures better adhesion between the epoxy and the floor.
Trust me, I skipped this step the first time around, and it showed. The epoxy didn’t stick properly, and I had to start all over again. Lesson learned: prep work is non-negotiable!
Step 2: Fix Cracks and Imperfections
Inspect the floor for cracks or chips. Use a patching compound to fill them in and let it dry completely before moving forward. Smooth out any uneven spots with sandpaper for a flawless base.
Step 3: Mix the Epoxy Components
Follow the instructions provided with your epoxy kit to mix the resin and hardener correctly. Stir slowly and consistently to avoid creating air bubbles, which can ruin the final appearance.
Step 4: Apply the Base Coat
Using a roller brush, apply the first layer of epoxy evenly across the floor. Work in small sections to maintain consistency. Allow this coat to dry according to the recommended time frame (usually 12-24 hours).
Step 5: Add Decorative Elements (Optional)
If you’d like to add color flakes or metallic pigments, sprinkle them onto the wet base coat. These elements not only enhance the visual appeal but also provide additional texture.
Step 6: Seal the Floor
Once the base coat has dried, apply a clear topcoat sealer to lock everything in place. This final layer adds extra shine and protection against scratches and UV damage.

Common Mistakes to Avoid
Even seasoned DIYers make mistakes, so here are some common errors to watch out for:
- Skipping Surface Prep : Failing to clean and grind the floor properly will result in poor adhesion.
- Rushing the Process : Patience is key. Don’t rush the drying times between coats.
- Overmixing the Epoxy : Too much agitation can introduce air bubbles, leading to an uneven finish.
Maintenance Tips for Longevity
Once your epoxy flooring is installed, follow these simple maintenance tips to keep it looking great:
- Sweep regularly to prevent dirt buildup.
- Mop with mild soap and water every few weeks.
- Avoid dragging heavy furniture directly on the floor; use felt pads instead.
FAQs: Epoxy Flooring
Epoxy flooring is a durable surface coating made from resin and hardener. When mixed, these components form a strong, adhesive layer that bonds to concrete surfaces. It’s ideal for high-traffic areas due to its resistance to stains, chemicals, and wear.
Yes! While it may seem complex, epoxy flooring is beginner-friendly if you follow proper preparation steps and use quality materials. With patience and the right tools, anyone can achieve professional-looking results.
When applied correctly, epoxy flooring can last 10–20 years or more, depending on usage and maintenance. Regular cleaning and avoiding abrasive damage will extend its lifespan significantly.
Yes, as long as the surface is clean, dry, and properly prepared. This includes grinding the concrete to create a rough texture for better adhesion and repairing any cracks beforehand.
On average, DIY epoxy flooring costs between $3–$6 per square foot, while professional installation ranges from $5–$12 per square foot.
Conclusion: Epoxy Flooring
Transforming your space with epoxy flooring is a rewarding DIY project that combines creativity with practicality. From its unmatched durability to its aesthetic versatility, epoxy flooring checks all the boxes for modern homeowners. Armed with the knowledge and confidence gained from this guide, you’re ready to embark on your journey toward creating a stunning, long-lasting floor.
So why wait? Grab your tools, roll up your sleeves, and start your epoxy flooring adventure today!